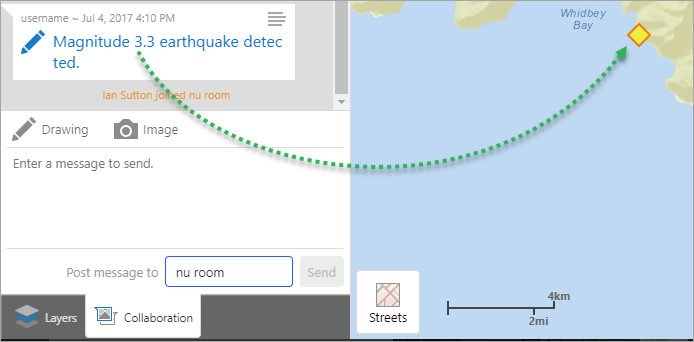
Once you have an AOP output connector, you can use the connector to send automated collaboration events from external services directly to your AOP application. For example, you can send notification of an earthquake above a certain scale from the US Government Earthquake site directly to a collaboration channel in AOP and a marker appears on the map simultaneously.

The service notification in AOP showing in the channel with the earthquake marker on the map
To send notifications to a collaboration channel, you first need to convert the format of the notification that your GeoEvent service is receiving from the website to the format that Geocortex AOP can accept and process.
The example that follows explains how to create a service that converts a simple earthquake GeoEvent definition into a Collaboration event. Before it can do so, you have to create a set of definitions that inform GeoEvent about what kind of data to expect so that they can process it. You essentially create a definition for an earthquake so that the GeoEvent service knows what form of input to expect from that source.
The process of setting up the service happens in several stages.
The Earthquake definition has a Latitude and Longitude that will be converted into a point geometry by the input, which is then stored inside the Geometry field. The Earthquake definition also contains the earthquake’s magnitude in the form of a double.
To create an earthquake point definition:
In the GeoEvent Definition Name field, type in Earthquake Point.
Click New Field and create the following fields:
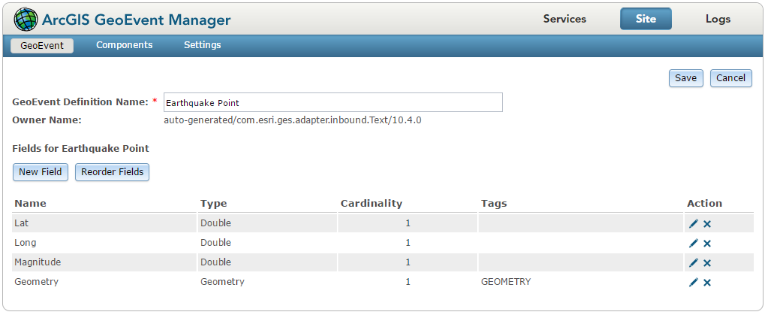
The Earthquake Point GeoEvent Definition
The Collaboration Event definition only contains a type parameter and a data parameter, both of which are strings. Unfortunately, GeoEvent Server has limitations when converting to hierarchical JSON: more complex events like the ShareMarkupEvent must be serialized into a JSON string for transport to the AOP endpoint.
To create a Collaboration Event definition:
In the GeoEvent Definition Name field, type in Collaboration Event.
Click New Field and create the following fields:
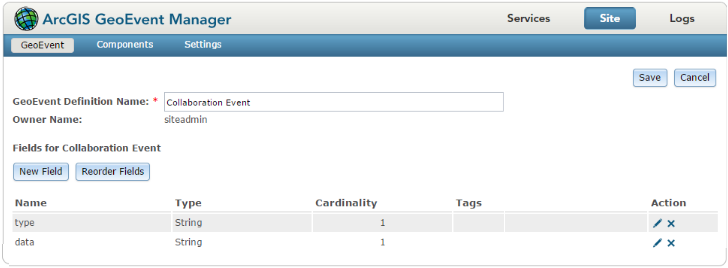
The Collaboration Event Definition
Although it is possible for simpler events like MessageEvents to use the Group type to fully define their JSON for the data field as shown in the graphic below, for our example service, we need to use the Generic Collaboration Event definition above because we need to include a point graphic with our automated message.
To create an Message Event definition:
In the GeoEvent Definition Name field, type in Message Event.
Click New Field and create the following fields:
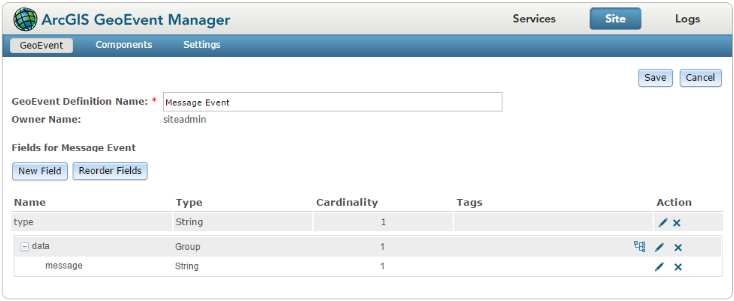
The Message Event Definition
The next definition helps to create a service that converts Earthquake Points into Collaboration Events. This conversion requires a transformation because of the limits of GeoEvent Processors. These limits mean that we first have to create an Intermediary GeoEvent Definition that contains the relevant properties of both definitions so we can hold all the data we need in a single object:
To create an Intermediary Event definition:
In the GeoEvent Definition Name field, type in Intermediary Event.
Click New Field and create the following fields:

The Intermediary Event Definition contains all the data in one definition
Now that the definitions exist, we can start to create the AOP Earthquake service. This process involves first dragging an Input and Output into the work area. Then several processors are added and defined one after the other.
Each processor operates on the data, transforming the Earthquake Event into the Collaboration Event. The first processor is a Field Mapper that extracts information from the Earthquake Event and puts it into an Intermediary Event. The second processor is a Field Calculator that sets the type of the Intermediary Event to ShareMarkupEvent string. The third processor is a Field Calculator that populates the data field with a JSON string. The final processor to add is a Field Reducer that removes the extra fields from the Intermediary Event and convert it into a completed Collaboration Event.
Finally all the pieces are joined by dragging an arrow between them and the service is published.
To create an Earthquake service:
In GeoEvent Manager, select Services in the top right corner.
On the toolbar, click GeoEvent Services, and then click Add Service.
In the Service Description field, type in a statement that explains what the service does, for example, Sends earthquake notifications to AOP.
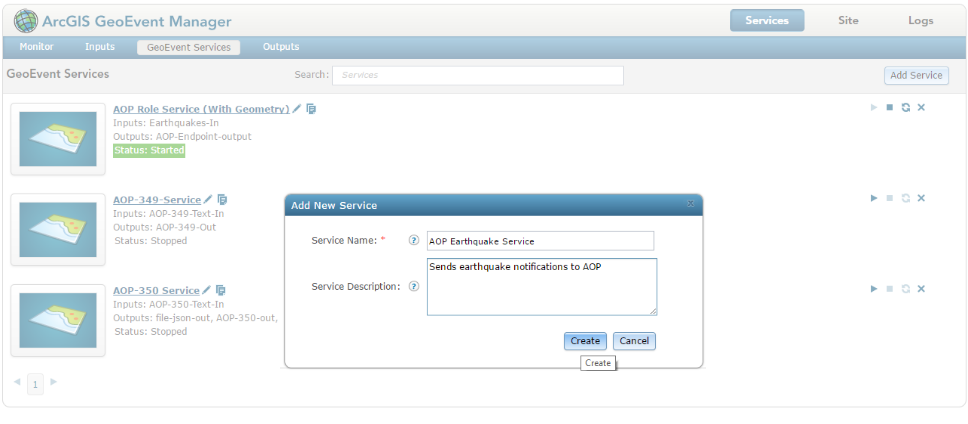
Click Create.
A blank service appears.
To open the sidebar so that we can drag the elements it contains into the service, click the small arrow on the left-hand side.
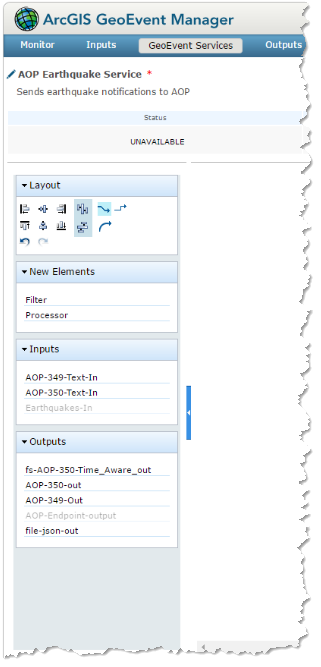
First drag the pre-made Earthquake Point input from the Inputs list into the work area and place it on the left side.
Drag the AOP outputs into the main area from the Outputs list on the left, leaving a large space between them for the processors we need to create.
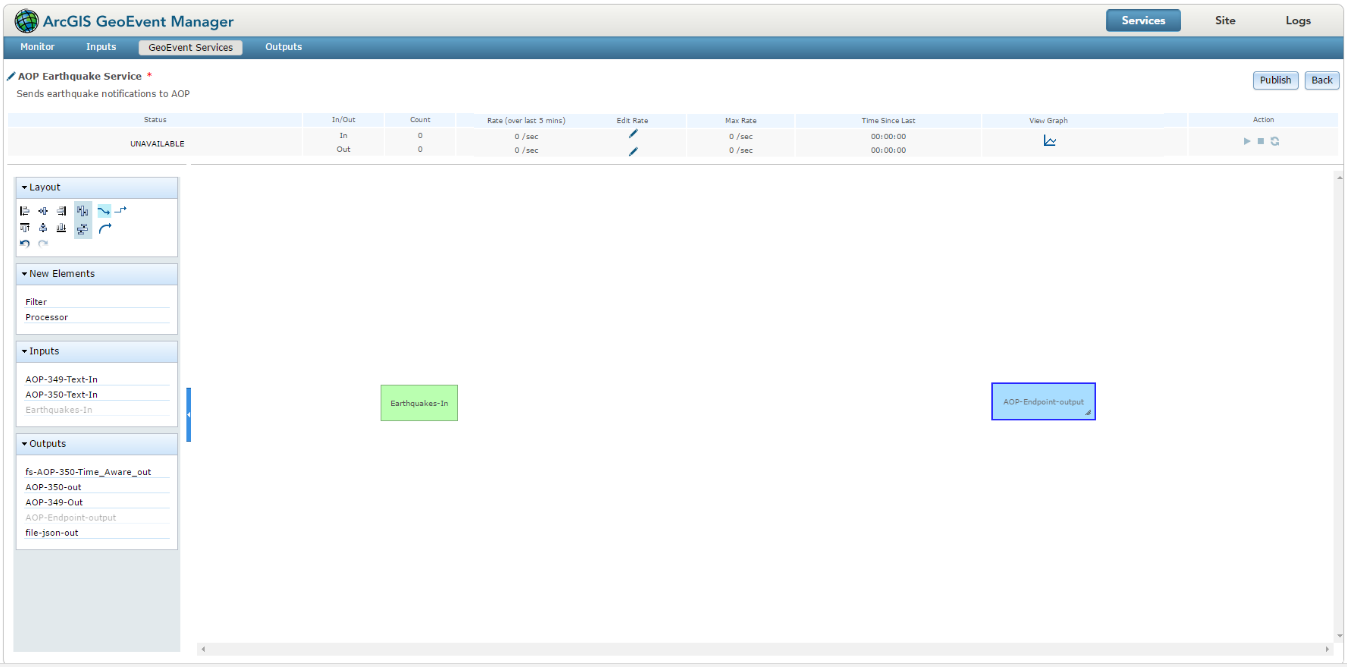
See Create an Output Connector for more information about creating an output connector.
To add the Field Mapper processor:
From the New Elements list, drag a Processor into the work area.
The Processor Properties dialog opens.
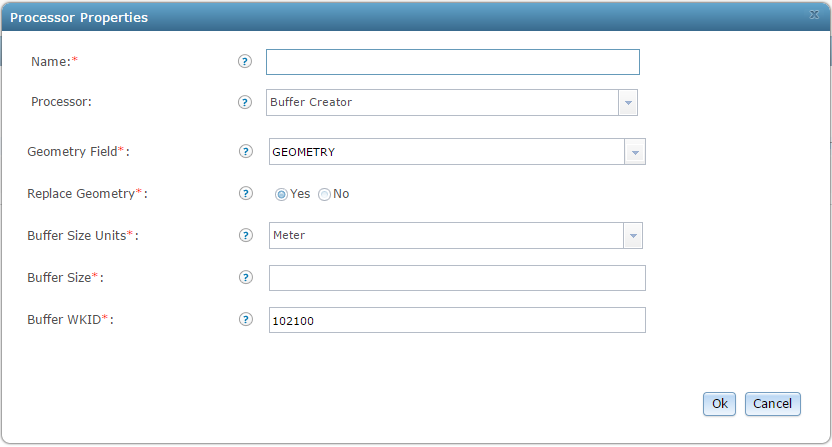
From the Processor drop-down list, select Field Mapper.

The contents of the dialog change when you select the Field Mapper type - the Source and Target drop-down lists appear so that you can map the source to a target.
In the Source GeoEvent Definition, select the Earthquake Point Definition.
In the Target GeoEvent Definition, select the Intermediary Event Definition.
When you select the definitions, the Source and Target Fields appear.
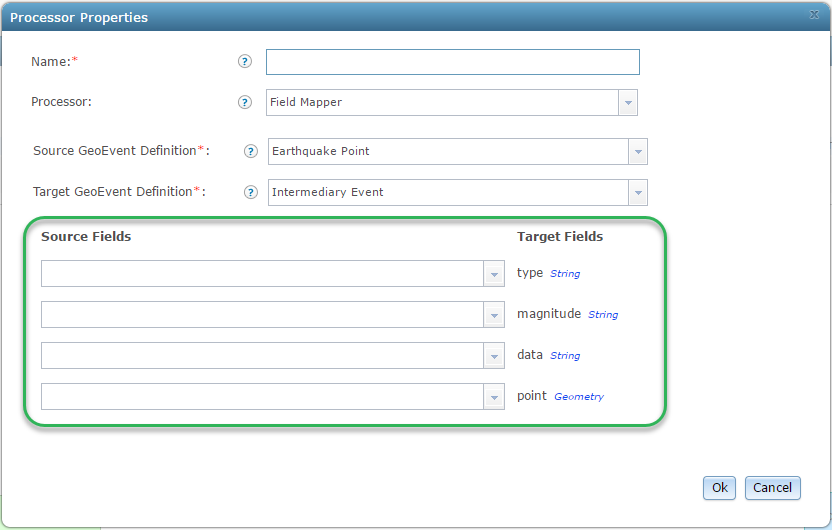
You can now use the mapper to copy the Magnitude and Geometry from the Earthquake Event into the Intermediary Event.

The processor will now convert the event into an Intermediary Event. The magnitude and point are taken from the original Earthquake event.
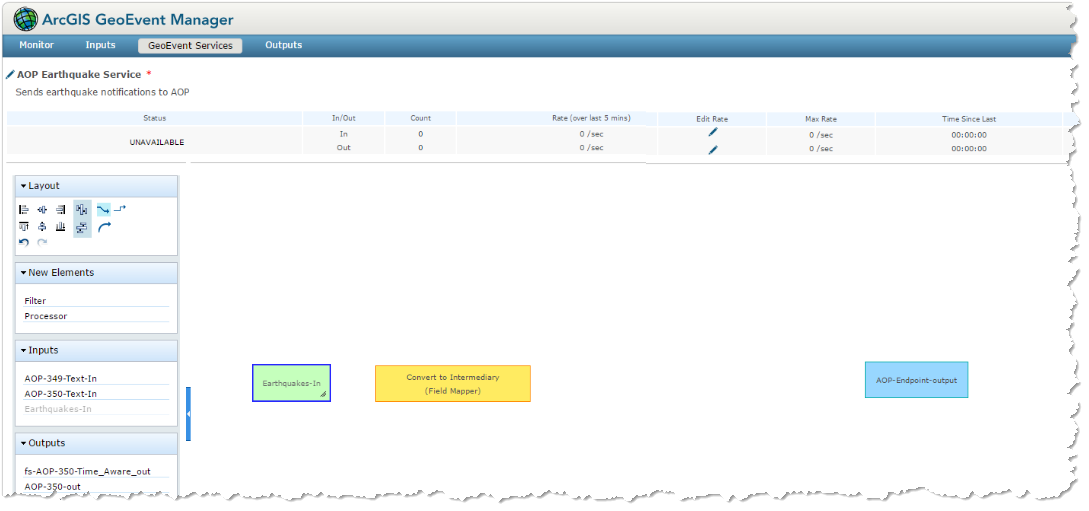
In the Name field, type in a name for this processor, for example, Convert to Intermediary and click OK.
The Service now looks like this:
To add the first Field Calculator processor:
From the New Elements list, drag another Processor into the work area.
When the Processor Properties dialog opens, select Field Calculator from the Processor drop-down list.
The dialog changes to show the following fields:
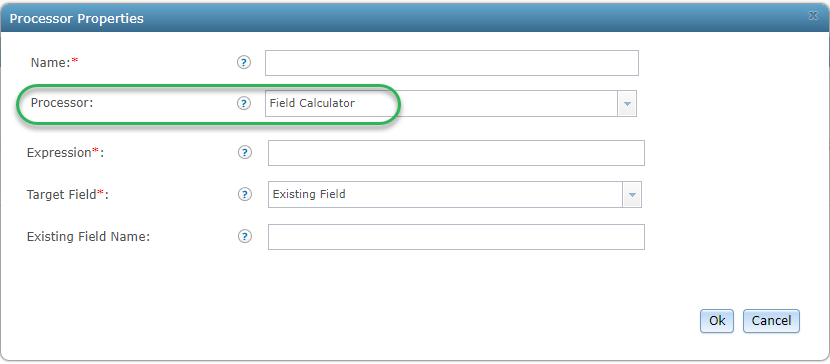
In the Existing Field Name, enter type.

Click OK.
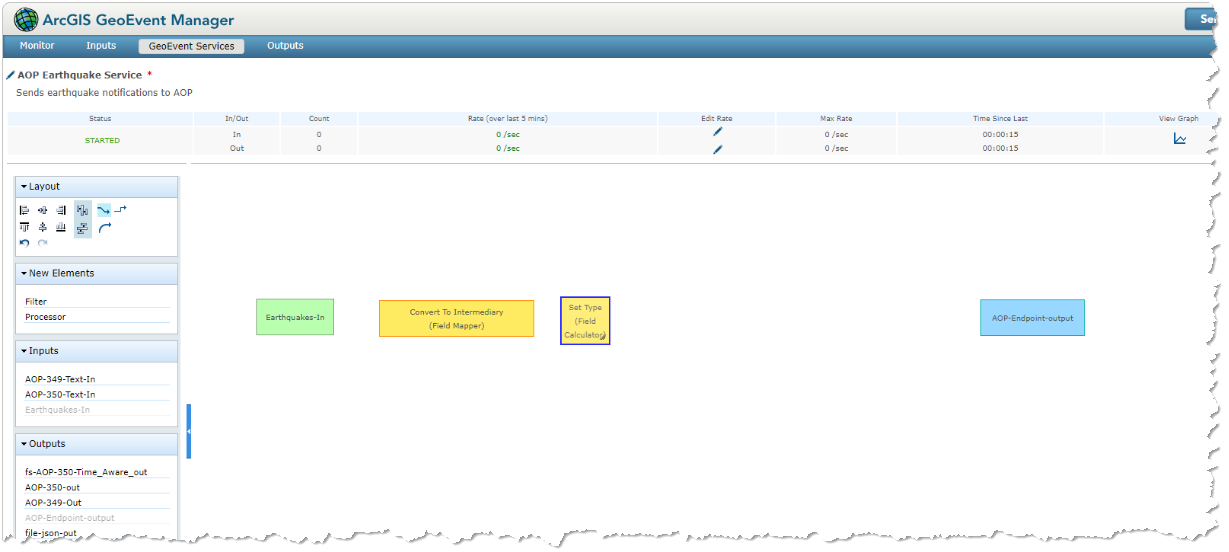
The service now looks like this:
To add the second Field Calculator processor:
This processor is a field calculator that we will use to create a serialized JSON string for our sharemarkup event and place it in the data field.
From the New Elements list, drag another Processor into the work area.
When the Processor Properties dialog opens, select Field Calculator from the Processor drop-down list.
The dialog changes to show the following fields:

In the Name field, type in Set Data as that is what we are doing in this processor.
In the Expression field, copy and paste the following string:
'{"markup":{"points":{"spatialReference":{"wkid":102100},"geometryType":"esriGeometryPoint","features":[{"geometry":' + point + ',"attributes":{"__symbol":{"color":[247,244,23,204],"size":16,"angle":0,"xoffset":0,"yoffset":0,"type":"esriSMS","style":"esriSMSDiamond","outline":{"color":[240,116,13,255],"width":1.5,"type":"esriSLS","style":"esriSLSSolid"}}}}]},"polylines":{},"polygons":{},"rectangles":{}},"message":"Magnitude ' + magnitude + ' earthquake detected."}'
This string is difficult to read in this format. When you see it formatted for clarity (below), you can see that the JSON contains some of the properties from our event inserted into it (bold text).
'{
      "markup": {
          "points": {
               "spatialReference": {
                     "wkid": 102100
                },
                "geometryType": "esriGeometryPoint",
                "features": [{
                    "geometry": ' + point + ',
                    "attributes": {
                        "__symbol": {
                            "color": [247, 244, 23, 204],
                            "size": 16,
                            "angle": 0,
                            "xoffset": 0,
                            "yoffset": 0,
                            "type": "esriSMS",
                            "style": "esriSMSDiamond",
                            "outline": {
                                "color": [240, 116, 13, 255],
                                "width": 1.5,
                                "type": "esriSLS",
                                "style": "esriSLSSolid"
                            }
                        }
                    }
                }]
            },
            "polylines": {},
            "polygons": {},
            "rectangles": {}
        },
        "message": "Magnitude ' + magnitude + ' earthquake detected."
}'
This string essentially hard codes the data we are sending to the Collaboration Channel into a string and dynamically inserts the point and magnitude from our Earthquake Event. The result will be a Collaboration Event that has the geometry (map position) of the earthquake point and a collaboration channel message containing the magnitude of the quake.
In the Existing Field Name, enter data.
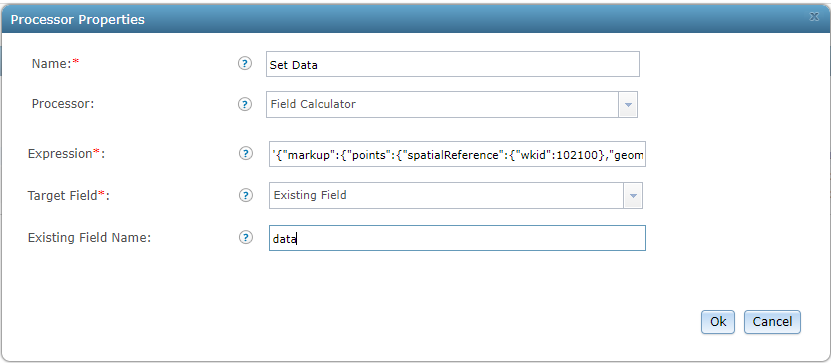
Click OK.
The service now looks like this:
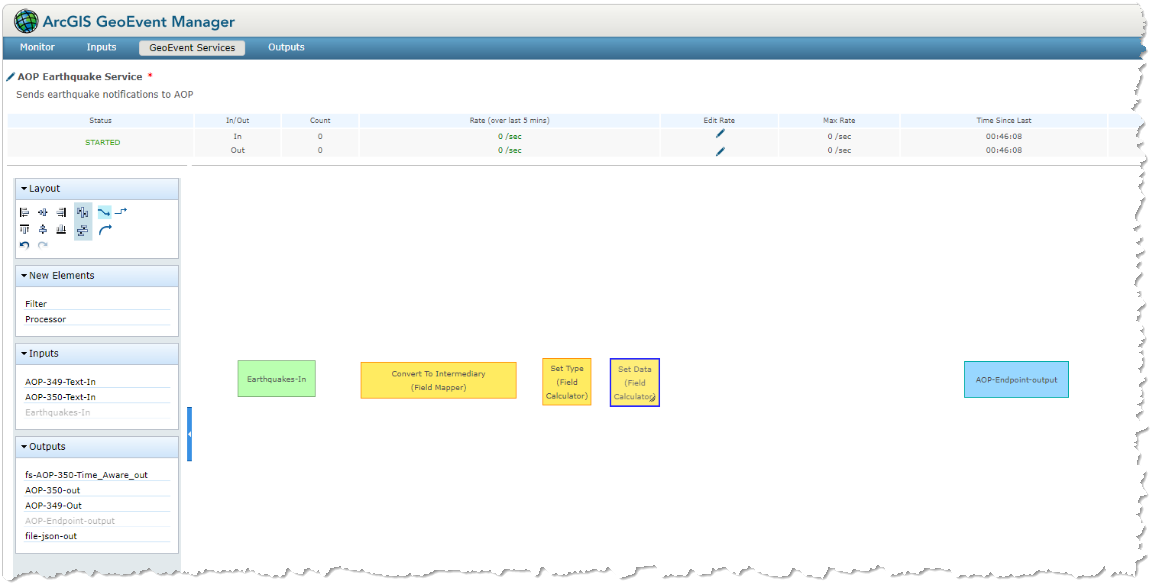
To add the Field Reducer Processor:
The last processor has to remove the extra fields from our Intermediary Event and convert it into a completed Collaboration Event. To do this, you need to use a Field Reducer processor.
From the New Elements list, drag another Processor into the work area.
When the Processor Properties dialog opens, select Field Reducer from the Processor drop-down list.
The dialog changes to show the following fields:

When the Select Fields dialog opens, from the GeoEvent Definition drop-down list, select the Intermediary Event Definition.
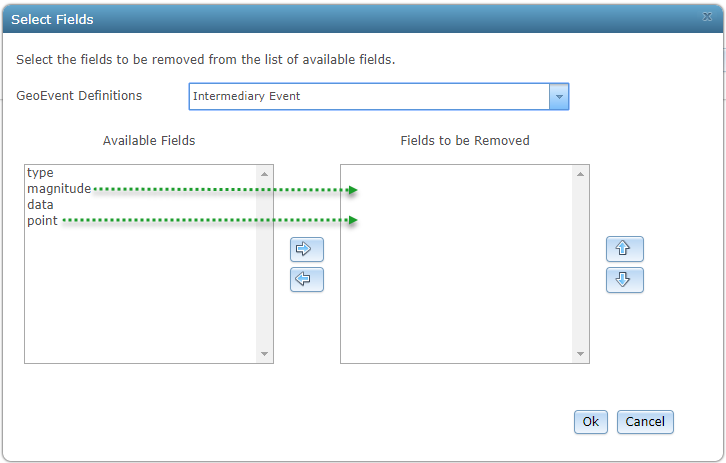
Select the magnitude and point fields and then click the arrows to move them to the Fields to be Removed box.
Click Ok to save the changes and close the dialog box.
In the Processor Properties dialog, in the New GeoEvent Definition Name, type Collaboration Event.
In the Name field, type in Convert to Collaboration Event as that is what we are doing in this processor.

Click OK.
To join all the parts of the service together, hover over each activity until an arrows appear on either side, click one of the arrows and drag it to the next activity in the service. When all the elements are joined, your service should look something like this:

Click Publish in the top right and your service is ready to use.