Configure Item Manager for use in Portal for ArcGIS
To manage items from an on-premises ArcGIS Portal, you must:
-
Request a subdomain from Support.
To complete the registration procedure, you will need:
-
A short name for your subdomain.
This name is a recognizable, unique identifier that matches your organizational identity. The name is used in the URL to access Item Manager. For example, if your short name is
myorg, the URL to Item Manager would behttps://myorg.apps.vertigisstudio.com/itemmanager/The name may contain 2-16 characters and can use the following characters:
-
Lower-case letters (a-z)
-
Digits (0-9)
-
Hyphens (-)
-
-
The URL of the ArcGIS Portal.
To configure Item Manager for use in Portal for ArcGIS:
-
Sign in to your portal, and navigate to the Content panel.
-
Click Add Item and select An application.
-
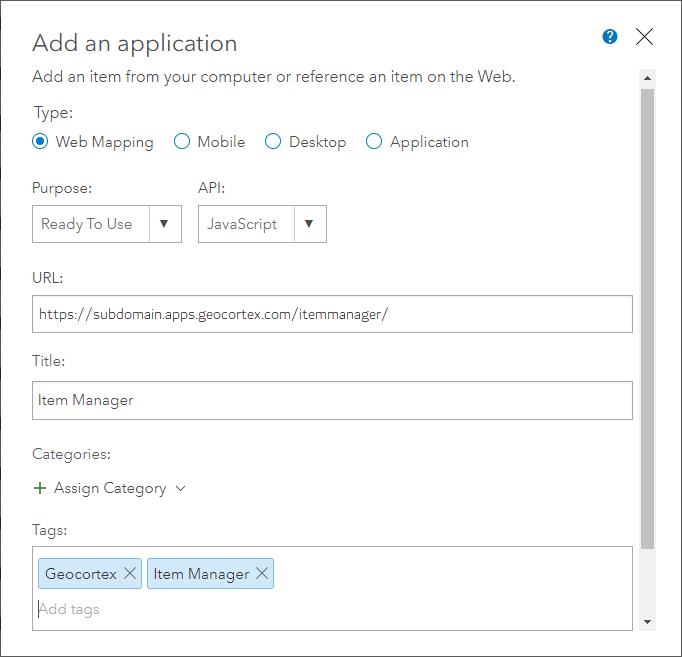
Configure the application item using the following settings.
-
Type:
Web Mapping -
Purpose:
Ready to Use -
API:
Javascript -
URL: Paste the URL to Item Manager with your chosen subdomain, for example:
https://subdomain.apps.vertigisstudio.com/itemmanager/ -
Title: Type a title for the item, for example:
VertiGIS Studio Item Manager -
Tags: Type one or more tags for the item, for example:
VertiGIS StudioandItem Manager

-
-
Click Add Item.
A new Application item is added to the portal. The item's details show.
-
Register the Application item:
-
Click the Settings tab.
-
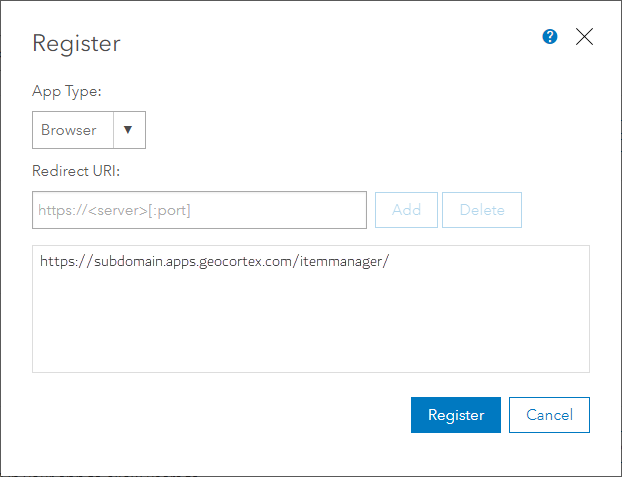
Scroll down to the Web Mapping Application section at the bottom of the panel. Under App Registration, click Register.
-
Paste the URL to Item Manager with your chosen subdomain into the Redirect URI box, and then click Add.
The URL is added to the list of permitted redirect URLs.

-
Click Register to complete the application registration.
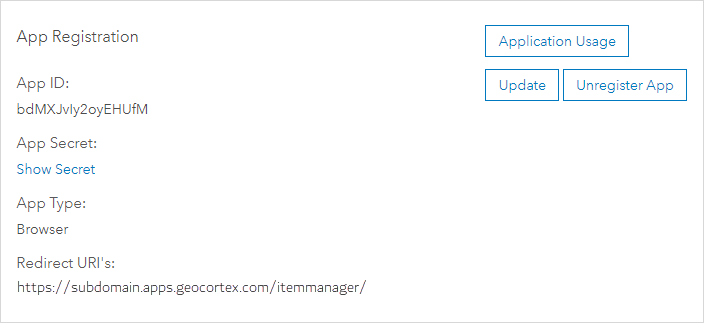
ArcGIS creates an app ID for the Application item.

-
-
Copy the App ID.
You need the App ID to request a subdomain from Support.
-
Contact to request a subdomain. Provide the following information in your email:
-
Short name for your subdomain
-
Portal URL
-
App ID
-
See Also...