Mobile Designer has built-in workflows for several of the most common uses for a workflow. The built-in workflows are available for use within multiple components in Mobile Designer, including the I want to menu, layers, and features. The built-in workflows that are available, differ depending on the context.
The built-in workflow templates can be used as they are and do not require editing except for the Blank Workflow template, which needs to be edited in VertiGIS Studio Workflow Designer. Most of the time, you will likely want to use the built-in workflow templates as a starting point for building your own custom workflow. The workflow templates take inputs from their context and turn them into code. So if you generate a built-in workflow on a feature, for example, that workflow has unique connections and properties based on the feature you generate it from.
To add a workflow using a template:
The procedure below adds a built-in workflow to the Details panel as a result action using the Result Details component in Mobile Designer. The procedure is the same if you are adding a built-in workflow to the I Want To menu - only the types of workflow templates are different.
1.In Mobile Designer in the Components panel, click Result Details, and then Add Menu Item.
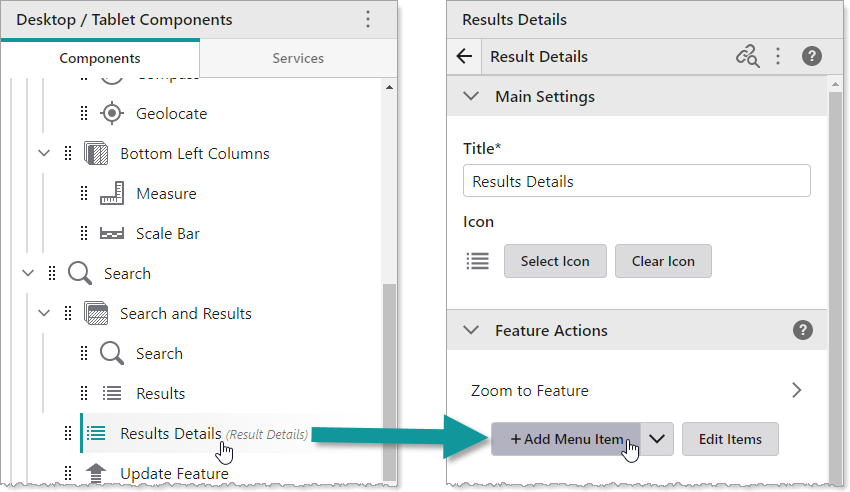
A window appears that lets you select a command or workflow.
2.Click the Workflows tab.
3.At the bottom, click ![]() Create a new Workflow.
Create a new Workflow.
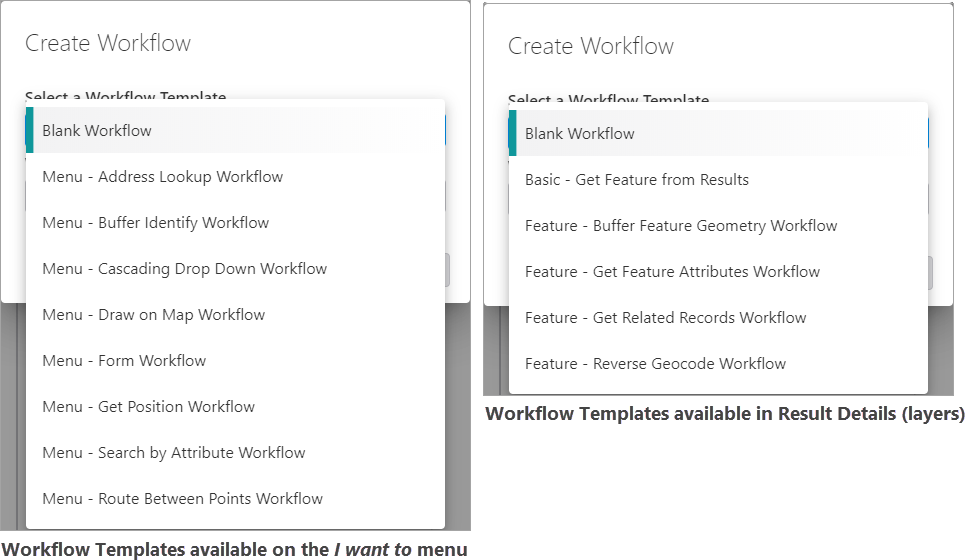
4.In the Select a Workflow Template menu, select a workflow template that provides the desired GIS functionality, or Blank Workflow if you want to create a workflow from scratch. The templates available depend on the context of the menu.
5.In the Workflow Title box, type a title for the workflow, for example, Find Address.
By default, this is also the title of your menu item.
6.Click Create.
To edit the menu item, click the name of the menu item, for example Find Address. To edit the workflow itself, additionally click Open in VertiGIS Studio Workflow. For information about editing workflows, see VertiGIS Studio Workflow Help.
7.Click File > Save.
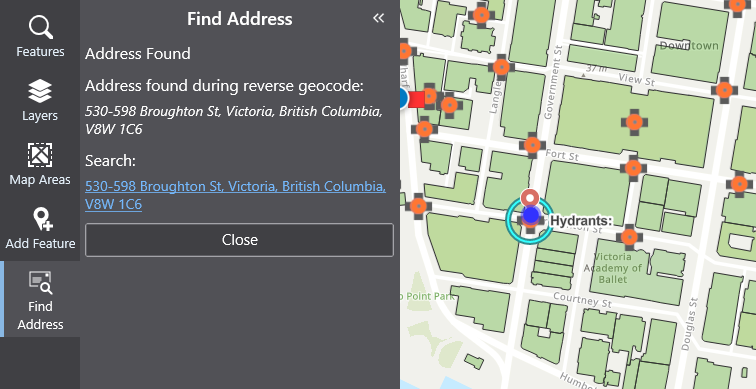
When you open the map and click on a feature, you now have the option to click a button to find the address of that feature.
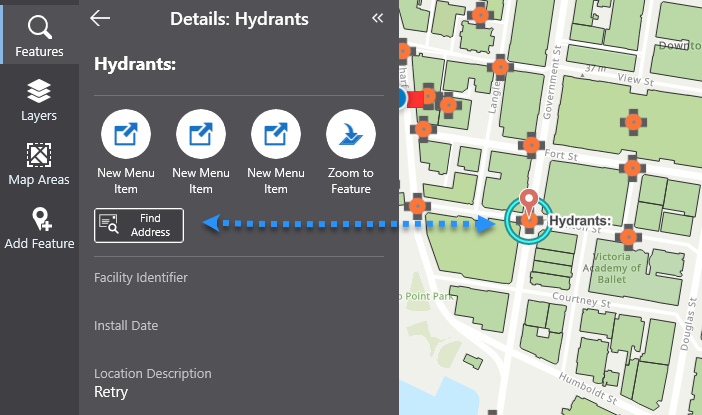
When you click Find Address, the workflow runs and displays the address in the panel. Find Address appears on the toolbar and the feature is highlighted on the map.