Introduction to VertiGIS Studio Printing
Welcome to VertiGIS Studio Printing.
VertiGIS Studio Printing enables end users to create high-resolution PDF maps of their current web mapping session, on demand. User markup and selections are included in the print output.
Print outputs are based on print templates created by an administrator using the web-based design tool, VertiGIS Studio Print Designer. Print Designer provides an extensive suite of tools for laying out print templates, including components like the map, scale bar, legend, overview map, and north arrow, as well as text, images, and branding elements. VertiGIS Studio Printing supports a full range of International and US paper sizes, including large format sizes.
Print templates are saved to the VertiGIS Studio Printing service, with an item in the content area of the author's ArcGIS account. To allow end users to use a print template, the author shares the ArcGIS print item with the users and configures a web application to host the template. Users run the print from the host application.
VertiGIS Studio Printing supports hosting print templates in VertiGIS Studio Web, the Geocortex Viewer for HTML5, and ArcGIS Web AppBuilder. Hosting in Web AppBuilder uses a custom widget that was developed by VertiGIS Studio for this purpose. The user clicks the widget to run the print.
VertiGIS Studio Printing can run in two environments—in the cloud or on premises. In the cloud version of VertiGIS Studio Printing, authors use the cloud offering of VertiGIS Studio Print Designer to design print templates. Templates are saved to VertiGIS Studio Printing in the cloud, with an item for each template in the author's ArcGIS Online account. Prints run in VertiGIS Studio Printing in the cloud.
In the on-premises version, authors use the on-premises deployment of VertiGIS Studio Print Designer to design print templates. Templates are saved to the on-premises deployment of VertiGIS Studio Printing, with an item for each template in the author's Portal for ArcGIS account or ArcGIS Online account. Prints run in the on-premises deployment of VertiGIS Studio Printing.
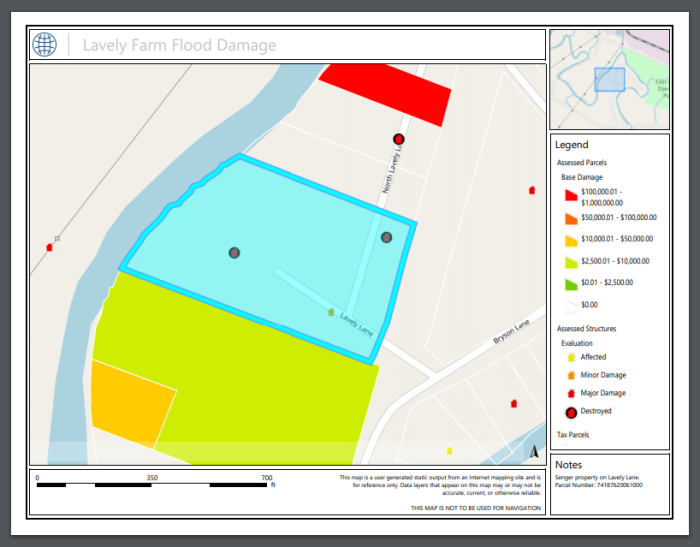
Example of a VertiGIS Studio print
See also...
Main Steps to Create and Run a Print Template
The main steps to create and run a VertiGIS Studio
-
Create a new
You can either create a
-
Design the
Add the map to the template. Add map components like a scale bar, legend, overview map, and north arrow. Add a title and any descriptive text, images, and branding elements you want. Format the content.
-
Preview the
Run the
-
Save the
-
Share the
To share the
-
Configure an application to host the
-
Run the
What's next?