Configure Feature Attachment Controls
You can include image attachments in reports using the feature attachment controls:
-
Single Feature Attachment Control: Use the Single Feature Attachment control to individually place image attachments within the layout.
-
Multi Feature Attachment Control: Use the Multi Feature Attachment control to show image attachments in a grid.
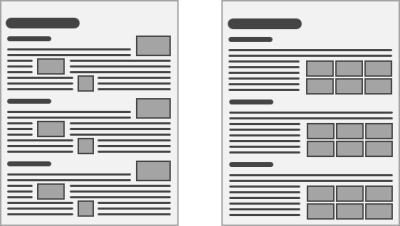
Report with Single Feature Attachment controls (left) and a Multi Feature Attachment control (right)
To include feature attachments in a report, the report's query must return the feature ID field, for example, OBJECTID. VertiGIS Studio Reporting uses the feature ID to retrieve the attachments.
If an attachment doesn't exist or is not available when the report is generated, the control will be blank in the report output.
By default, feature attachment controls have the Behavior | Keep Together setting enabled. This prevents the control's content from breaking across the page resulting so part of the content appears on one page and the remainder appears on the next page. See Single Feature Attachment Control or Multiple Feature Attachment Control for more information.
Use the Actions | Image Quality setting to reduce the size of the generated report. By default, Image Quality is set to Original, which inserts images into the report at their original resolution. High resolution images may result in a large report—the higher the resolution of the images, the larger the file size of the generated report. Try different Image Quality settings to find a setting that balances quality with file size.
Supported Attachment Types
VertiGIS Studio Reporting supports the following types of image attachments:
- image/bmp
- image/img
- image/jpg
- image/jpeg
- image/png
- image/tif
- image/tiff
An attachment's type is given in the feature's Attachment Infos | Content Type property.
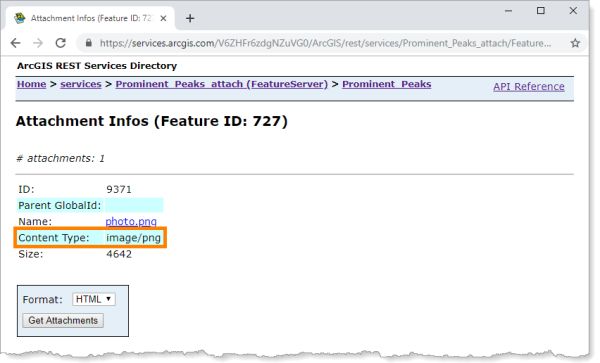
Content Type property for a feature attachment, shown in the ArcGIS REST Services Directory
Use the Single Feature Attachment Control
The Single Feature Attachment control is used to include a particular image attachment in a report, for example, the feature's first image attachment. To specify which image to use, configure the control's Actions | Image Number setting. The first image attachment is Image Number 1, the second image attachment is Image Number 2, and so on. This is illustrated in the screen capture below.
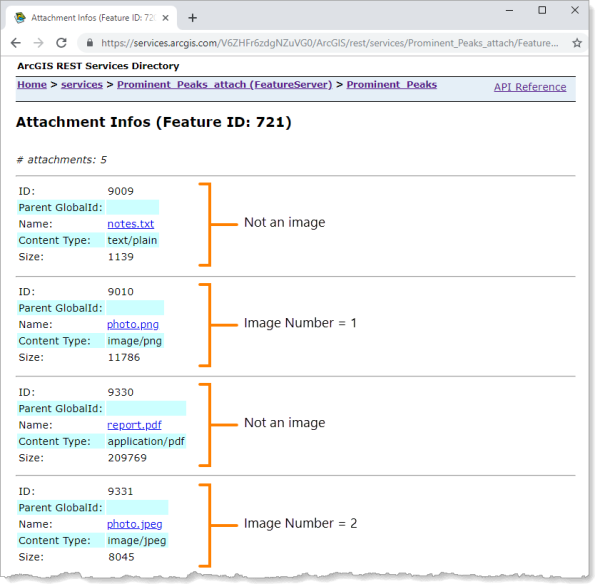
Example of a feature's Attachment Infos property, showing how VertiGIS Studio Reporting numbers the images
VertiGIS Studio Reporting shrinks large images to fit the control, while maintaining the image's proportions. If the image is smaller than the control, it occupies as much space as it needs, leaving blank space around it.
To prevent extra space around small images, enable the control's Behavior | Can Shrink setting. When Can Shrink is enabled, the size of the control is automatically reduced to fit the image if the image is smaller than the control. See the documentation for the Single Feature Attachment Control or the Multiple Feature Attachment Control for more information.
To use a Single Feature Attachment control:
-
Drag a Single Feature Attachment control
 to a band that shows data, like a Details band.
 -
Select the control and configure the Actions | Image Number setting.
To show the feature's first image attachment, enter 1; to show the second feature attachment, enter 2; and so on.
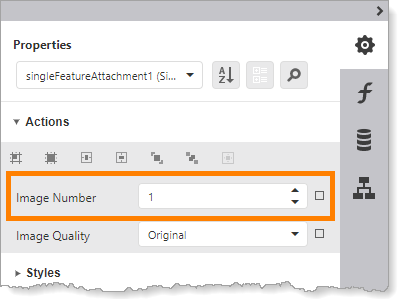
Configuration to show the feature's first image attachment
-
Preview and download the report at different Actions | Image Quality settings so you can compare the file sizes. Choose a setting that reduces the file size while maintaining satisfactory image quality in the generated report.
-
Repeat the previous steps for each Single Feature Attachment control you want to include in the report.
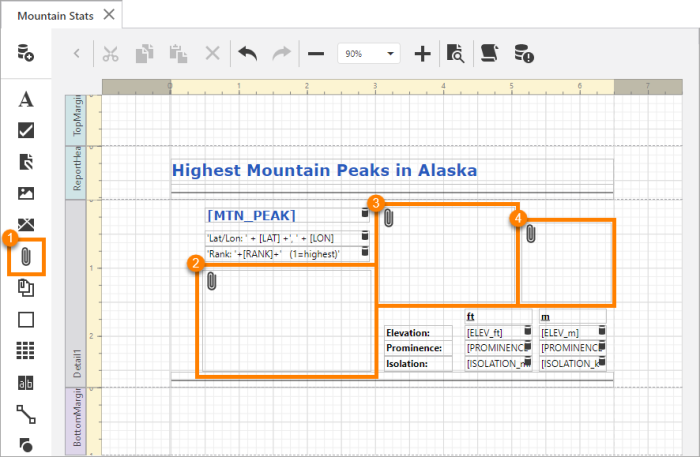
Single Feature Attachment control in the Control Bar (
 ) and in the report's layout (
 ,
,  ,
,  )
) -
Preview
 the report.
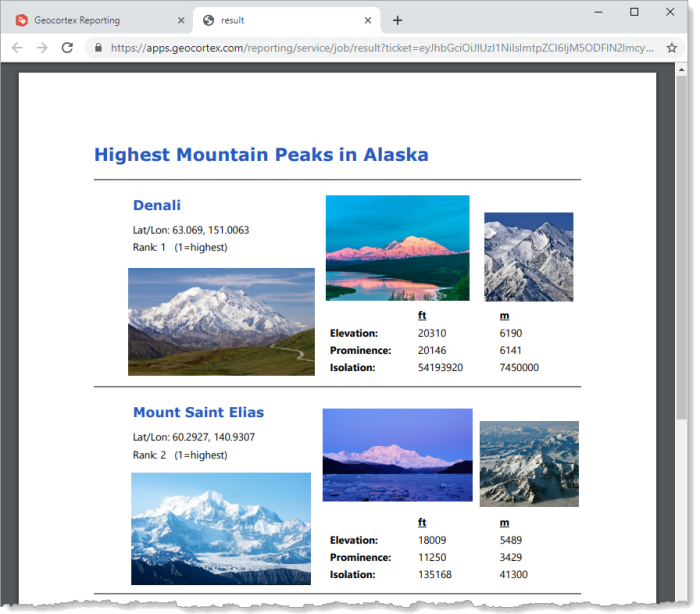
Report with three Single Feature Attachment controls in the layout
Use the Multi Feature Attachment Control
The Multi Feature Attachment control is used to show multiple image attachments for each feature, displayed in a grid. Use the control's Actions | Columns setting to configure the number of columns in the grid, in other words, the number of images to fit across the width of the control. Set an upper limit on the number of images to show per feature using the Actions | Max Attachments setting.
The Multi Feature Attachment control has the Behavior | Can Grow setting enabled by default. This allows the height of the control to increase to fit the images. If you disable Can Grow, the images may be cut off. For more information, see the Multiple Feature Attachment Control documentation.
To use a Multi Feature Attachment control:
-
Drag a Multi Feature Attachment control
 to a band that shows data, like a Details band.
 -
Select the control and configure the Actions | Image Quality setting.
Preview and download the report at different Image Quality settings so you can compare the file sizes. Choose a setting that reduces the file size while maintaining satisfactory image quality in the generated report.
-
Set Actions | Max Attachments to the maximum number of images you want to show per feature.
-
Set Actions | Columns to the number of images to show per row.
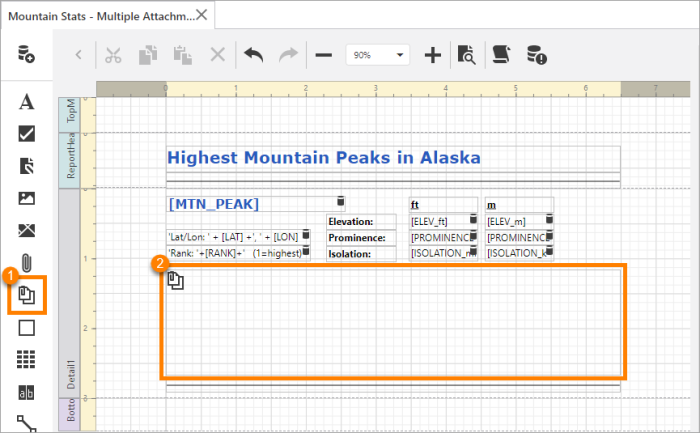
Multi Feature Attachment control in the Control Bar (
) and in a report's layout () -
Preview
the report.The screen capture below shows the first page of a report with a Multi Feature Attachment control. The control is configured to show a maximum of six images in three columns. The first feature only has five image attachments. The second feature has at least six attachments.
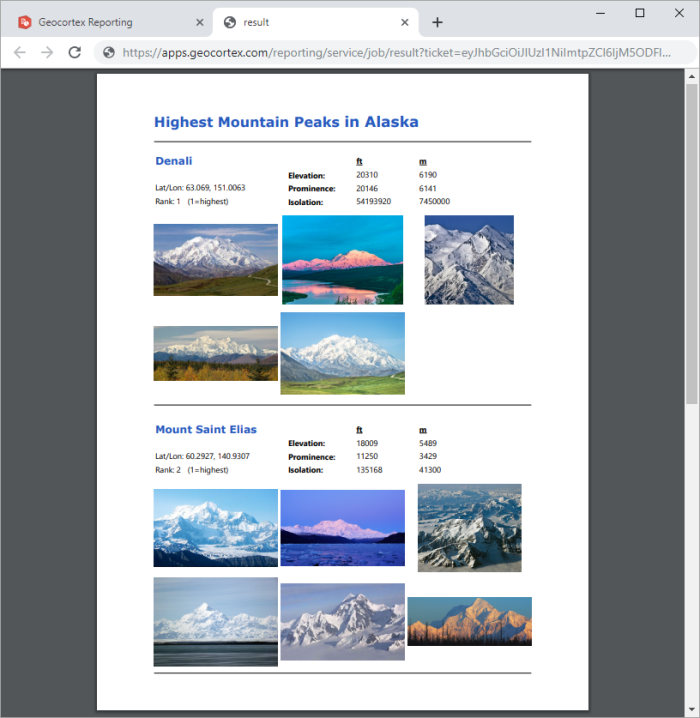
Report with Multi Feature Attachment control set to three columns and maximum six images