The following procedure creates a new workflow, either from scratch or a built-in template, and adds it as a menu item to the I Want To menu.
The built-in workflow templates offer common GIS functions, such as performing a buffer identify operation. You can customize the workflow in VertiGIS Studio Workflow or use the functionality provided by the template as is.
The built-in templates available are dependent on the context of the menu, which determines the type of data (if any) that is passed as input to the workflow. For example, while the I Want To menu does not pass any type of information into the workflow, the Map Context menu passes the point where the user right-clicked the map into the workflow. For more information about menu contexts, see Use the Menu Context as a Workflow Input.
This option is not available for on-premises Workflow installations that are not installed in the default installation folder. If so, you must create the workflow within Workflow Designer instead.
To create a new workflow for an app:
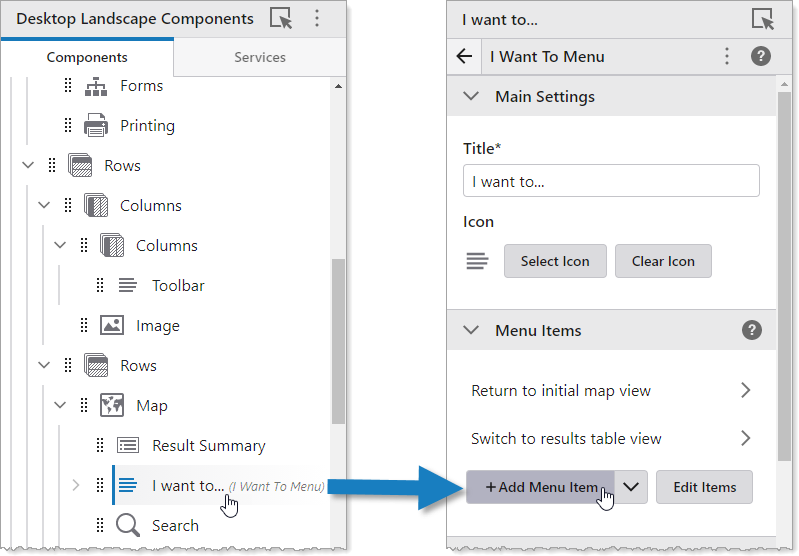
1.In Web Designer, in the Components panel, click I want to..., and then click +Add Menu Item.

The Select Command window appears that lets you to select a command, workflow, or report.
2.Click the Workflows tab.
3.Click Create a new Workflow.
4.In the Select a Workflow Template menu, select a workflow template that provides the desired GIS functionality, or Blank Workflow if you want to create a workflow from scratch. The templates available depend on the context of the menu.
5.In the Workflow Title field, type a title for the workflow, for example, Run My Workflow.
By default, this is also the title of your menu item.
6.Click Create.
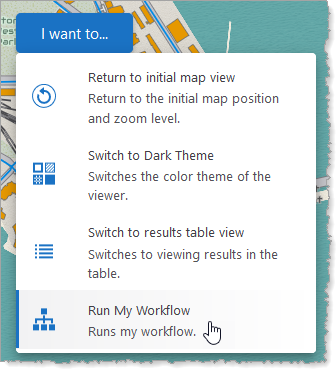
7.The workflow menu item appears in the I Want To menu.

To edit the menu item, click the name of the menu item, for example Run My Workflow. To edit the workflow itself, additionally click Open in VertiGIS Studio Workflow. For information about editing workflows, see VertiGIS Studio Workflow Help.
8.Click File > Save to save the app.
If you want the workflow to be available to other users, see Configure Sharing Permissions.