Get Started
Anyone can build a workflow, without writing any code. This tutorial shows you how to build a simple workflow that displays a message to the end user. Once you have built the workflow, you will run the workflow in the built-in test environment, the Sandbox.
This tutorial is intended to get you started building and running workflows quickly. The tutorial skips some of the steps that you will follow when creating production workflows, like sharing workflows and configuring host applications to run workflows. The complete steps are given in the End-to-End Tutorial.
Before you Begin
VertiGIS Studio Workflow can run in two environments—in the cloud or on premises. To do this tutorial, you must have access to one of these environments.
-
Cloud: To do this tutorial in the cloud environment, you need an ArcGIS Online account. You can use a public account or an organizational account. You can get a public account here for free.
-
On Premises: If your organization has installed VertiGIS Studio Workflow on premises and configured it to work with an on-premises installation of Portal for ArcGIS, you can do this tutorial with the account that you use to access your organization's portal.
The tutorial uses a public ArcGIS Online map service. To do the tutorial, your organization’s portal must have access to the Internet.
Quick Steps to Create and Run a Workflow
The steps to create and run your first workflow are:
-
Build the workflow in VertiGIS Studio Workflow's authoring tool, VertiGIS Studio Workflow Designer.
Tutorial - Create your First Workflow
Step 1: Build the Workflow
This step shows you how to build a simple workflow that displays a message to the end user.
-
Launch VertiGIS Studio Workflow Designer.
If you are using VertiGIS Studio Workflow in the cloud, you can access Workflow Designer here. If you are using on-premises VertiGIS Studio Workflow, use your organization's deployment of Workflow Designer.
-
Sign in if you are prompted.
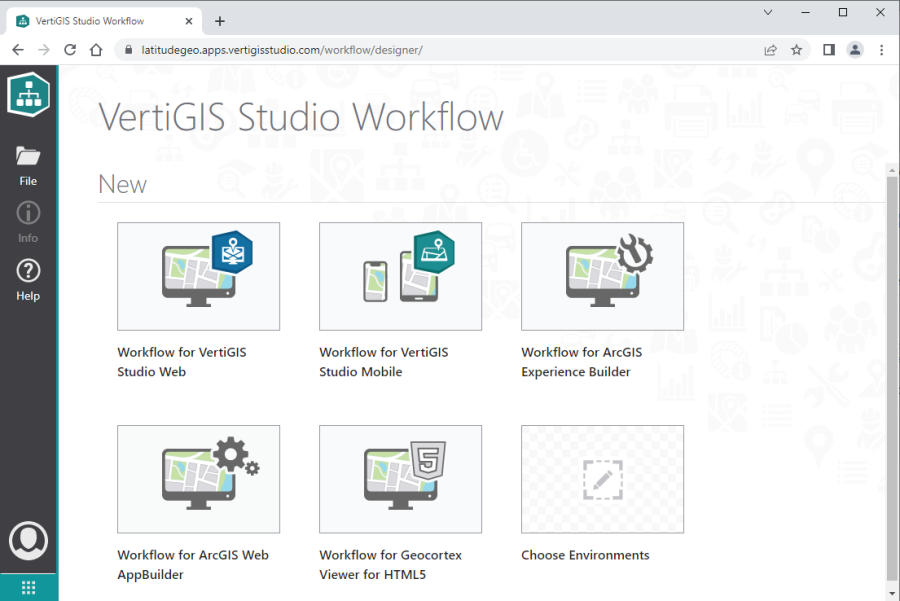
Designer opens at the Dashboard. The Dashboard lists the templates you can use to create a new workflow.
-
Click the Workflow for VertiGIS Studio Web template.
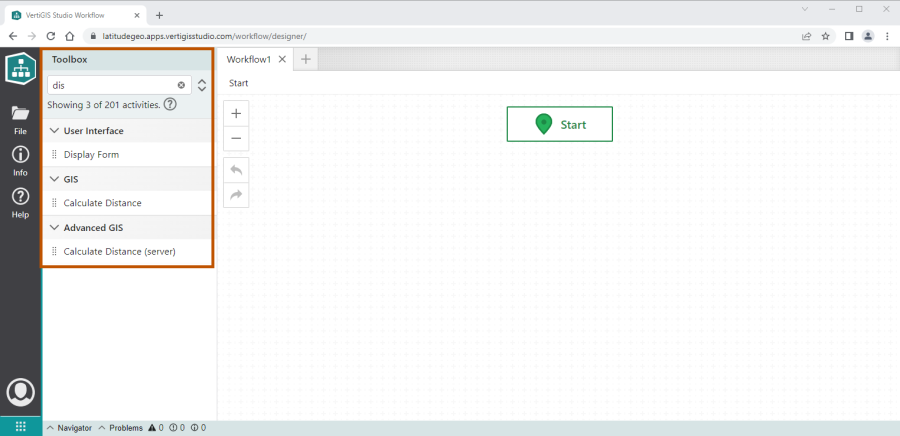
Designer opens a new, blank workflow. The Start block is the beginning of the workflow.

The Toolbox at the left contains activities, the building blocks of a workflow. Each activity represents a unit of work, for example, one activity sets the map extent, while another activity buffers a point on the map. To build a workflow, you drag activities from the Toolbox onto the design surface and connect them into a flowchart.
In this tutorial, you will use a single activity, the Display Form activity. The main function of the Display Form activity is to gather input from the user, but you can also use it to display information to the user.
-
Find the Display Form activity in the Toolbox.
An easy way to find a particular activity is to type part of the activity's name in the Filter box at the top of the Toolbox. The Toolbox will show only those activities that match what you type.
-
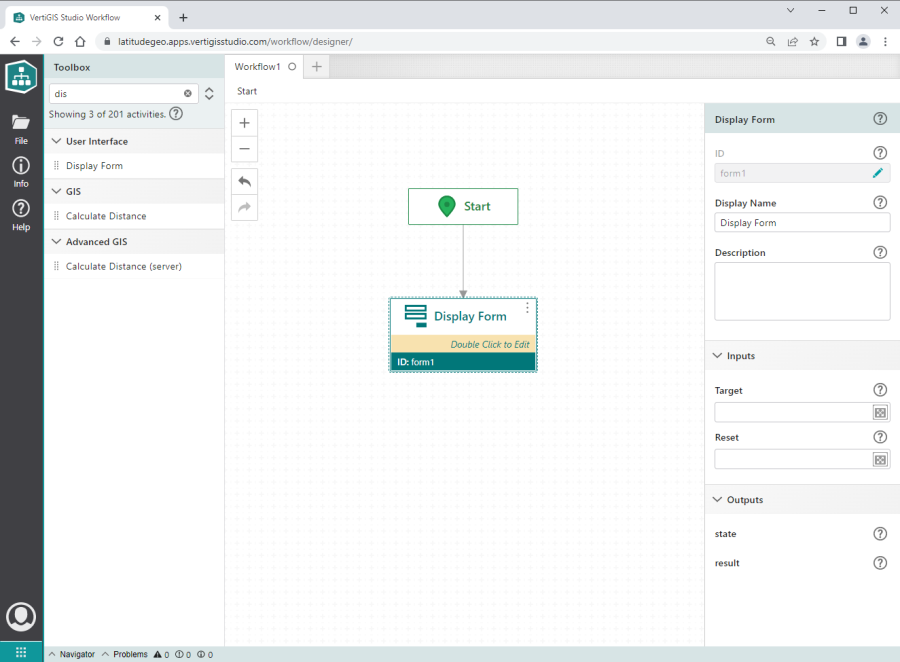
Drag the Display Form activity to the design surface and drop it on the Start block.
Dropping an activity on the last item in the workflow automatically positions and connects the activity. In this case, the Start block is the last item in the workflow. You can also connect and disconnect activities manually.
The Display Form activity's properties show at the right. These properties apply to the form as a whole. You can edit the activity to configure the contents of the form.
-
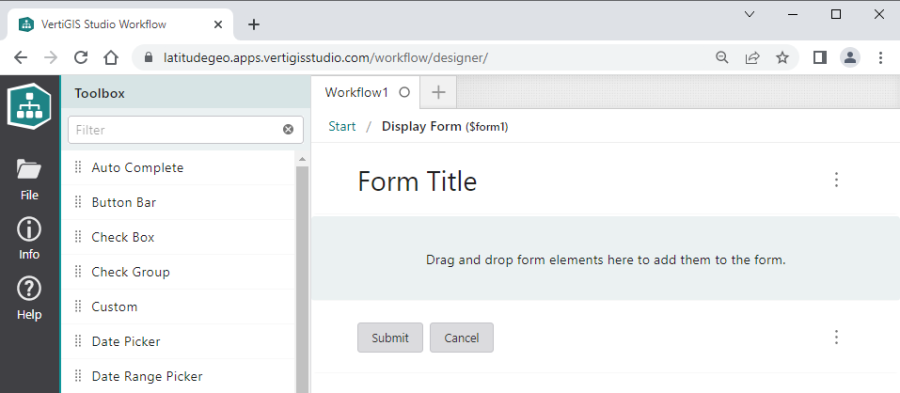
Double-click the Display Form activity.
The form opens for editing. In this view, you add whatever elements you want to include in the form. Instead of activities, the Toolbox shows the building blocks of forms, form elements. Initially, the form has a title and buttons for the user to submit or cancel the form.
-
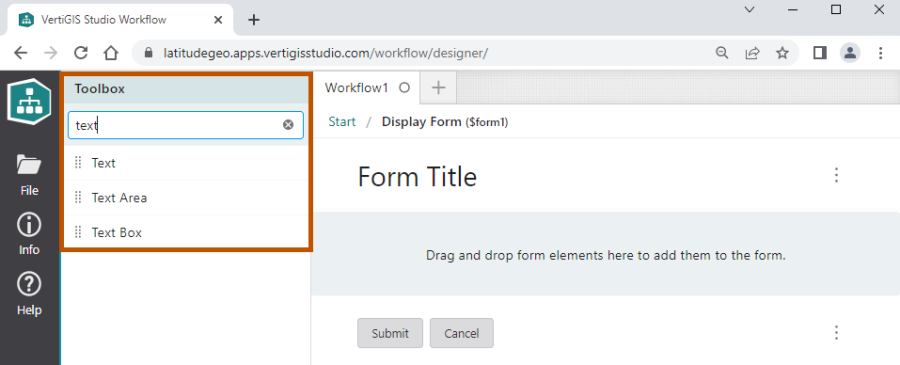
Find the Text element in the Toolbox.
The Text element allows you to display instructions and other information within the form.
-
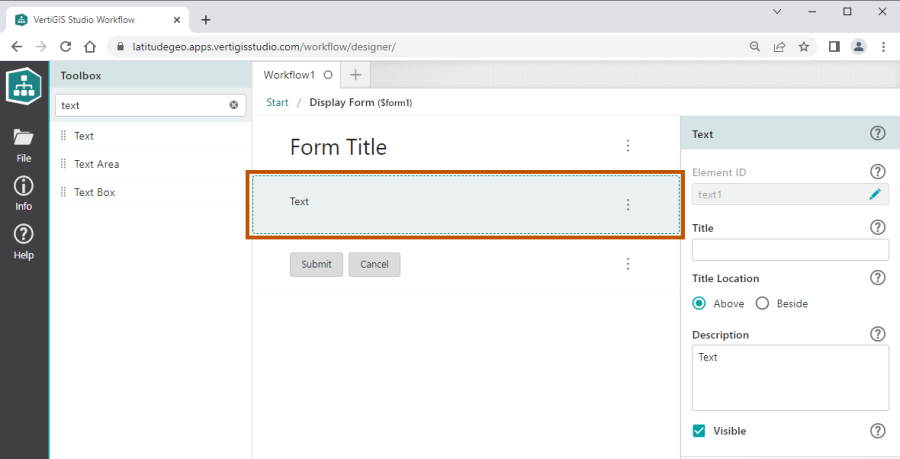
Drag the Text element from the Toolbox to a position between the form title and the buttons.
The Text element's properties show at the right.
-
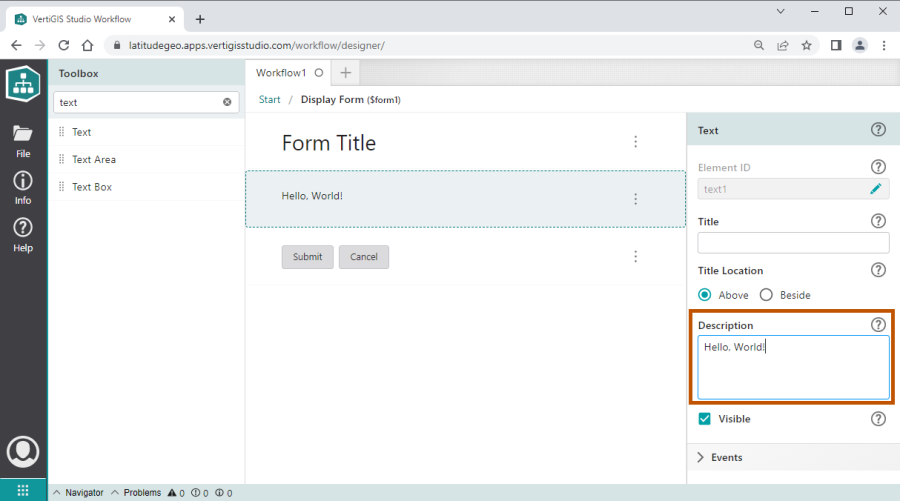
In the Description box, type the message that you want to display.
Your text appears in the form preview as you type.
Step 2: Run the Workflow in the Sandbox
Follow the instructions to run the workflow in the Sandbox, Workflow Designer's built-in test environment.
-
Click Info in Workflow Designer's sidebar.
-
Click Run in Sandbox.
-
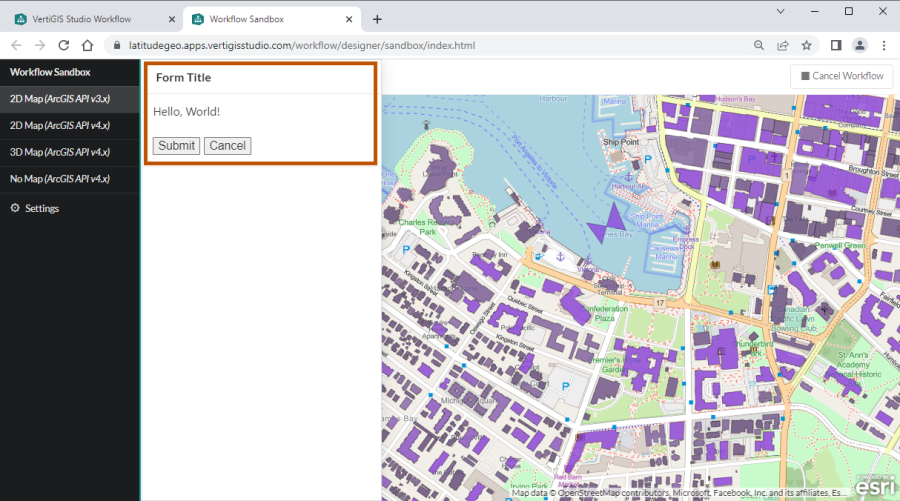
Click Run Workflow.
The workflow opens the form that displays the message. Click either of the form's buttons to close the form.
Step 3: Save the Workflow
-
Press Ctrl+S or click File | Save or File | Save As in the sidebar and enter a title for the workflow.
An item is created for the workflow in ArcGIS. You can access the item from your Content page in ArcGIS.
The item's title in ArcGIS is the same as the workflow's title in Designer.