Install VertiGIS Studio Workflow on Premises
The instructions given below step you through the installation of VertiGIS Studio Workflow, component installation, post-installation configuration, and application registration with your ArcGIS portal. When you have completed these steps, you will have a working installation of VertiGIS Studio Workflow.
Before you Begin
Make sure your server meets the requirements outlined in Requirements for On-Premises Workflow.
Download the VertiGIS Studio Workflow installer here.
Main Steps to Install VertiGIS Studio Workflow
The main steps to install VertiGIS Studio Workflow on premises are as follows:
-
Configure post-installation settings.
The Post Installer enables you to do the following:
-
Configure VertiGIS Studio Workflow's deployment in IIS.
This step may cause IIS to restart.
-
Register the application with Portal for ArcGIS or ArcGIS Online.
Install VertiGIS Studio Workflow
To install VertiGIS Studio Workflow:
-
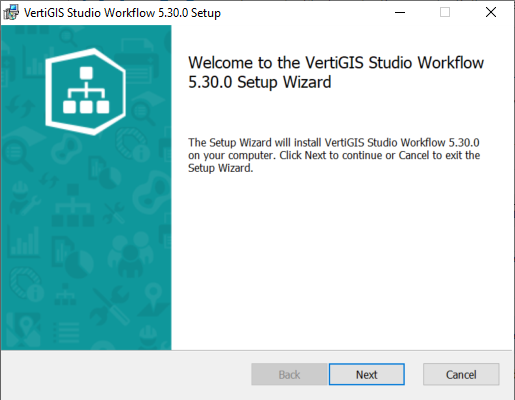
Run the VertiGIS Studio Workflow installer.
-
Click Next.
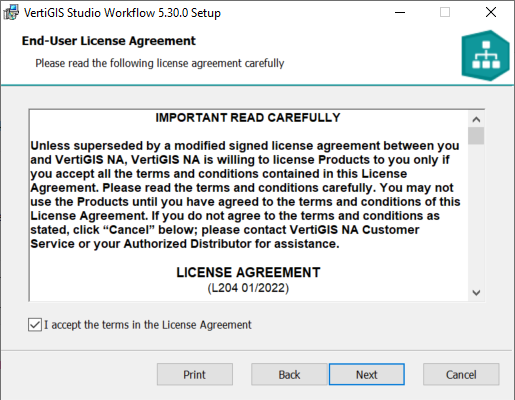
The End-User License Agreement panel opens.
-
Read the license agreement.
To print a copy of the agreement for your records, click Print.
-
If you agree to the terms of the license agreement and supporting documents, select the I accept the terms of the License Agreement checkbox, and then click Next.
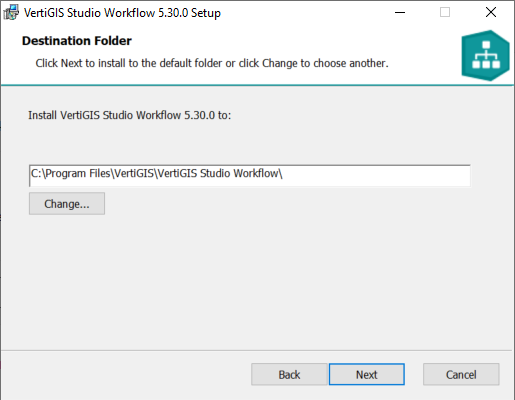
The Destination Folder panel opens.
-
Select a location to install VertiGIS Studio Workflow, and then click Next.
By default, VertiGIS Studio Workflow is installed in
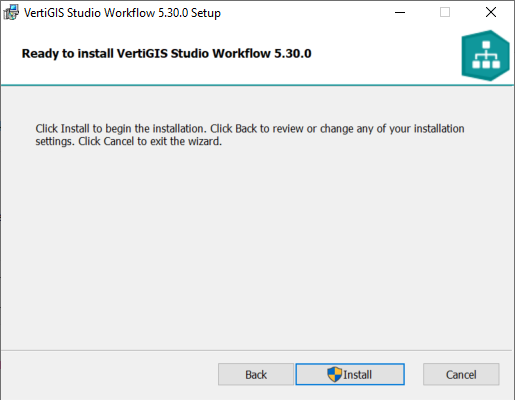
C:\Program Files\VertiGIS\VertiGIS Studio Workflow\.The Ready to Install panel opens.
-
Click Install and wait for the installation to complete.
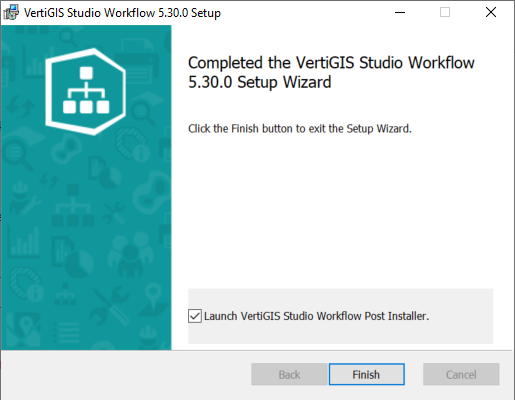
The Completed panel opens.
-
Make sure the Launch VertiGIS Studio Workflow Post Installer checkbox is selected and click Finish.
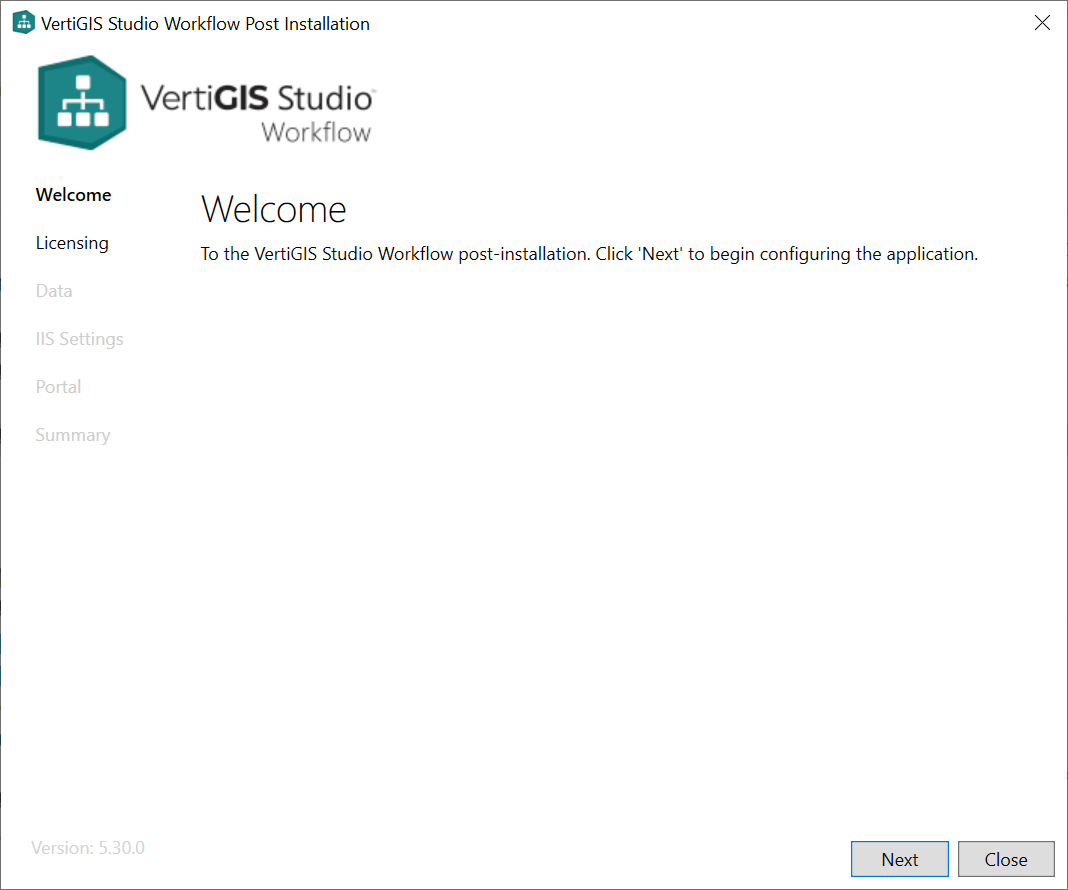
The installer closes and the Post Installer opens.
-
Follow the steps in Configure Post-Installation Settings.
Configure Post-Installation Settings
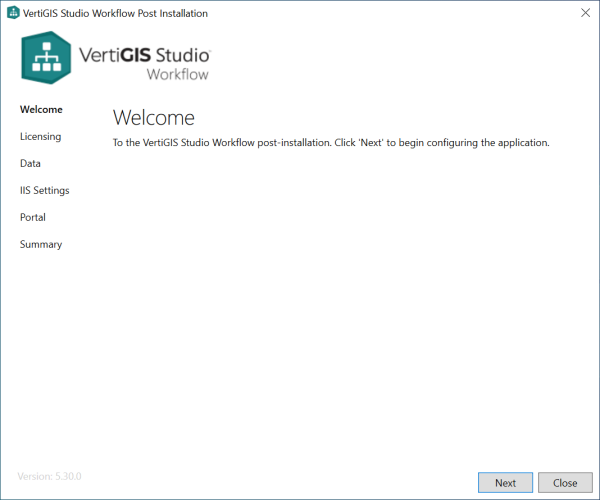
The VertiGIS Studio Workflow Post Installer is used to configure on-premises deployments of VertiGIS Studio Workflow. You must configure the post-installation settings to run your on-premises installation of VertiGIS Studio Workflow. By default, when you install VertiGIS Studio Workflow on premises, the Post Installer opens after the installer completes. This allows you to do the required post-installation configuration right away. You can run the Post Installer at any time later to modify your configuration.
If the links in the Post Installer's sidebar are not available, you must click Next to step through the panels one at a time. This is the case the first time you run the Post Installer after installing VertiGIS Studio Workflow on premises. If you navigate away from a panel by clicking a link in the sidebar, the panel's configuration will not be applied, regardless of whether you are using the default configuration or a custom configuration.
The Post Installer allows you to do the following:
-
Licensing: Activate your license.
-
IIS Settings: Configure IIS.
-
Portal: Register the application with ArcGIS.
To configure post-installation settings:
VertiGIS Studio Workflow is licensed software. The Licensing panel allows you to activate the product.
-
Open the Licensing panel.
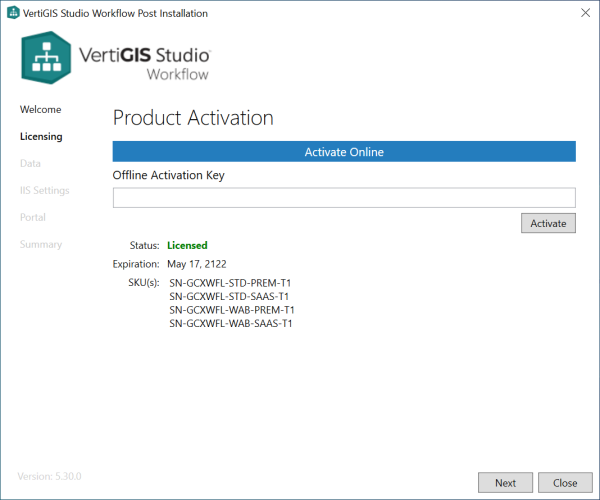
Licensing panel
-
Follow the steps for one of the following options:
-
Use Trial License: VertiGIS Studio Workflow comes with a 60-day trial license. You can use the trial license until it expires. To continue using VertiGIS Studio Workflow after the trial period, the product must be activated.
or
-
Activate Online: To activate VertiGIS Studio Workflow online, you must have a VertiGIS Studio account.
-
Click Activate Online.
-
Sign in to your VertiGIS Studio account.
Activation will complete automatically.
or
-
-
Activate Offline: To activate VertiGIS Studio Workflow offline,
-
Contact Customer Service at
customerservice-ca@vertigis.comto request an activation key.While you wait for your key, you can use the trial license, as long as it has not expired.
-
When you receive the key:
-
Click Licensing to open the Licensing panel.
-
Paste the key into the Offline Activation Key box.
-
Click Activate.
-
Click Close to close the Post Installer.
-
-
The Data panel allows you to specify the folder for storing files related to your Workflow installation, such as configuration files and server workflows. This allows you to organize your files on a different drive or network location, to suit your environment.
We recommend that you choose a permanent location for the data directory now. If you decide to change the data directory location later, follow the instructions in Move the Data Directory so you do not lose access to your existing workflows.
The default data directory is C:\ProgramData\Geocortex\Workflow. Some possible custom locations are as follows:
-
Within the installation location: For example, if you installed VertiGIS Studio Workflow at the default location,
C:\Program Files\VertiGIS\VertiGIS Studio Workflow\Data\ -
At the root of the same drive as Workflow: For example,
C:\data\ -
On a different drive: For example,
D:\VertiGIS Studio Workflow Data\orD:\Data\VertiGIS Studio Workflow\ -
On a network share via UNC path: For example,
\\servername\data\vertigis-studio-workflow\
If you use a custom location, you must give the application pool identity write permission in IIS. The default identity is IIS AppPool\VertiGISStudioWorkflow.
If you choose a location on another machine, you will have to change the application pool identity that VertiGIS Studio Workflow uses to one that both the Workflow server and the data server can see, like a service account on your domain. Typically this is the DomainName\MachineName$ user.
To configure the data directory:
-
Open the Data panel.
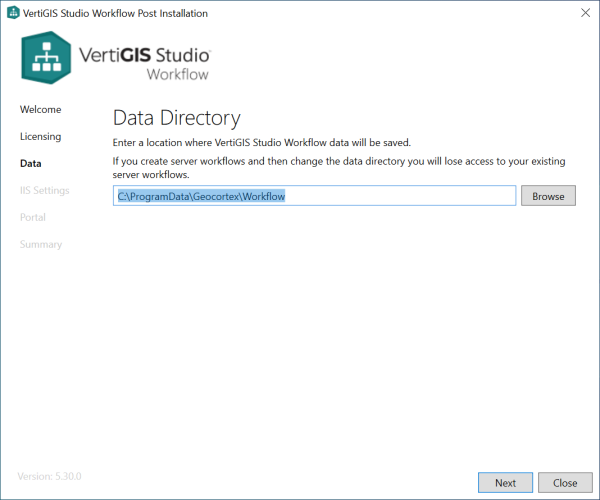
Data panel
-
Enter the path to the data directory. Alternatively, if the data directory is on the same machine as Workflow, click Browse to browse to the data directory.
Remember to give the application pool identity write permission in IIS.
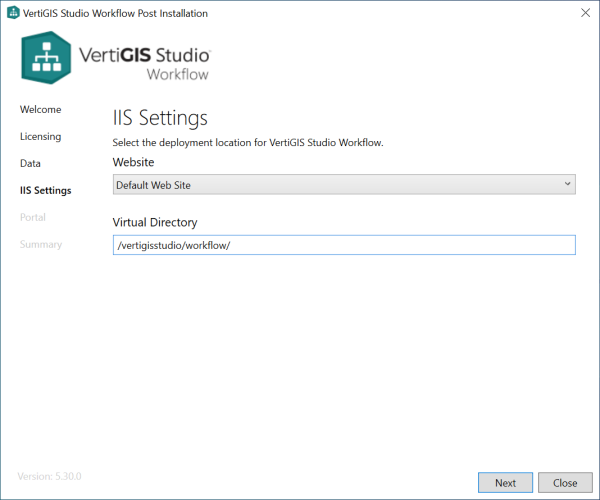
The IIS Settings panel allows you to manage how VertiGIS Studio Workflow is deployed in IIS.
This step may cause IIS to restart.
If you later decide to change the IIS settings, make sure to update the Redirect URL on the Post Installer's Portal tab. See Change the IIS Deployment.
-
Open the IIS Settings panel.
-
To use a different website, select the website from the Website drop-down list.
By default, VertiGIS Studio Workflow is deployed to IIS's Default Web Site.
-
To use a different virtual directory, type or paste the path in the Virtual Directory box.
By default, VertiGIS Studio Workflow uses
/vertigisstudio/workflow/as the virtual directory.
In order to save and share workflows, VertiGIS Studio Workflow must be registered with an ArcGIS portal, either your on-premises Portal for ArcGIS installation or ArcGIS Online. To register with a portal, you create an Application item and register the item to create an app ID and secret. You then configure the app ID in the Post Installer.
If you later decide to change how VertiGIS Studio Workflow is registered with ArcGIS, follow the steps in Change the ArcGIS Registration.
-
Open the Portal panel.
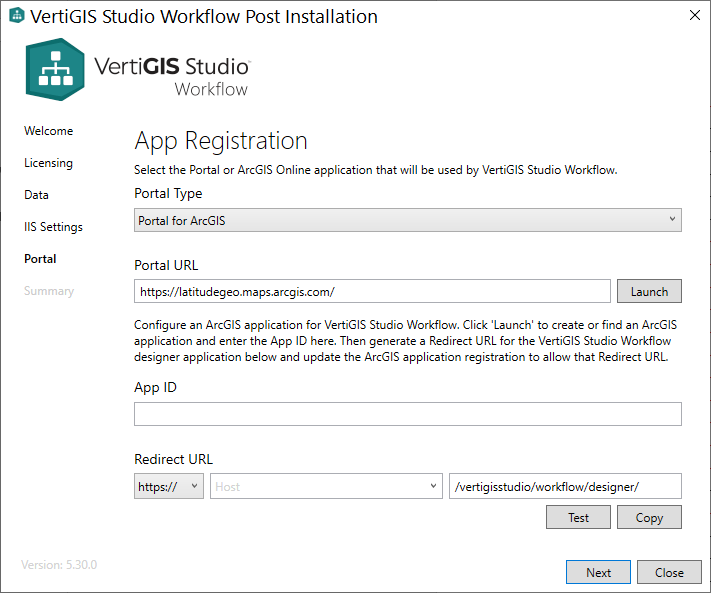
Portal panel
-
Select the type of portal you are using from the Portal Type drop-down list: ArcGIS Online or Portal for ArcGIS.
-
Follow the instructions that apply to you based on your selection in the previous step:
-
ArcGIS Online: In the Organization box, enter your organization name, for example
myorganization, or the URL of your ArcGIS Online portal, for examplehttps://myorganization.maps.arcgis.com. -
Portal for ArcGIS: In the Portal URL box, enter the URL to your portal instance, for example,
https://host.domain.com/arcgis/.
-
-
In the Redirect URL boxes:
-
In the left-hand box, make sure
https://is selected. -
In the middle box, select or type the host name of your web server.
-
In the right-hand box, change the virtual path if you want.
By default, the Post Installer bases the virtual path on your configuration on the IIS Settings panel.
-
Click Copy to copy the redirect URL to your clipboard for use in a later step.
-
-
Create an Application item for VertiGIS Studio Workflow:
-
Click Launch to open your portal.
-
Sign in to your portal, and navigate to the Content panel.
-
Click Add Item and select An application.
-
Configure the application item using the following settings.
-
Type:
Web Mapping -
Purpose:
Ready to Use -
API:
Javascript -
URL: Paste the redirect URL, for example:
https://host.domain.com/vertigisstudio/workflow/designer/ -
Title: Type a title for the item, for example:
VertiGIS Studio Workflow -
Tags: Type one or more tags for the item, for example:
VertiGISandWorkflow
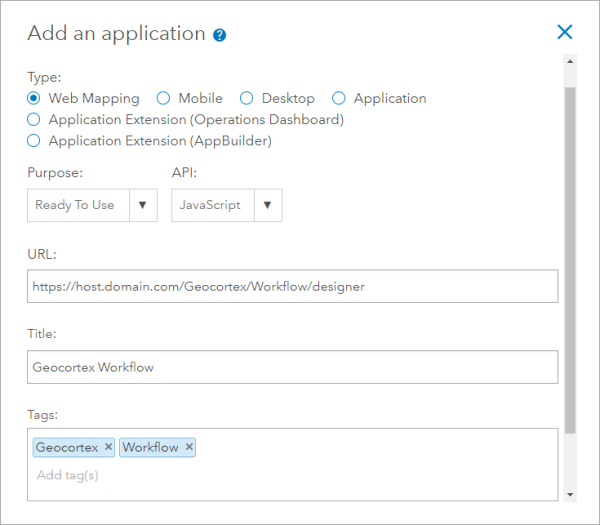
Settings to use for the ArcGIS application item
-
-
Click Add Item.
A new Application item is added to the portal. The item's details show.
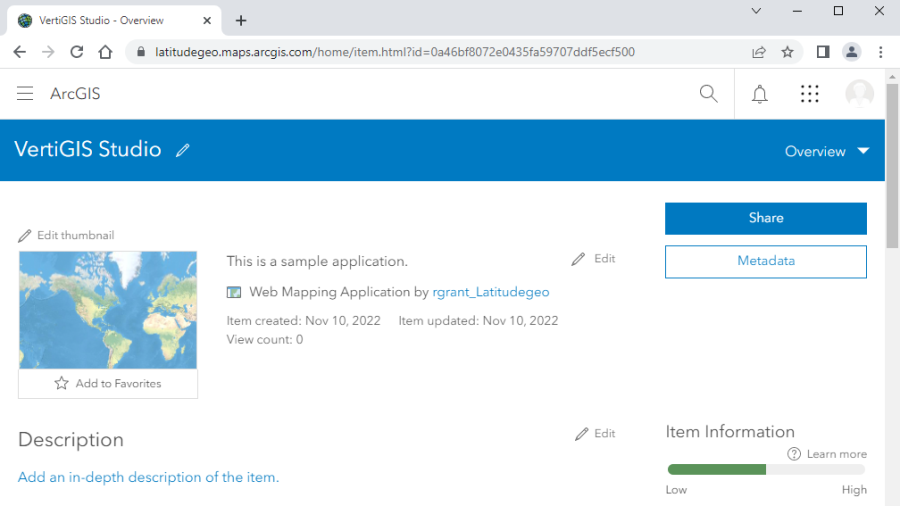
Application item for VertiGIS Studio Workflow
-
-
Register the Application item:
-
Click the Settings tab.
-
Scroll down to the Web Mapping Application section at the bottom of the panel. Under App Registration, click Register.
-
Paste the redirect URL into the Redirect URI box, and then click Add.
The redirect URL is added to the list of permitted redirect URLs.
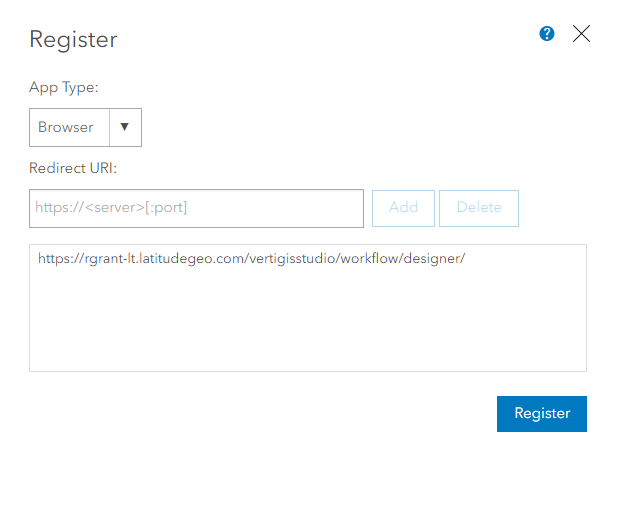
Redirect URL added to the VertiGIS Studio Workflow Application item
-
Click Register to complete the application registration.
ArcGIS creates an app ID and secret for the Application item.

App registration information
-
-
Provide the app ID to the Post Installer:
-
In ArcGIS, copy the app ID to your clipboard.
-
In the Post Installer, paste the app ID into the App ID box.
-
-
Test the application registration by clicking Test.
The Post Installer will test the registration and either show a success message or prompt you to fix any errors.
If Portal for ArcGIS is secured using Windows Integrated Security and anonymous access to the portal is disabled in IIS, the Post Installer will present a warning that says: "The portal application registration is valid—however the specified portal requires authentication". You must install the VertiGIS Studio Web Adaptor Extensions to allow VertiGIS Studio Workflow to communicate with Portal for ArcGIS.
To allow other members of your organization to run Workflow Designer, share the Application item with them.
The Summary panel shows Workflow Designer's URL for you to distribute to Workflow authors in your organization. The Summary panel also provides a link to launch Workflow Designer.
-
Open the Summary panel.
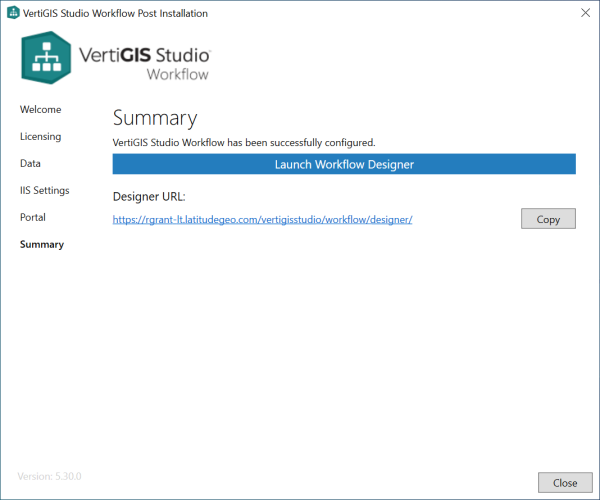
Summary panel
-
Launch Workflow Designer from the Summary panel, or copy the Designer URL for distribution to your team.
-
Click Close to exit the Post Installer.
VertiGIS Studio Workflow is ready to use.
Launch the Post Installer
You can open the Post Installer at any time to modify the post-installation configuration.
To launch the VertiGIS Studio Workflow Post Installer:
-
Navigate to the
VertiGIS Studio Workflowfolder in your file system and open theSetupsubfolder.If VertiGIS Studio Workflow is installed in the default location, the Post Installer is here:
C:\Program Files\VertiGIS\VertiGIS Studio Workflow\Setup\
-
Run the Post Installer's executable file,
VertiGIS.Workflow.Setup.exe.