Host and Run Workflows in ArcGIS Experience Builder
This procedure assumes you have already downloaded and deployed the widget that allows you to host and run workflows from Experience Builder apps.
See Prepare the Workflow Widget for ArcGIS Experience Builder for more information.
The following steps are required to host and run workflows in Experience Builder:
-
Configure a widget to run the workflow.
-
Add a workflow to the widget.
-
Add data to the widget.
-
Configure widget behavior.
-
Add parameters to the widget.
-
Configure Message Action Workflows.
-
Configure a Widget to Run the Workflow
Add a Workflow to the Widget
To add a workflow to the widget:
-
In Experience Builder, configure the app that will run the workflow.
-
In the left toolbar, click Insert to open the Insert Widget panel.
-
Drag and drop the Workflow widget from the toolbar onto the canvas.
-
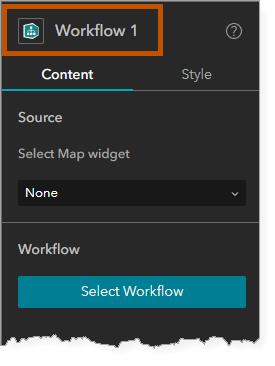
In the widget configuration panel on the right, you can customize the widget icon and label. The label is used as a tool-tip for the widget in the running app.
For best results, the icon should be 24 x 24 pixels. Other sizes are adjusted to fit. The supported file formats are PNG, GIF, and JPEG.
-
Click Select Workflow.
The Select Workflow window opens for you to navigate to the workflow you want to assign to the widget.
If you created the workflow, it is listed in the My Content tab. If the workflow is shared with you, it is in the My Organization, and/or ArcGIS Online tab, depending on how it is shared.
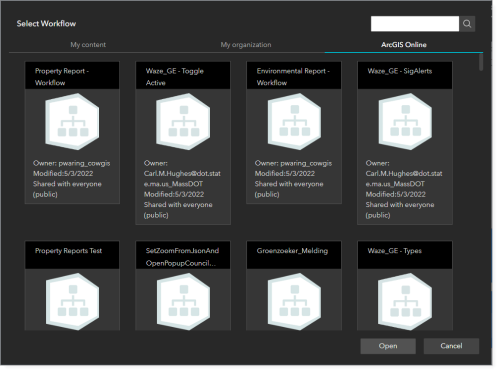
Example of ArcGIS Online tab showing workflows
-
Locate and select the workflow.
-
Click Open.
-
Save the app.
Add Data to the Widget
Your workflow may require either a map or access to an Experience Builder data source.
To configure a Map widget to run the workflow:
Select the Map widget from the drop-down list.

To configure an Experience Builder data source to run the workflow:
-
Click Set Data Sources.
-
Expand the map or feature service to see a list of related data sources.
-
Select the data source(s) you want the widget to access.
-
Click Set Data Sources to save your settings.
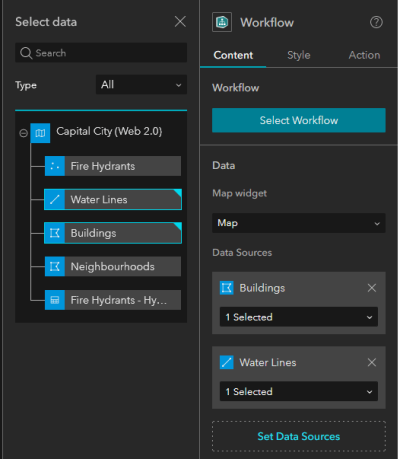
Example of a widget configured with multiple data sources.
Configure Widget Behavior
The table below describes the settings you can apply to change the widget behavior.
|
Setting |
Description |
| Show Form Title |
If enabled, shows the title of the active form at the top of the widget. |
| Start Operation |
Determines how the widget will start the workflow. The options are as follows:
|
| Show Icon |
Shows the Workflow icon when a form is not being displayed. If you specify Click for the Start Operation, this option is permanently enabled. |
Add Parameters to the Widget
If the workflow takes one or more inputs, you must add parameters to the widget.
To add parameters to the widget:
-
Click Configure Parameters > Add Parameter.
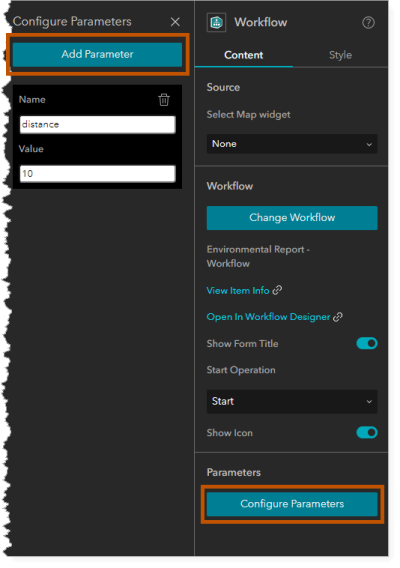
-
Enter a Name that you will use to access the input in the workflow.
-
Enter the input value in the Value field.
The value must be a string. You do not need to use quotes around the string.
-
Repeat steps 1 to 3 to add as many inputs as the workflow requires.
-
Save the app.
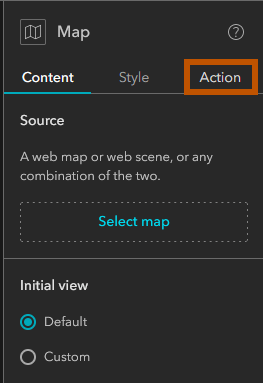
Configure Message Action Workflows
Configuring a Message Action Workflow allows you to run workflows from other widgets.
In the example below, we configure a Message Action Workflow for a Map widget.
To configure a Message Action Workflow:
-
Click Add Message Action Workflow.
The Select Workflow window opens.
-
Locate and select the workflow you want to use via a Message Action Workflow.
-
Click Open.
-
Repeat steps 1 through 3 to add as many Message Action Workflows as you need.
-
Select the widget you want to run the Message Action Workflow. In our example, we use the Map widget.
-
Click Action.
-
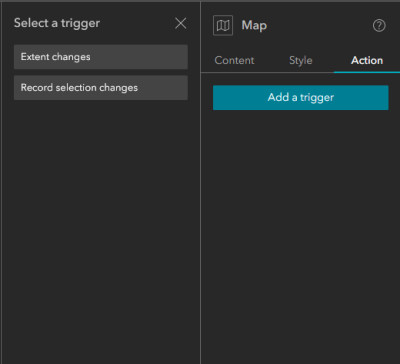
Click Add a trigger.
-
Choose a trigger.
The Map widget has two triggers: Extent changes and Record selection changes. Other widgets can have other Message Actions. You can see a full list of Message Actions here.
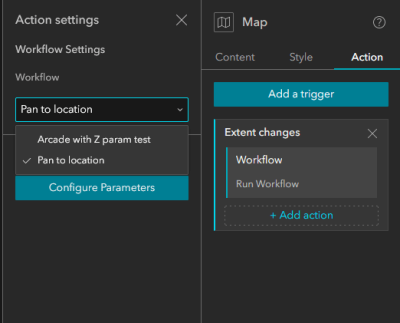
-
Under the Widgets heading, click Workflow.
If you changed the title of your Workflow widget, the new title appears here instead.
-
Click Run Workflow.
-
Choose the workflow you want to run.
The drop-down list contains the primary workflow and all Message Action Workflows configured with your widget.
-
Add any parameters that you would like to include with the Message Action.
These are only provided to the workflow when it is run as a Message Action.
Message Actions automatically add the message data as workflow inputs.
-
Save the app.
Run the Workflow
You can either run the workflow from the widget you configured in the previous steps, or run it from another widget that is configured with a Message Action Workflow.
To run the workflow from the widget:
Run the app.
-
If you configured the Start Operation as Start, the workflow runs automatically.
-
If you did not configure the Start Operation as Start, click the widget to run the workflow.
The location of the widget depends on the app theme and the administrator's configuration.
To run the workflow from another widget:
-
Run the app.
-
Trigger the action on the widget that is configured with a Message Action Workflow.
For example, if you configured the Map widget with an Extent Change trigger, pan the map to run the workflow.