Configure Post-Installation Settings
If you do not yet have an activation key for Access Control, contact Customer Service at customerservice-ca@vertigis.com to obtain one. You cannot configure the post-installation settings until you have an activation key.
To configure the post-installation settings, you must visit every panel in order and click Next to apply the panel's settings.
The Post Installer has the following panels:
Welcome
The Welcome panel provides an overview of post installation.
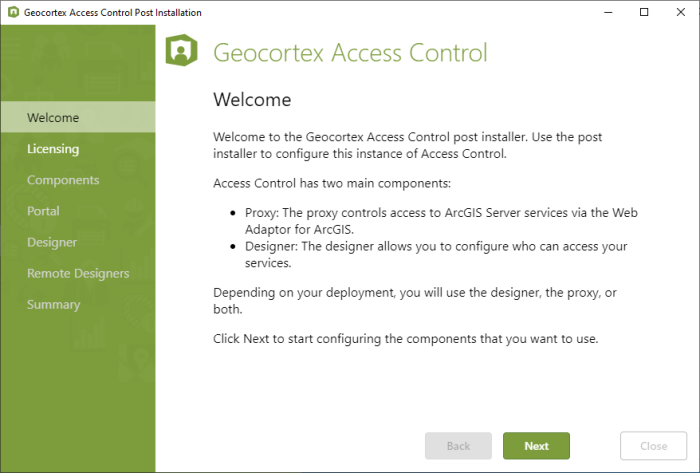
Welcome panel
Licensing
VertiGIS Studio Access Control is licensed software. Use the Licensing panel to activate the product.
You cannot configure the post-installation settings until you have an activation key.
-
Click Next on the Welcome panel to open the Licensing panel.
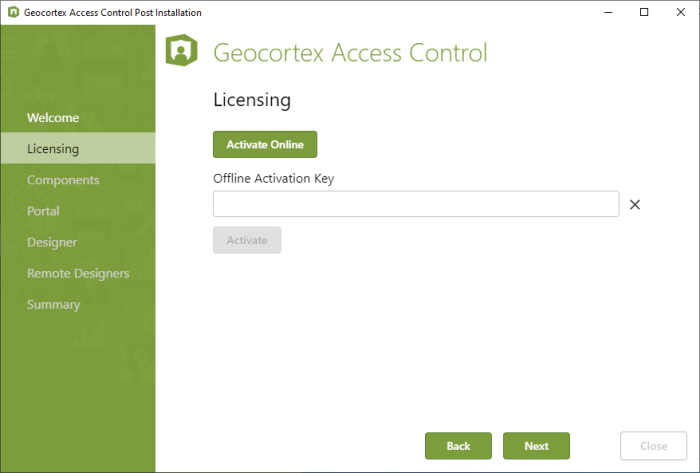
Licensing panel
-
When prompted for a license key, you have two options:
-
Activate Offline: Contact Customer Service for an activation key.
-
Activate Online: Sign in to your ArcGIS Online organization associated with your VertiGIS Studio Access Control license. If your organization already has a license, activation completes automatically. If your organization does not have a license, you are asked if you would like to submit a request for a trial license.
-
After the product key is activated, the status changes to show that the product is Licensed and the SKUs for this product display.

Licensing panel after activating Access Control
Components
Use the Components panel to specify which components you want to use—the Designer, the Proxy, or both.
-
Click Next on the Licensing panel to open the Components panel.
- If this machine has one or more Web Adaptors installed, the Web Adaptors are listed in a drop-down list.
- In addition, the panel displays links to the selected Web Adaptor's ArcGIS Server and, if the server is federated, to the portal.
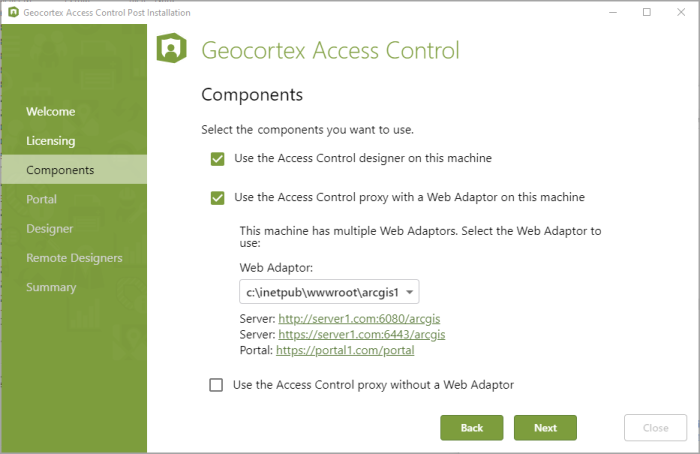
Components panel for a federated server
-
Designer: If you want to use the Designer to configure local or remote Proxy components, select the Use the Access Control designer on this machine check box.
You must register the Designer with your portal on the Designer panel.
-
Proxy:
-
If there are Web Adaptors installed on this machine that you want to proxy:
-
Select the Use the Access Control proxy with a Web Adaptor on this machine check box.
-
If this machine has more than one Web Adaptor, select the Web Adaptor that you want to proxy.
If the machine has multiple Web Adaptors that you want to proxy, run the Post Installer once for each Web Adaptor. After you complete the post installation for the selected Web Adaptor, close the Post Installer and repeat the following steps for each additional Web Adaptor:
- Re-open the Post Installer.
- On the Components panel, select a Web Adaptor.
- Complete the configuration for the selected Web Adaptor.
- Close the Post Installer.
If you have configured the Designer on another machine, you can use the remote Designer for this Proxy by adding the remote Designer on the Remote Designers panel.
-
-
If you want to use the Access Control Proxy without a Web Adaptor:
-
Select the Use the Access Control proxy without a Web Adaptor check box.
-
In the Server Backend Host Name box, enter the name of your ArcGIS Server.
-
If the ArcGIS Server is federated with your portal, enter the URL of the portal in the Portal Frontend URL box. For non-federated ArcGIS Servers, leave this box blank.
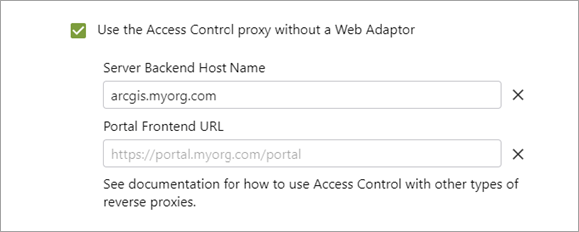
For details on configuring a reverse proxy and/or load balancer, see Reverse Proxy and/or Load Balancer Deployments.
-
-
Portal
VertiGIS Studio Access Control requires access to your portal. Use the Portal panel to sign in to your portal.
-
Click Next on the Components panel to open the Portal panel.
-
Follow the instructions that apply to you—Federated ArcGIS Server or Token-Secured or Windows-Secured ArcGIS Server:
-
Federated ArcGIS Server: If ArcGIS Server is federated, the portal's URL shows in the Portal URL box.
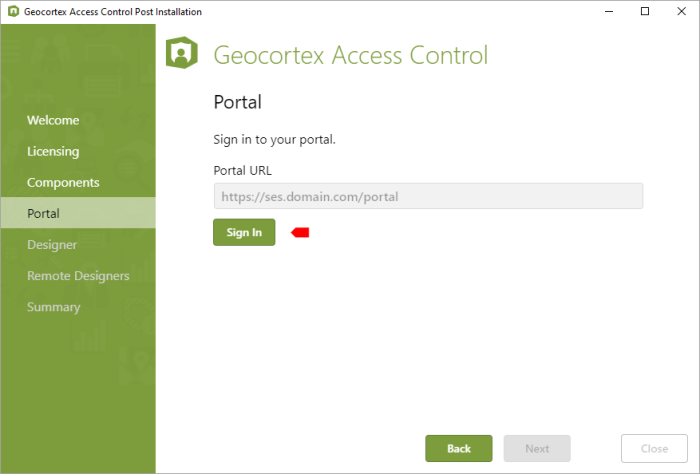
Portal panel for a federated server
-
Click Sign In.
-
-
Token-Secured or Windows-Secured ArcGIS Server:
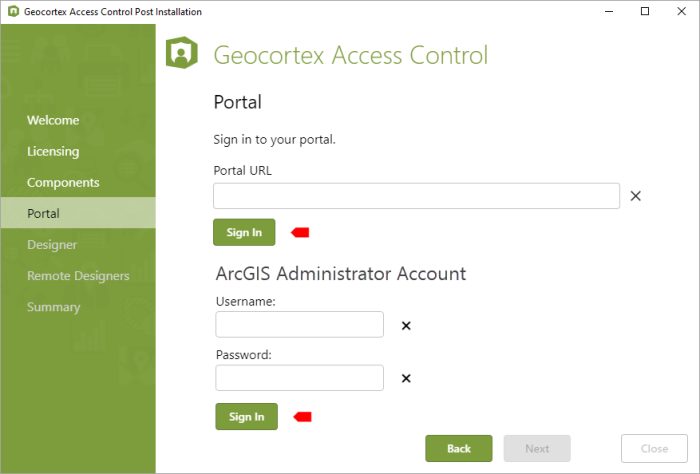
Portal panel for a token-secured or Windows-secured server
-
Type or paste the portal's URL in the Portal URL box.
-
Click Sign In.
-
In the ArcGIS Administrator Account area, enter the username and password for an administrative account that allows you to sign in to ArcGIS Server, such as the primary site administrator account.
-
Click Sign In.
-
-
Designer
To use this installation's Designer, you must register the Designer with the portal specified on the Portal panel.
To register the Designer, copy the app ID of a Web Mapping Application item from the portal to the Designer panel. If your organization has more than one Geocortex application that is used with the specified portal, the portal may already have an item you can use. Otherwise, you will have to create one.
Before other members of your organization can use the Designer, you must share the Web Mapping Application item with them.
Using the same app ID to register more than one Geocortex designer allows single sign-on between the designers, so you can switch freely between them without having to sign in again.
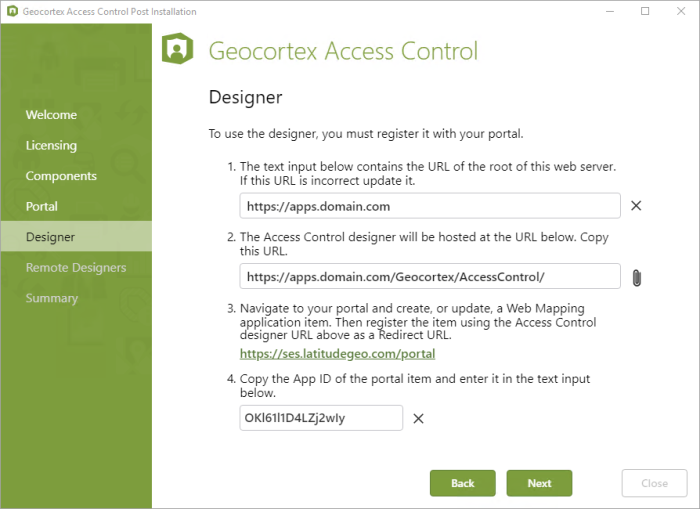
Designer panel
-
Text box 1 contains the URL of the root of the Access Control web server configured in IIS, for example,
https://apps.domain.com. If this URL is incorrect, update it.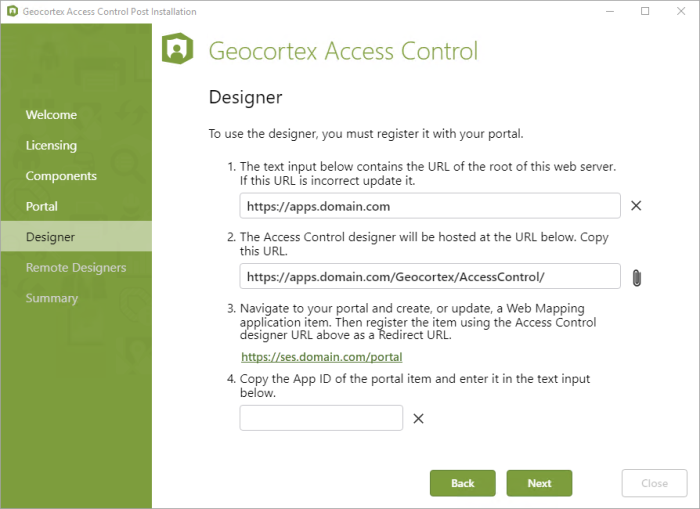
App Web Site configured on the Designer panel
-
Text box 2 contains the App URL you will use to launch the Designer. Copy this URL to the Clipboard. You will use this as redirect URL when you register your Web Mapping application.
-
Follow the instructions that apply to you to register the Designer as a Web Mapping Application item:
-
If your organization already uses other Geocortex products with the same portal as Access Control, we recommend that you use the existing Web Mapping Application item to register the Designer with the portal. Follow the instructions in Register the Designer Using an Existing Item.
-
If this is the first Geocortex product used with this portal, you will have to create a Web Mapping Application item in the portal and use it to register the Designer. Follow the instructions in Register the Designer Using a New Item.
Register the Designer Using an Existing Item
-
Open the portal in your browser.
-
Locate the item and view its details.
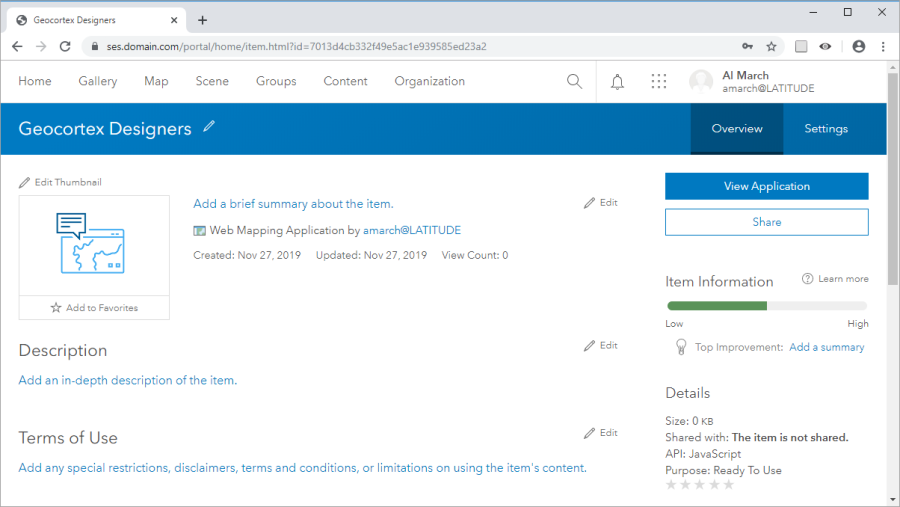
Details for an item for Geocortex designers
-
On the Settings tab, scroll down to the App Registration area and click Update.
The Registered Info dialog box opens.
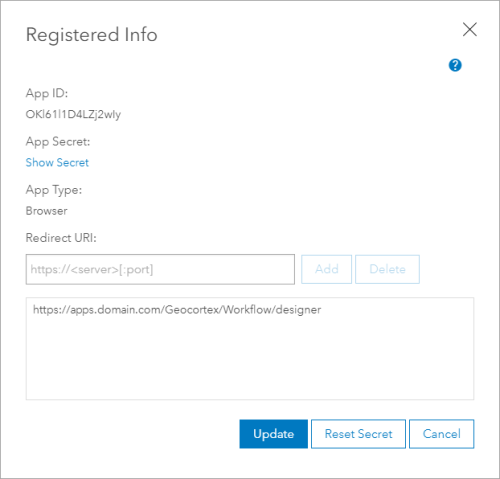
Registered Info dialog box with one Geocortex Designer
-
Paste the copied redirect URL into the Redirect URI box, and then click Add.
The URL is added to the list of redirect URIs.
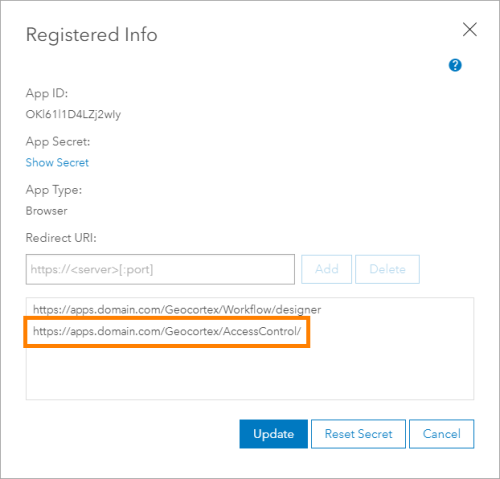
Access Control redirect URL added to the item
-
Click Update.
The dialog box closes. The item's registration information shows on the Settings panel.

Registration details for the item, shown on the item's Settings panel
-
Copy the app ID to the clipboard.
-
On the Overview tab, edit Tags and add one or more tags for Access Control.
-
Return to the Post Installer to enter the app ID.
Register the Designer Using a New Item
There are two steps:
-
Sign in to your portal and open the Content page.
-
In My Content, click Add Item and select An application.
-
Configure the application using the following settings, and then click Add Item.
-
Type:
Web Mapping -
Purpose:
Ready to Use -
API:
JavaScript -
URL: Enter the Designer's URL.
For example:
https://apps.domain.com/Geocortex/AccessControl/ -
Title: For example:
Geocortex Designers -
Tags: For example:
Geocortex,Designer, andAccess ControlYou may want to add additional tags used by your organization.
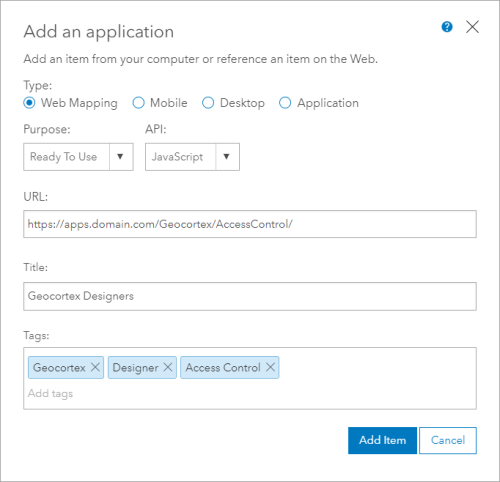
Settings for a Web Mapping Application item for Geocortex designers
A new Web Mapping Application item is added to the portal.
Details for an item for Geocortex designers
-
Step 2: Use the item to register the Designer with the portal
-
On the Settings tab, scroll down to the App Registration area.
-
Click Register beside App Registration.
The Register dialog box opens.
-
Paste the copied redirect URL into the Redirect URI box, and then click Add.
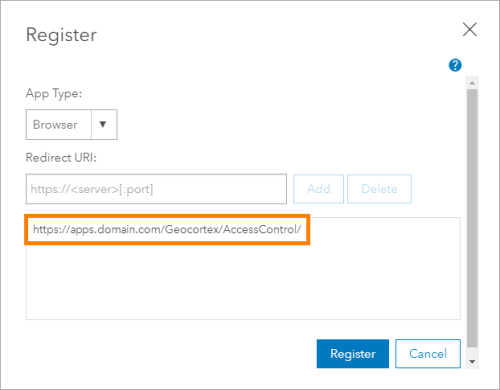
Access Control redirect URL added to the item
-
Click Register.
The dialog box closes. The item's registration information shows on the Settings panel.
Registration details for the item, shown on the item's Settings panel
-
Copy the app ID to the clipboard.
-
-
Enter the App ID: In the Post Installer Designer panel, paste the app ID into the App Id text box.
Example Designer settings
Remote Designers
There are a few instances where you may need to configure a remote Designer:
-
If the installation uses the Proxy but not the Designer.
-
If the domain of the ArcGIS server that you are setting permissions on is on is different than the domain of the Designer.
A few types of URLs to the remote designer are acceptable:
-
The host name of the server that you will access the designer at. For example:
server1.domain.comorreverse.proxy.com. -
The URL of the root of the server that you will access the designer at. For example:
https://server1.domain.comorhttps://reverse.proxy.com.
If you are only installing a single instance of Access Control, this step is not required.
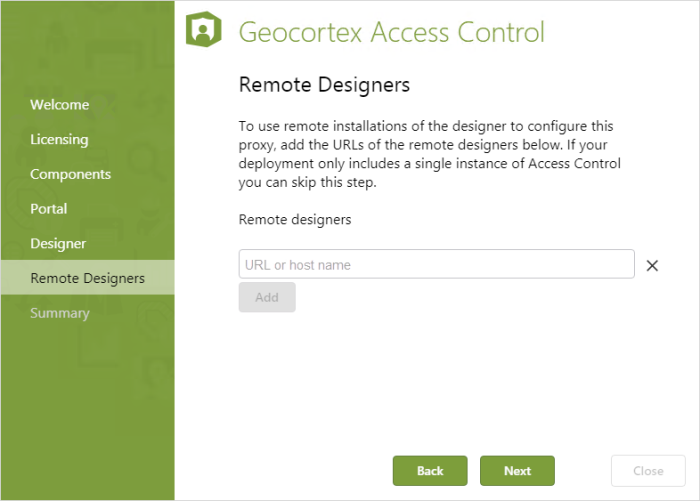
Remote Designers panel
-
Click Next on the Designer panel to open the Remote Designers panel.
-
In the Remote designers text box, type or paste the remote Designer's URL or host name.
-
Click Add.
Summary
-
Click Next on the Remote Designers panel to open the Summary panel.
-
Click Close to exit the Post Installer.
You have now completed the post installation for this installation of Access Control.