To collect information from ArcGIS Online or Portal for ArcGIS, or to configure ArcGIS Online or Portal for ArcGIS as a security provider for Analytics, Analytics requires that a developer credentials item exist in the respective portal. Follow this procedure to create and register a new application on your portal using OAuth 2.0 credentials.
Esri periodically updates the user interface for ArcGIS Online and Portal for ArcGIS. The following steps are accurate as of this writing, which was written for Portal for ArcGIS 12.1. Be aware that newer or older versions of Portal for ArcGIS, or new updates to ArcGIS Online, could result in a different user interface experience.
In different versions of Esri software, the terms App ID and Client ID, as well as App Secret and Client Secret, are used interchangeably.
If creating an item for data collection, you will need to be logged in as an Administrator so you can provide the appropriate permissions Analytics requires to collect data.
If configuring a Portal for ArcGIS that is older than 12.1 it will be similar to the security provider instructions, requiring a Redirect URI. You can also follow the instructions in the Analytics version 1.7 documentation.
To create an application in a portal:
1.Sign in to your organization's Esri portal.
• For ArcGIS Online, the URL should look similar to this: https://MyCompany.maps.arcgis.com
Note that this URL uses arcgis.com as its domain.
• For Portal for ArcGIS, the URL may look something like this: https://MyCompany.com/arcgis
2.Click the Content tab. This should take you to the My Content page, otherwise, click My Content.
3.Click New Item.
4.In the New Item dialog, click Developer Credentials. This takes you to the Create Developer Credentials dialog.
Follow the steps below for either adding an app to act as a security provider or an app for data collection.
Finish adding an app to act as a security provider:
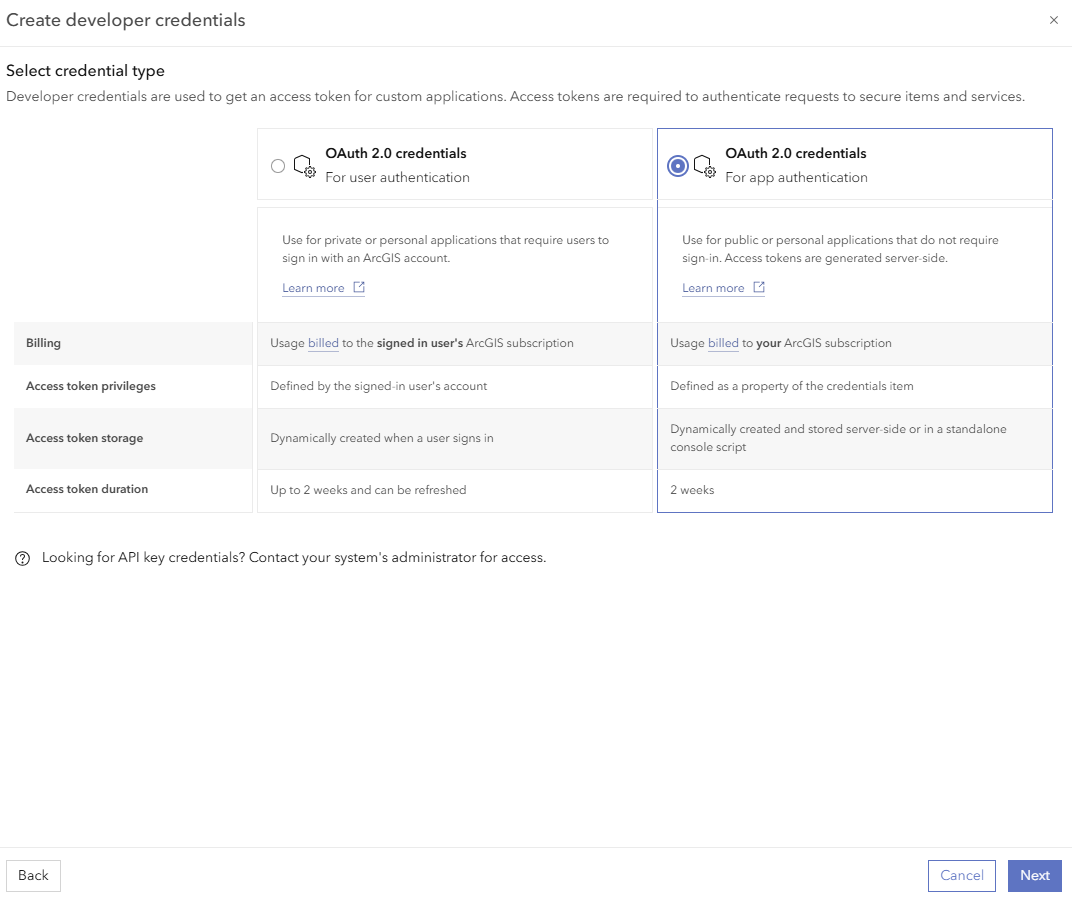
5.Select the OAuth 2.0 credentials - For user authentication radio button and click Next.
6.Enter a Redirect URI and click Next. If you are configuring an item to be a security provider for Analytics, copy the redirect URI from the Add Security Provider form in Analytics. With the default setup, it will look similar to https://myServer.myDomain.com/VertiGIS/Studio/Analytics/sign-in-handoff.html.
The other settings in this section of the dialog with the Redirect URI are not needed.
7.Add a Title and click Next. The title should help identify the item and its purpose so it is easy to find at a later date.
8.On the final screen, review your item settings and click Create.
The item has been created and registered. The Overview tab for your application is shown. You can copy the Client ID and Client Secret from this page.
Finish adding an app for data collection:
5.Select the OAuth 2.0 credentials - For app authentication radio button and click Next.
6.Select the Private application with all owner privileges radio button and click Next.
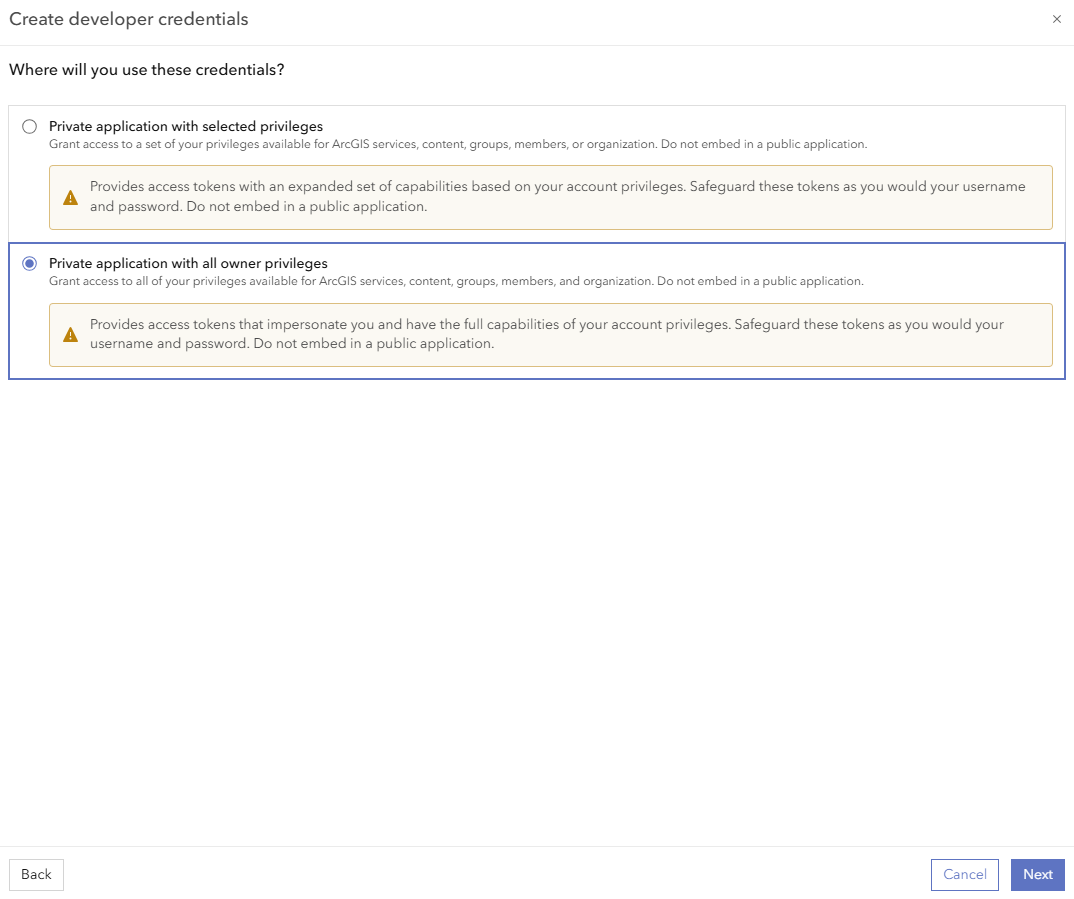
At this time, selecting selected privileges (other radio button) does not expose enough options to allow Analytics to successfully monitor the portal.
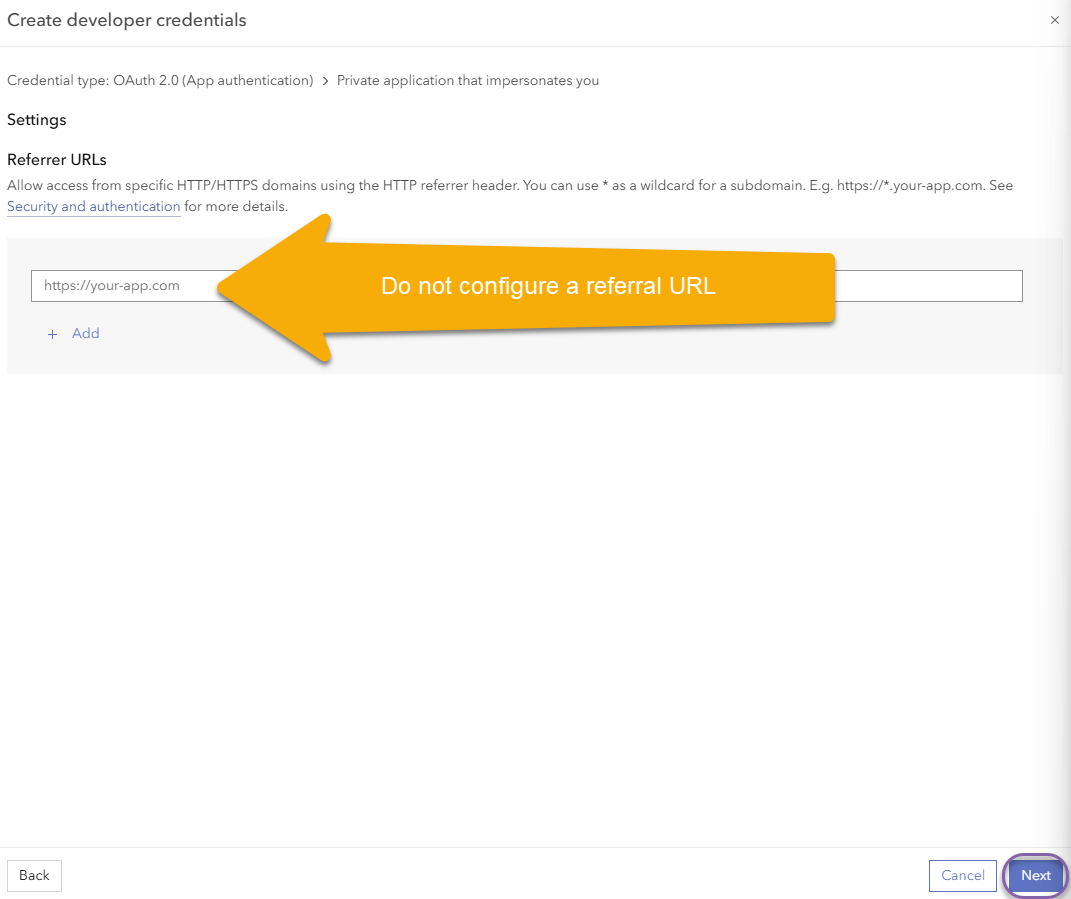
7.Do not configure any Referrer URLs on this screen. Data collection will be server-to-server communication and not through a browser, so the referrer header is not sent. Click Next.
8.Add a Title and click Next. The title should help identify the item and its purpose so it is easy to find at a later date.
9.On the final screen, review your item settings, click the acknowledgment checkbox, and click Create.
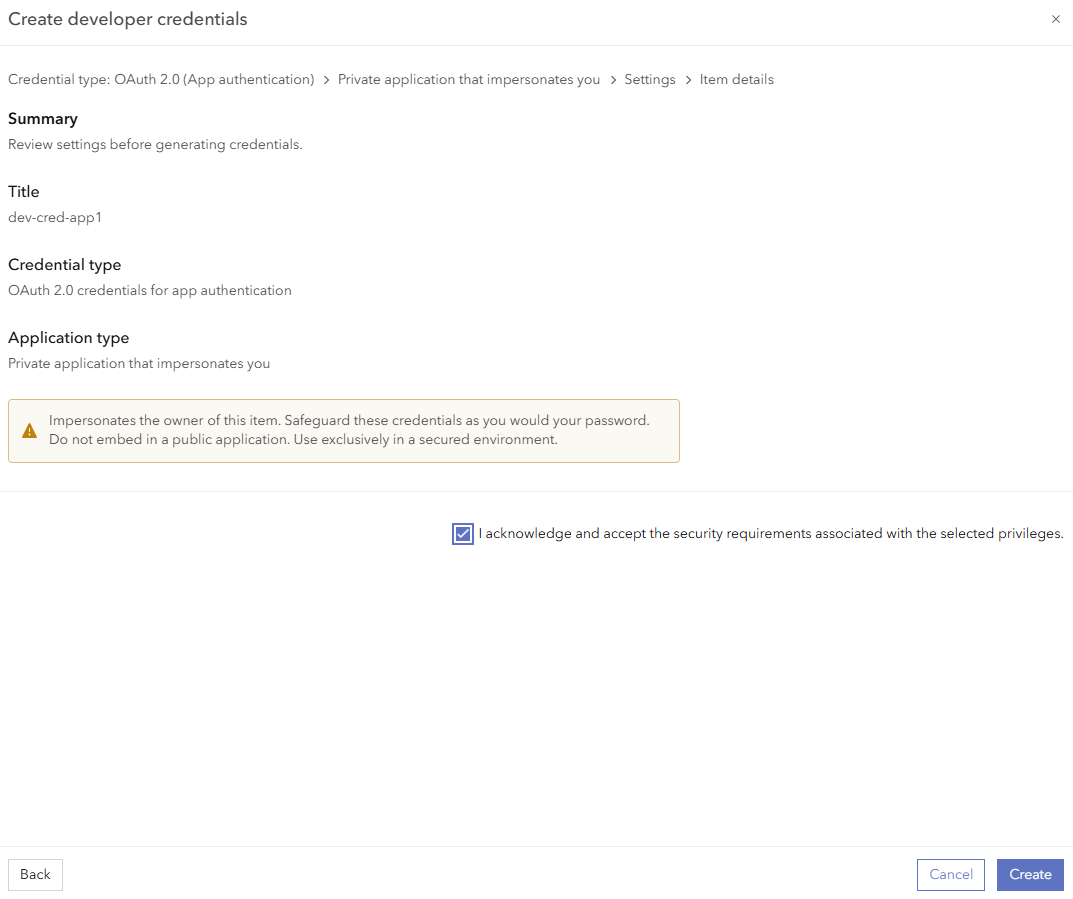
The item has been created and registered. The Overview tab for your application is shown. You can copy the Client ID and Client Secret from this page.
You can leave the the browser tab open so that you can copy and paste the Client ID, Client Secret, and the URL when you need them during the security provider setup or data collection for ArcGIS Online or Portal for ArcGIS.