After you install the Analytics Agent, you must set it up and configure it with a data path and connection information for the Hub server.
To set up the Analytics Agent:
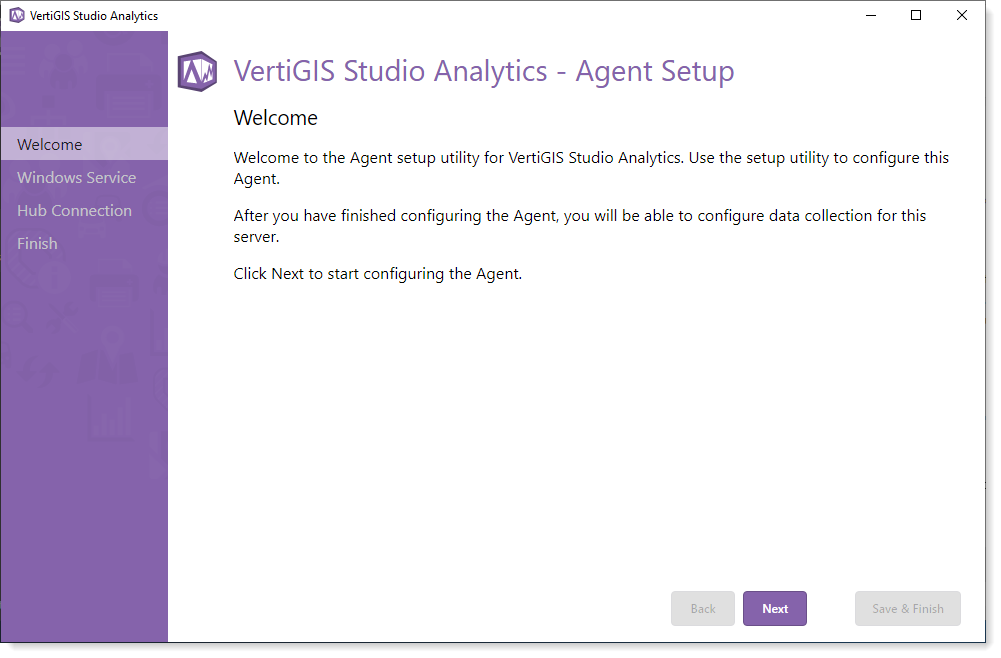
1.When the install wizard finishes, the Agent Setup utility starts automatically. Click Next.
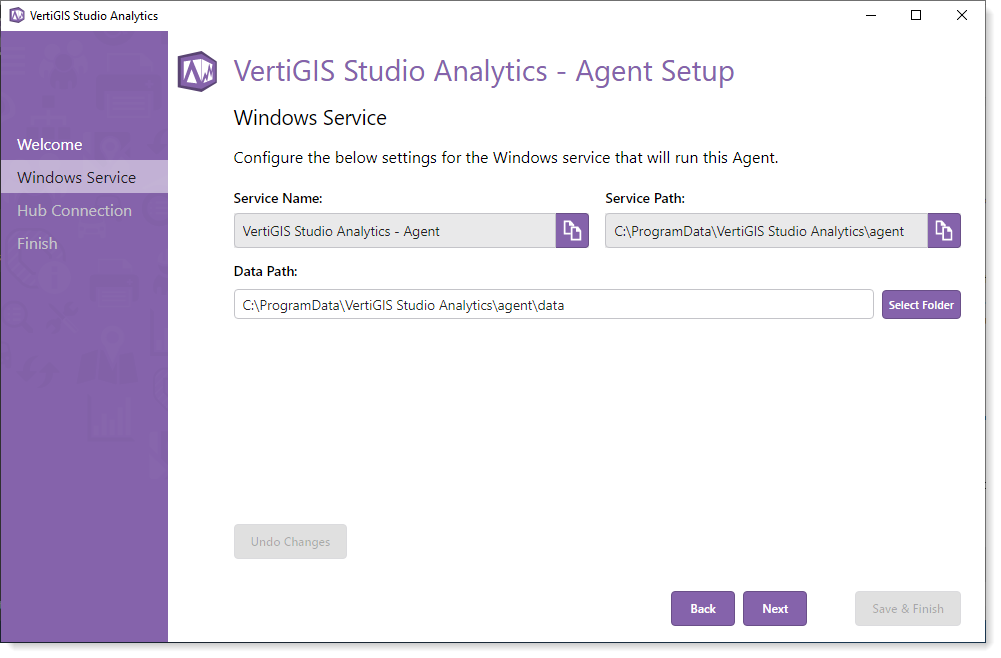
2.The Service Name, Service Path, and Data Path fields are auto-populated. Optionally, you can select another data path by clicking Select Folder and navigating to the desired folder path. Any desired path can be used and you can also create a new folder as well. When you are satisfied with the Data Path, click Next.
3.Click Yes To accept the connection from the Analytics Hub,
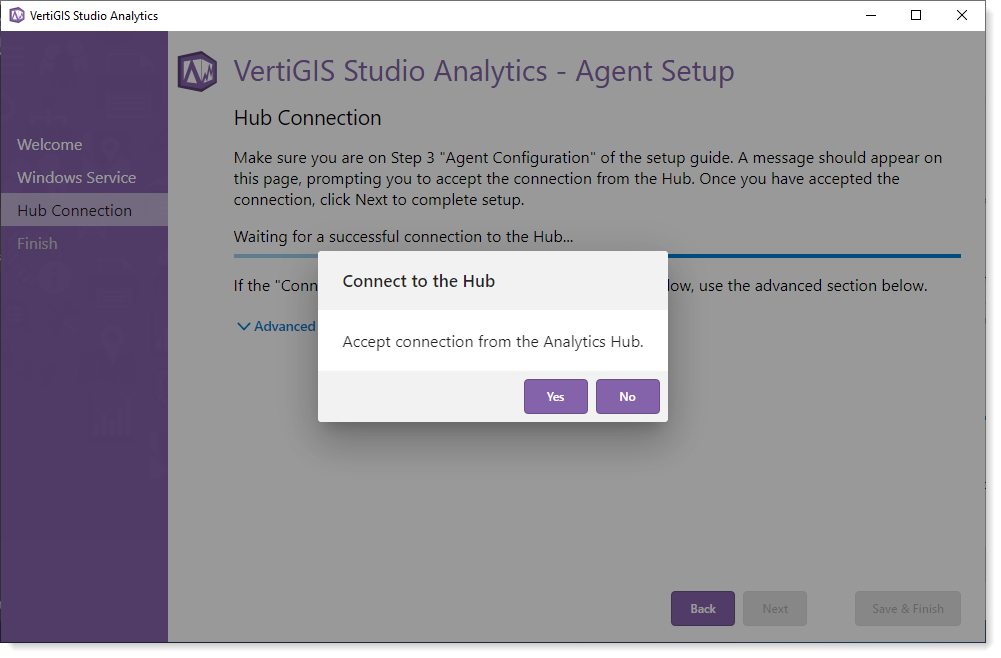
4.If successful, you are prompted with a success message. Click Next to finish setting up this Agent.
5.Click Save & Finish to finalize this Agent's configuration.
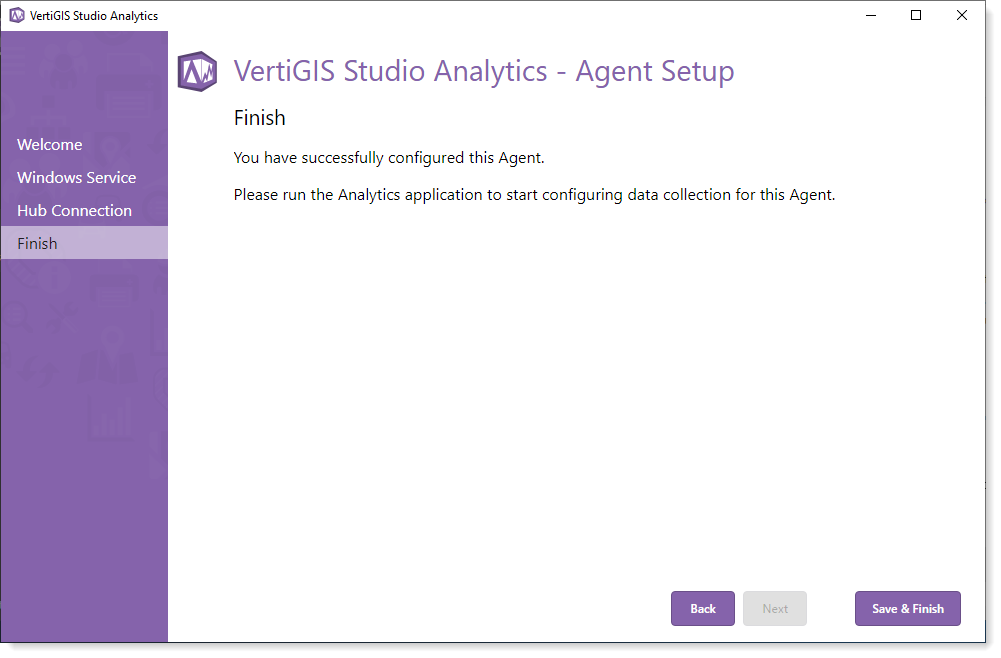
6.The Agent's installation is complete. Click Finish to complete the setup. Optionally, add resources below.
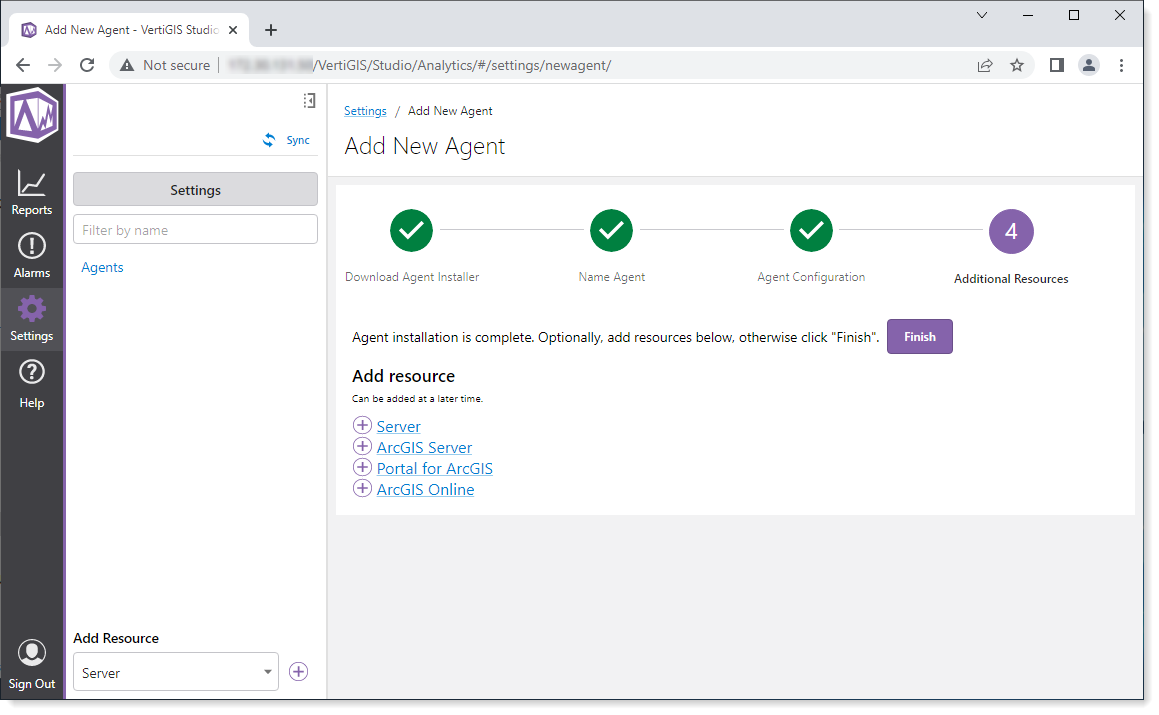
Resources to monitor (Servers, ArcGIS Servers, Portals for ArcGIS, and ArcGIS Online) can be added now or at any time in the future. See Add a Resource.
7.In the Agents screen, you can see the new Agent listed with its details: Agent Name, Machine Name, # of Configured Resources, Is Alive, and Last Reported.
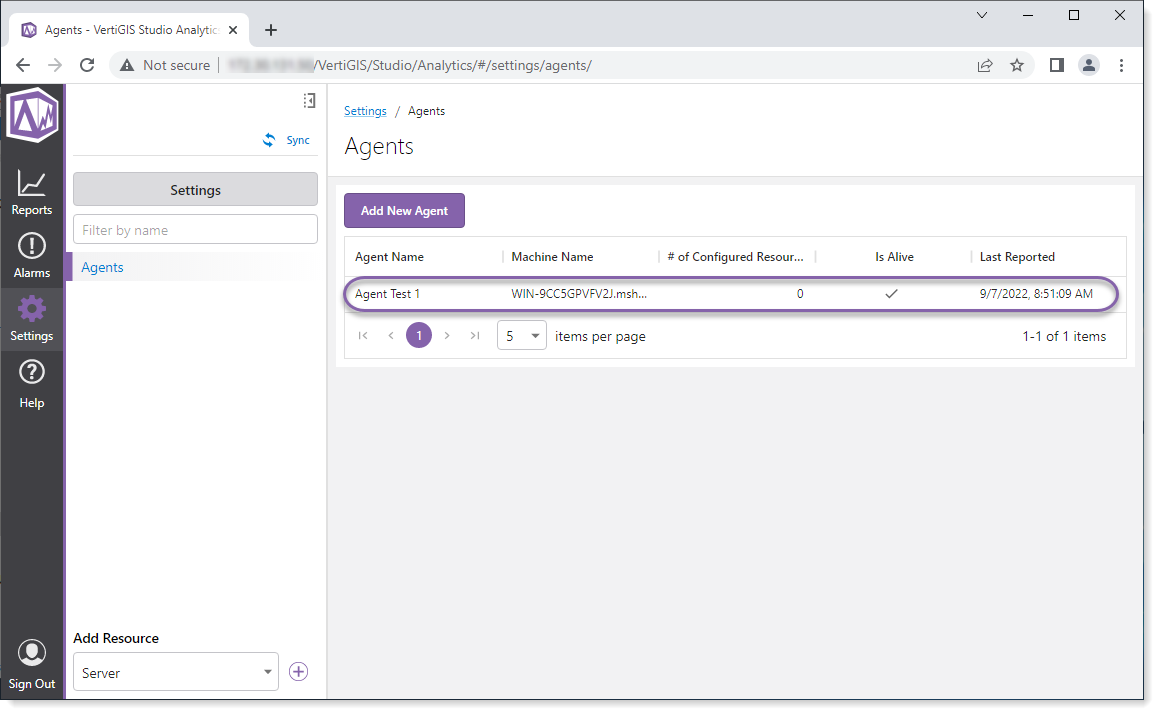
Note that the # of Configured Resources is zero. Resources have not been added yet, but can be added at any time. See Add a Resource.