A layout has two parts: project layout and portal layout. The project layout is stored in your local ArcGIS Pro's database and can be seen in Catalog view > Project. The project layout defines, at a minimum, the print size along with a Main Map Frame. It can contain other details as well, such as text and function fields, a logo, and a scale bar. At least one project layout must be defined before a portal layout can be created.
Create a Project Layout
1.In the Studio Printing tab, click New Layout.
2.Choose a page size from the popup window.
A new tab opens called Layout. Any successive layouts will be named Layout1, Layout2, etc.
3.In the Studio Layout Editor section, click Map Frame.
4.Click the Main Map icon in the popup window.
This changes the cursor to a cross. Use the cursor to draw a Main Map Frame.
5.Optionally, you can add other elements to the project layout via the Studio Layout Editor section and the Graphics and Text section.
6.Once you are done editing the project layout, click the Save Project icon.
Host (Share) a Portal Layout
1.Ensure that the Layout is active by double-clicking it in the Catalog.
2.Open the Studio Layout Manager.
3.Click Create to open the Properties window.
4.Enter a relevant name in the Name field.
5.Enter a short description in the Summary field.
6.Enter at least one tag in the Tag field.
7.Enter a topic in the Topic field.
8.Select a Portal folder.
9.Choose Share With options such as All, Organization, or a specific group.
10. Choose a Print Type associated with the portal layout.
11. Choose a Layout Template Type: Standard, Legend, Overview, or Cover.
12. Click Analyze. If the analysis returns with no errors, click Share. If the analysis returns an error, fix the error and repeat this step.
Run a Portal Layout
General procedure of the printing process:
1.Locate template in the Studio Layout Manager.
a.Click the Studio Layout Manager on the Ribbon.
b.Ensure the Layouts tab is active in the Layout Manager.
c.Locate the layout either visually, or using a sorting/filtering process.
2.Choose a print type by selecting the Print Type icon.
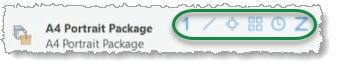
![]() = Standard
= Standard
![]() = Infinite
= Infinite
![]() = Line
= Line
![]() = Grid
= Grid
![]() = Time Series
= Time Series
![]() = Range Series
= Range Series
3.Define the print area using the map and the print type-specific popup dialog.
4.In the Studio Printing dockpane, fill in fields either manually or using field presets.
5.Preview and/or print the map.