Geocortex Essentials Upgrading
Upgrading installs the same components in the same location as the existing installation.
If your Geocortex system has two or more servers and you are upgrading from a version of Essentials that is older than 4.6, your current deployment environment may require infrastructure changes. The Knowledge Base article Start Here: Upgrading to Geocortex Analytics 1.1 or Geocortex Essentials 4.6 describes the supported deployment scenarios and provides instructions for upgrading your current deployment to a supported deployment.
Note that this Knowledge Base article also applies to upgrading to newer versions than Analytics 1.1 and Essentials 4.6. Specifically:
-
Scenarios that cover upgrading to Essentials 4.6 also apply to upgrading to Essentials 4.6.1, 4.6.2, 4.6.3, 4.7, and so on.
-
Scenarios that cover installing or upgrading to Analytics 1.1 also apply to installing or upgrading to Analytics 1.1.1, 1.2, 1.3, and so on.
If your Geocortex system has only one server, you can follow the instructions in this documentation to perform the upgrade.
If you are upgrading Essentials from version 4.3.x or 4.4.x directly to 4.7, the collaboration feature does not work as intended. To avoid this situation, you need to upgrade first to Essentials 4.5 and then to Essentials 4.7.
Geocortex Essentials is not engineered to automatically upgrade load-balanced deployments. Manual steps may be required to upgrade Essentials in a load-balanced, multi-server environment. If you need help upgrading a multi-server deployment, contact Geocortex Support. The time required to complete the upgrade depends on the complexity of your environment. Please ensure that you have adequate Support hours available.
Geocortex Core 3.1 and newer offer a number of benefits over older versions of Core. Upgrading to Essentials 4.6 or newer automatically upgrades to Core 3.1 or newer. However, if you want to continue to run an older version of Essentials, you can upgrade to Core 3.1 or newer without upgrading Essentials.
Upgrading Essentials and the HTML5 Viewer
You can upgrade Essentials and the HTML5 Viewer independently—you can upgrade only Essentials, or only the Viewer, or both Essentials and the Viewer. To use certain features, you may have to upgrade both Essentials and the viewers.
For best results, we recommend upgrading both Essentials and the HTML5 Viewer.
To find out the Essentials version that Geocortex Viewer for HTML5 4.14.0 works with best, see the Geocortex Essentials Requirements in the Geocortex Viewer for HTML5 documentation.
If you customized the viewer by modifying its CSS files, be sure to back up the files before upgrading to version 2.10 or newer. Customized viewer CSS files should be located in a Resources\Styles\Custom directory to ensure that they are not overwritten during an upgrade. For more detailed information, see Customizing the Viewer in the Shells module description in the Geocortex Viewer for HTML5 Help.
Upgrade Essentials
To upgrade Essentials, you run the installer for the version that you want to upgrade to. The installer will detect your existing installation and offer to perform an upgrade instead of a new installation.
After the installer finishes, you must run the Post Installer. This allows the Post Installer to update the web configuration.
Usually you do not have to restart the server after upgrading. In rare cases, you may have to restart the server for the upgrade to complete.
To upgrade Essentials:
-
Download the Essentials installer for the version of Essentials that you want to upgrade to.
For instructions, see Download Geocortex Essentials.
-
Read Essentials Versions that Require Additional Steps to find out if you need to perform any additional steps before you begin the upgrade. Perform any additional steps that must be done before you begin the upgrade.
Step 2: Run the Essentials Installer
If you are upgrading from Essentials versions 4.3.x, 4.4.x, or 4.5.x, the installer may encounter a permissions error which stops the upgrade from completing. To fix this, reset IIS. For more information and instructions on resetting IIS, see Insufficient Privileges Error when Upgrading Essentials 4.3.x, 4.4.x, or 4.5.x.
-
Run the Essentials installer.
The installer is
Geocortex Essentials [version].msi, where[version]is the version of Essentials that you want to upgrade to.The Geocortex Essentials Setup Wizard launches. The Welcome panel indicates that the installer will upgrade the existing installation of Essentials.
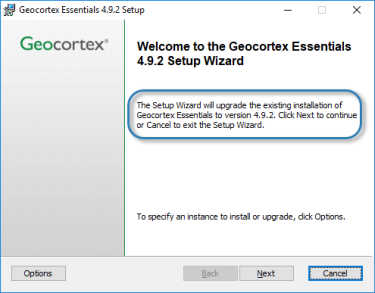
Welcome panel with message about upgrading
-
If you want to upgrade a named instance of Essentials:
-
Click Options.
-
Select Upgrade an existing instance of Geocortex Essentials.
-
Select the instance that you want to upgrade from the drop-down list.
-
Click Next.
The installer restarts with its window title containing the name of the instance to upgrade in brackets.
-
-
Click Next.
-
Read the license agreement.
-
If you agree to the terms, select the I accept the terms in the License Agreement checkbox and click Next.
-
Click Install.
-
When the installer completes, make sure the Launch Post Installation Configuration checkbox is selected, and then click Finish.
You must run the Post Installer and click Finish at least once after upgrading Essentials.
Step 3: Configure the Post Installer
The Post Installer performs a number of different functions, including updating IIS and upgrading Geocortex Core. If you are upgrading from a version of Essentials that is older than 4.6, the Post Installer will launch the Geocortex Core installer to get some information about your server.
If you are upgrading from a version of Essentials that is older than 4.6 and your Geocortex system has two or more servers, you should be following the upgrade instructions in the Knowledge Base article Start Here: Upgrading to Geocortex Analytics 1.1 or Geocortex Essentials 4.6. The following instructions apply only to single-server deployments.
-
If you are upgrading from a version of Essentials that is older than 4.6:
The Core installer launches.
-
Click Next on the Core installer's Welcome panel.
The Configure Cluster Information panel opens.
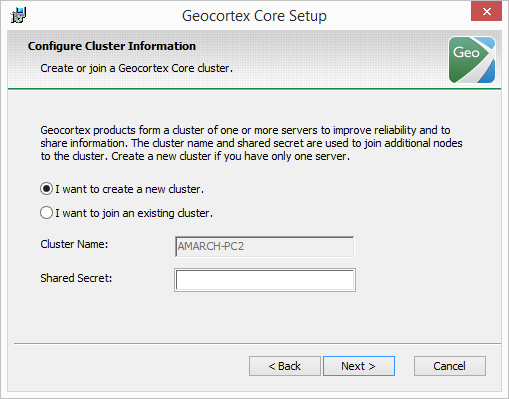
Configure Cluster Information panel in the Geocortex Core installer
-
Make sure I want to create a new cluster is selected.
Even though you only have one server, the server must be in a cluster. The Cluster Name box shows the name of the cluster. You cannot change the cluster name during the Core upgrade.
-
Enter a secret into the Shared Secret box.
The secret can contain letters and numbers.
Keep a record of the cluster name and shared secret. If you ever add another server to your system, you will need to know the cluster name and shared secret to join the new server to the cluster. The secret acts as a password.
-
Click Next.
-
Click Install.
-
When the Core installer completes, click Finish.
The Post Installer opens.
-
-
In the Post Installer, click Finish.
-
Follow the instructions to close the Post Installer.
Step 4: Perform Additional Steps
-
Continue at Essentials Versions that Require Additional Steps.
Usually, your custom files such as sites, viewers, and projects, are upwardly compatible—after you upgrade the software, the old files still work. Occasionally, improvements to the software break upward compatibility. In this case, you may have to perform some additional steps to complete the upgrade.
Essentials Versions that Require Additional Steps
Depending on the version that you are upgrading from, you may have to perform one or more additional steps when you upgrade Essentials. For example, you may have to update a feature's configuration to make the feature work in the new version of Essentials, or you may have to manually update the IIS configuration so Essentials can take advantage of improvements to IIS. For some versions, you do not have to perform any additional steps.
The list below lists the versions of Essentials that may require additional steps when you upgrade to Essentials 4.14.0. Scan the list to determine which steps apply to you, if any. To find out more about a step, click the link. Note that you may have to perform more than one of the steps in the list.
Upgrading from the following versions may require additional steps:
-
Upgrade from a Version that is Older than 4.6: Rebuild your Instant Search index.
See Upgrade Essentials from a Version that is Older than 4.6.
-
Upgrade from a Version that is Older than 4.5: Add Tables of existing map services.
See Upgrade Essentials from a Version that is Older than 4.6.
-
Upgrade from a Version that is Older than 4.3: Update workflows to work with nullable results from Date Picker form items.
See Upgrade Essentials from a Version that is Older than 4.3.
-
Upgrade from a Version that is Older than 4.2: Configure sign-in and hosts, upgrade viewers, and update application pools.
See Upgrade Essentials from a Version that is Older than 4.2.
-
Upgrade from a Version that is Older than 3.15: Upgrade custom
Web.configfiles.See Upgrade Essentials from a Version that is Older than 3.15.
-
Upgrade from a Version that is Older than 3.6: Update application pools.
See Upgrade Essentials from a Version that is Older than 3.6.
-
Upgrade from Essentials 3.x: Upgrade Essentials Security.
See also...
Insufficient Privileges Error when Upgrading Essentials 4.3.x, 4.4.x, or 4.5.x
Upgrade Essentials from a Version that is Older than 4.6
If you use Instant Search and you upgraded from Essentials 4.5.x or older, your Instant Search index has been deleted. To continue to use Instant Search, you must rebuild the index. For instructions, see Build the Instant Search Index.
Upgrade Essentials from a Version that is Older than 4.5
In versions prior to Essentials 4.5, related table data automatically appeared in the HTML5 Viewer. As of Essentials 4.5, you can now explicitly choose which tables of a map service to include. By default, when a map service is added to a map, all of its tables are included. However, for existing map services, you must manually add the tables.
To add a table to an existing map service:
-
In
-
Edit the map service that contains the table.
-
Click the Add/Remove Tables tab.
-
To include one or more tables, select the tables in the Excluded Tables column, and then click the » button.
To exclude one or more tables, select the tables in the Included Tables column, and then click the « button.
To select multiple tables, hold the Ctrl key down while selecting tables.
-
Click Submit Layer Changes.
For more information, see ArcGIS Tables.
Upgrade Essentials from a Version that is Older than 4.3
Starting in Essentials 4.3, Date Picker form items in workflows return a System.Nullable<System.DateTime> result, instead of a System.DateTime. If you have older workflows that use System.DateTime output arguments for Date Pickers, the workflows will continue to work as before, as long as you do not modify the form in Essentials Workflow Designer. Modifying the form changes the output argument's type to System.Nullable<System.DateTime>. You may have to update your workflow to work with the new output type.
To prevent future problems, you may want to update all your forms and workflows to use System.Nullable<System.DateTime> Date Picker results. This saves you from having to remember to do it later, when you change a form.
Upgrade Essentials from a Version that is Older than 4.2
If you are upgrading from a version of Essentials that is older than 4.2, there are several additional steps that you must take:
-
Configure the Sign-In Method: Starting in Essentials 4.2, you must configure the method that administrators will use to sign in to Manager. Depending on the method you choose, administrators will sign in using an ArcGIS Online account, a Portal for ArcGIS account, or a Windows account.
The sign-in method has implications for the types of content that you can use in your sites and the methods that you can use to secure your sites. For information, see Choose a Method to Sign In to Manager.
Before Essentials version 4.2, you could add ArcGIS Online security providers in Manager. Starting in Essentials 4.2, you can no longer add ArcGIS Online security providers. If you have an existing (pre-4.2) ArcGIS Online security provider, the security provider and its permissions will continue to work when you upgrade to Essentials 4.2 or newer, as long as you configure the ArcGIS Online sign-in method.
If you have a pre-4.2 ArcGIS Online security provider and you configure one of the other sign-in methods (Portal for ArcGIS or Windows) when you upgrade to Essentials 4.2 or newer, you will lose your ArcGIS Online security provider and all of its associated permissions.
If you do not have a pre-4.2 ArcGIS Online security provider and you want to use ArcGIS Online to secure your sites, configure the ArcGIS Online method of signing in to Manager—the Post Installer will create an ArcGIS-type security provider that works the same as pre-4.2 ArcGIS Online security providers. Starting in version 4.2, the only way to create a security provider that uses ArcGIS Online to authenticate end users is by configuring the ArcGIS Online sign-in method.
-
Configure Hosts: Starting in Essentials 4.2, you must register the hosts through which communications with Essentials are routed. Follow the instructions in Hosts.
-
Upgrade Viewers: Upgrade the Geocortex Viewer for HTML5 to a version that works with the Essentials version you are upgrading to. To find out the viewer version that the Essentials version works with, refer to the Geocortex Essentials Release Notes. Follow the instructions in Viewer Upgrading.
-
Update Application Pools: Starting in Essentials 4.2, the Essentials and Essentials Manager application pools use the built-in IIS identity,
ApplicationPoolIdentity.Older versions of Essentials create local users for the application pools. Upgrading Essentials does not update the identities. As a result, you may be denied access when you try to sign in to Manager. To prevent this, open IIS Manager and configure the
EssentialsAppPool4andEssentialsAdministrationAppPool4application pools to run as theApplicationPoolIdentityuser. Afterward, re-run the Post Installer and click Finish, so the Post Installer can detect the change.
Upgrade Essentials from a Version that is Older than 3.15
Depending on the upgrade history of your Essentials installation, upgrading may overwrite the Essentials REST and Manager Web.config files. If you are upgrading from a version that is older than 3.15, you will have to make backups of the old Web.config files and then manually copy your changes to the new Web.config files after upgrading. If you are upgrading from Essentials 3.15 or newer, the installer is capable of automatically carrying forward modifications from the old Web.config files to the new Web.config files.
To manually upgrade your Web.config files:
Step 1: Back Up the Web.config Files
You must do this before you upgrade Essentials.
-
If you are upgrading from a version of Essentials that is older than 3.15, and you have modified one or both of the
Web.configfiles, make backups of the modified files.The
Web.configfiles are:-
Essentials REST API Web.config: If you installed Essentials in the default location, Essentials's
Web.configfile is here:C:\Program Files (x86)\VertiGIS\Geocortex Essentials\[instance]\REST Elements\REST\Web.config
-
Manager Web.config: If you installed Essentials in the default location, Manager's
Web.configfile is here:C:\Program Files (x86)\VertiGIS\Geocortex Essentials\[instance]\REST Elements\Manager\Web.config
-
Step 2: Carry Forward your Web.config Customization
Do this after you upgrade Essentials.
-
Run a text editor as an administrator.
-
Open the backup copy of the
Web.configfile and the upgraded version of theWeb.configfile in the text editor. -
Copy your modifications from the backup file to the corresponding position in the upgraded file.
-
Save the upgraded file.
-
Repeat these steps for the other
Web.configfile, if it also has modifications that you want to carry forward.
Upgrade Essentials from a Version that is Older than 3.6
Before version 3.6, all Essentials web applications ran in 32-bit application pools in Classic mode. Upgrading Essentials does not update the application pools. If you upgrade from a version of Essentials that is older than 3.6, we recommend that you use 64‑bit Integrated application pools unless you have a specific reason to use some other mode.
Upgrade Essentials from Version 3.x
If you have one or more 3.x sites that are secured, you must take additional steps to carry forward your security configuration. For instructions, see the Geocortex Knowledge Base article "Upgrade Security in Essentials from 3.x to 4.x".
Insufficient Privileges Error when Upgrading Essentials 4.3.x, 4.4.x, or 4.5.x
If you are upgrading from Essentials versions 4.3.x, 4.4.x, or 4.5.x, the installer may encounter a permissions error which stops the upgrade from completing. The installer displays a dialog that contains this text:
The installer has insufficient privileges to access this directory: [path to your
REST\binfolder]. The installation cannot continue.
If you click Cancel, your Essentials instance is not upgraded and is rolled back to its previous state. You may still be unable to access the REST\bin folder—when you browse to the folder in the file system, it cannot be accessed, and the permissions cannot be changed.
If you experience this issue, you can regain access to the REST\bin folder by resetting Internet Information Services (IIS). After resetting IIS, retry upgrading.
Reset IIS
To reset IIS:
-
Open the Windows Command Prompt as an administrator.
-
Press WINDOWS + S and search for "CMD".
-
Right-click Command Prompt.
-
Choose Run as Administrator from the context menu.
-
-
Enter
iisresetat the prompt.IIS attempts to stop and restart itself.
Upgrade to Core 3.1 or Newer Without Upgrading Essentials
We recommend that you upgrade your Geocortex Core version to 3.1 or newer to take advantage of its new features. Upgrading to Essentials 4.6 or newer automatically upgrades Core to 3.1 or newer. If you want to keep an older version of Essentials, you can upgrade Core without upgrading the Essentials instance that uses it.
The process of updating Geocortex Core differs depending on the version of Geocortex Essentials that you are using currently. It is easier to upgrade Core if you are using Essentials 4.6 than it is to upgrade Core if the version of Essentials is 4.4 or 4.5. The reason for this is that the 4.4 and 4.5 versions of Core require that you run the Geocortex Essentials Legacy Version Compatibility Tool in order to update key files needed to make Essentials compatible with the new Core.
Upgrade to Core 3.1 or Newer but Keep Essentials 4.6
If you use Analytics:
-
On the server with Essentials, install or update the Analytics Hub or Agent.
The installation or update automatically updates the existing Core installation and nothing further is required.
If you do not use Analytics:
-
Install Geocortex Essentials 4.7 alongside the old version of Essentials on the server.
Geocortex Core is automatically updated to version 3.1 during this installation.
Do NOT upgrade Essentials. Install the new version beside the old.
-
Uninstall Essentials 4.7.
Upgrade to Core 3.1 or Newer but Keep Essentials 4.4 or 4.5
If you use Analytics:
-
On the server with Essentials, install or update the Analytics Hub or Agent.
The installation or update automatically updates the existing Core installation.
-
Run the Geocortex Essentials Legacy Version Compatibility Tool for each instance of Essentials that is older than 4.6 on the server.
If you do not use Analytics:
-
Install Geocortex Essentials 4.7 alongside the old version of Essentials on the server.
Geocortex Core is automatically updated to version 3.1 during the installation.
Do NOT upgrade Essentials. Install the new version beside the old.
-
Run the Geocortex Essentials Legacy Version Compatibility Tool for each instance of Essentials that is older than 4.6 on the server.
-
Uninstall Essentials 4.7.
See also...