Tutorial - Create Your First Mobile App
The objective of this tutorial is to introduce you to the basic actions required to use the VertiGIS Studio Mobile Designer and VertiGIS Studio Go to build your first app.
The tutorial walks you through the following:
- Create and save a new app.
- Link to your Esri Web Map.
- View your new app in VertiGIS Studio Go.
- Edit Components of your app in Mobile Designer and view the results.
- Integrate a workflow into your app.
Before you begin...
For this tutorial, you need:
-
Access to the VertiGIS Studio Mobile Designer.
-
The VertiGIS Studio Go app installed on the device you plan to use to review your changes. For installation instructions, see
-
ArcGIS login credentials for either an ArcGIS Online or ArcGIS Enterprise account.
Your First Mobile App
Create and Save a New App
-
Sign in to VertiGIS Studio Mobile Designer, also known as Mobile Designer or Designer.
-
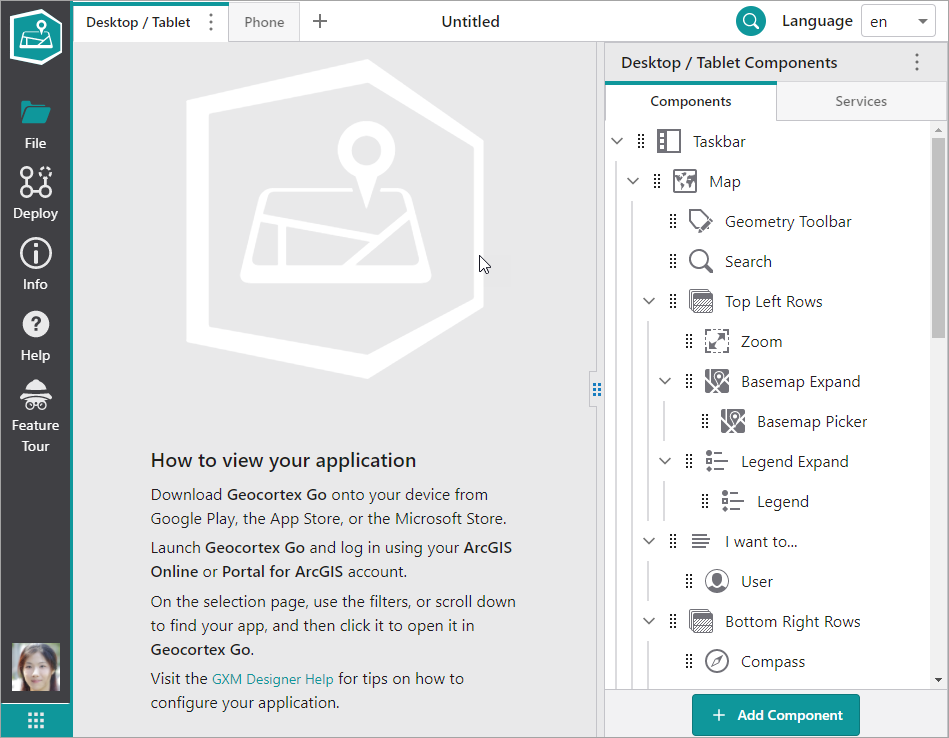
In Mobile Designer, click File | New, and then click Mobile Default.
The default template opens.
The template contains all the basic components you need for a Mobile app.
Let's save it under the name we want to call the new app.
-
In the taskbar, click File, and then click Save As in the panel that opens.
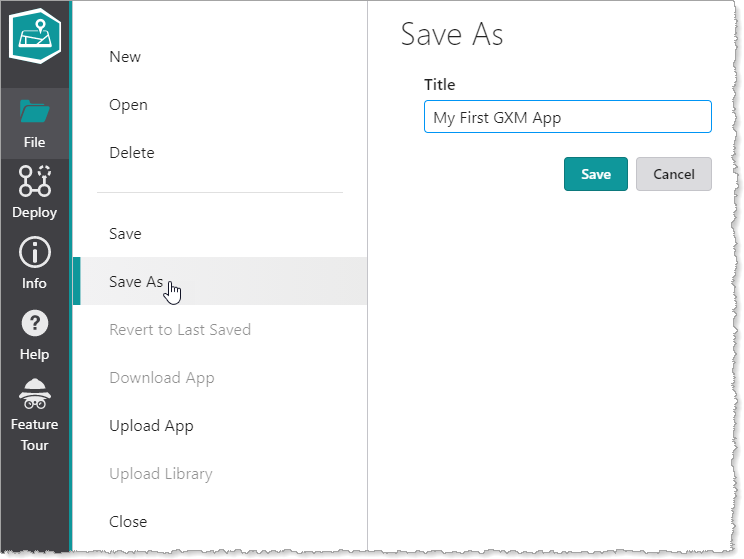
-
In the Title box, type in the name you want to give your app, and then click Save.
Your new app opens in the Mobile Designer with the name of the new app now in the title bar.

Link to Your Esri Web Map
The basis for all Mobile apps is an Esri web map. So the first thing we need to do is tell Mobile Designer which web map we want to use and link to it.
- In the Components panel, click Map.
-
When the Map panel opens, click Select.
The Select Items window opens.
You can type in the name of the web map and click Search, or change the filter from My Content, to Shared With Me or Public and then browse to find the map you want.
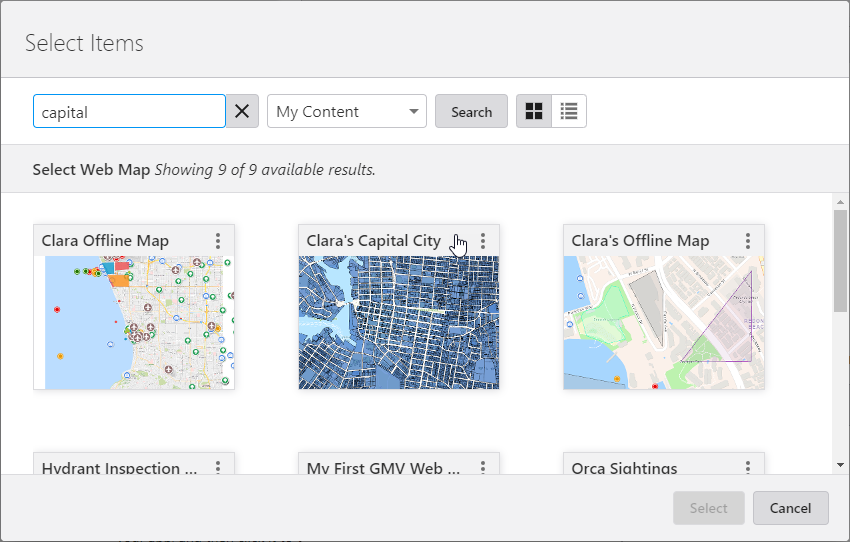
-
When you find your web map, click it, and then click Select.
-
Click File | Save.
View Your New App in VertiGIS Studio Go
Before we go any further, let's take a look at the new app in Studio Go.
-
On the device where you installed Studio Go, open the app and sign in using the same ArcGIS account that you used for Mobile Designer.
The screen displays a list of all the apps that you have permission to view.
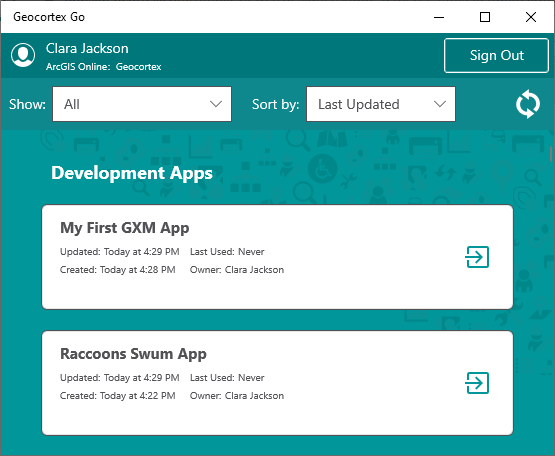
-
In the list, scroll down and find your new app.
You can also use the Show and Sort by filters to narrow your search. -
Click the white card that has the name of your app.
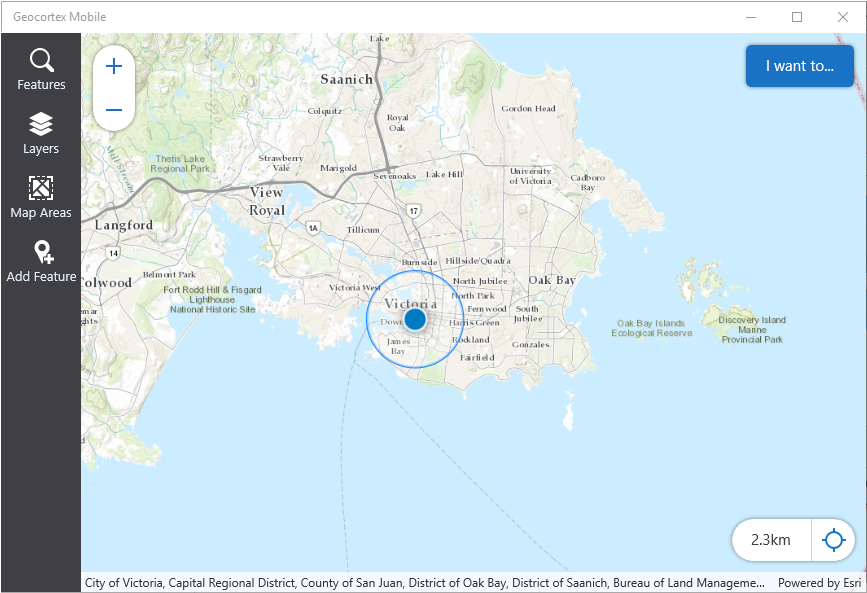
Your new app opens in Studio Go and shows the map with your location showing as a blue dot.
If your location is outside the visible part of the map, you may not be able to see the blue dot.
If your location is not on the current map, you will see an error message.You can explore the interface.
For more information about the elements of the UI, see VertiGIS Studio Go UI.
 Leave VertiGIS Studio Go running as you continue with the next part of the tutorial.
Edit the Configuration of a Component in Mobile Designer
Let's make a simple change in Mobile Designer and then take a look at how it immediately takes effect in VertiGIS Studio Go.
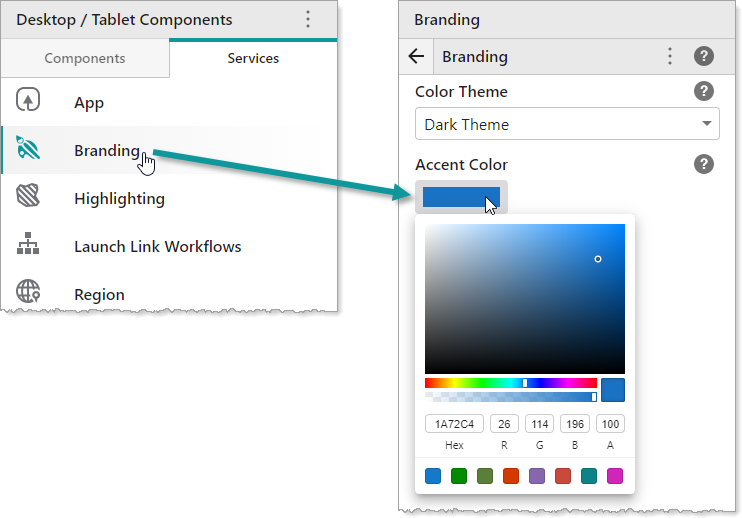
- In Mobile Designer, in the Services panel, click Branding.
-
In the Accent Color drop-down, select a different color from the default blue.
-
Click File | Save.
-
Return to the Studio Go app and open the I want to menu.
-
Click Refresh App to load the change we just made.
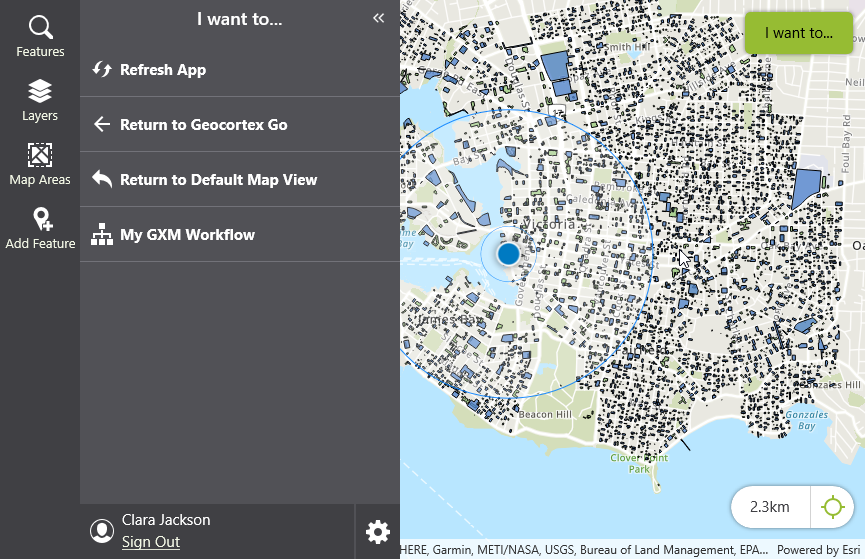
The changes appear immediately.
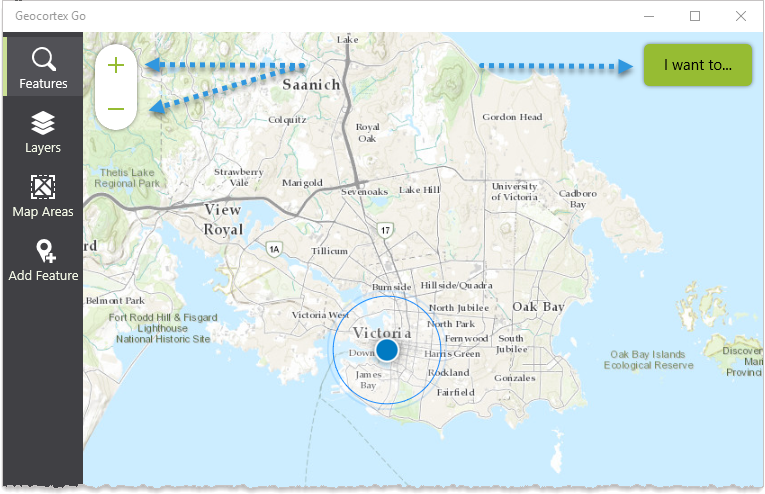
You can now make any changes to your new app that you want to by following these basic steps; make a change in the Mobile Designer and then preview the change in Studio Go.
Integrate a Workflow
The VertiGIS Studio Mobile license includes an entitlement to use VertiGIS Studio Workflow. The ability to add a workflow to an app is a useful feature, so we are going to create a simple workflow and add it to the new app.
To add a workflow to a Mobile app:
-
To open Workflow Designer, do one of the following:
-
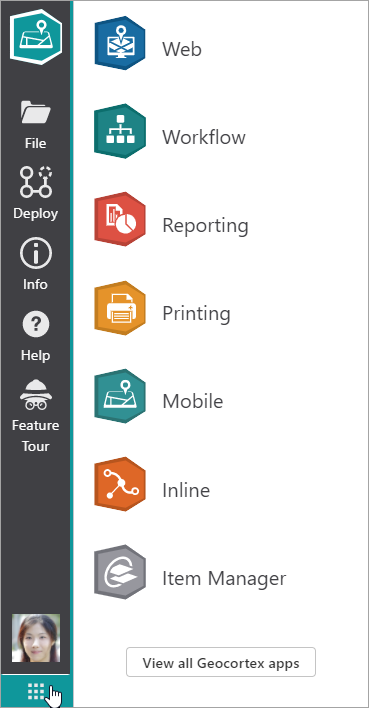
If you are using the SaaS version of Mobile Designer - at the bottom of the toolbar, click the product icon
 to open the panel, and then click Workflow.
 Log in using the same credentials you used for both Mobile Designer and your Esri web map.
- If you have Mobile Designer installed on premises - in a browser, navigate to Workflow Designer and log in using the same credentials you used for both Mobile Designer and your Esri web map.
By default, Workflow expects you to create a new workflow, which is what we plan to do. -
-
In the Toolbox on the left, scroll down until you find Display Form activity.
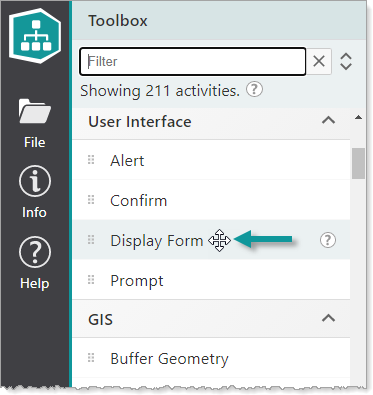 You can use the filter at the top of the Toolbox to find it; type in "display" to list only that activity.
 -
Drag the Display Form activity out of the toolbox and onto the work area beneath the Start box.
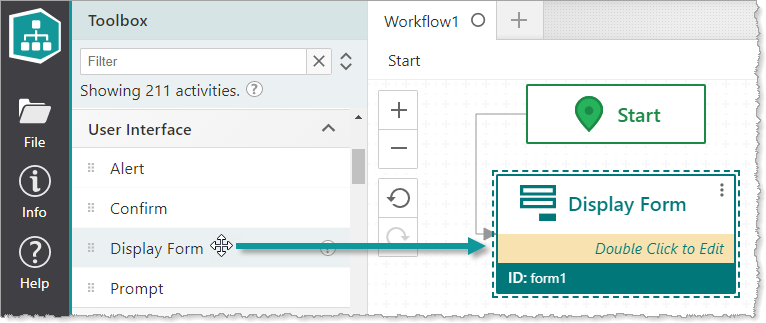
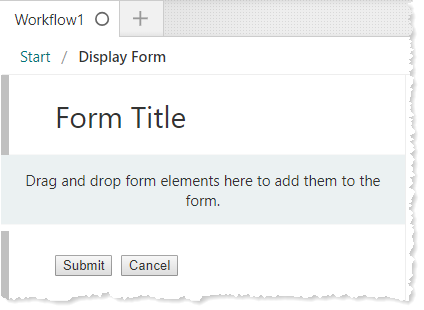
When you drop the activity, a Display Form dialog appears for you to configure this new activity.
-
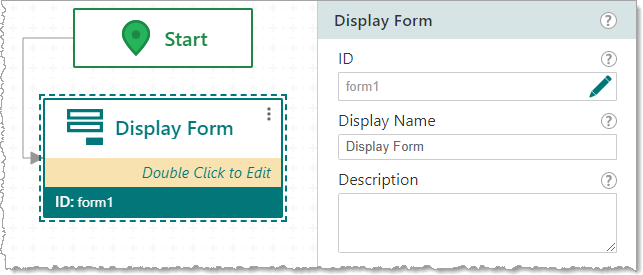
For now, ignore the Display Form dialog and double-click the green Display Form box so that we can edit the Form Title.
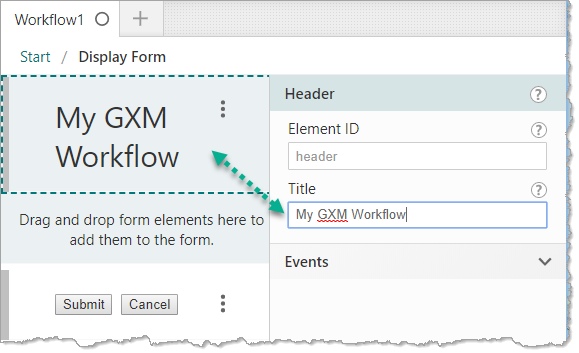
-
Click the Form Title text and in the Title box in the Header section, type My Mobile Workflow.
As you type, the words are added to the Display Form title.
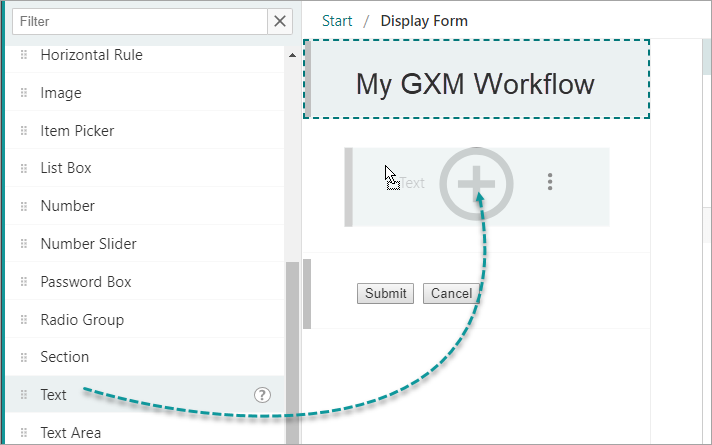
-
From the Toolbox on the left, drag the Text control onto your Display Form.
This text will display when you run the workflow inside your new app.
- In the Text panel to the right, type in a Description like "This is my first Mobile Workflow”.
-
Click File | Save As in the side panel, and then in the Title box, type a name that's easy to remember; My Mobile Workflow.
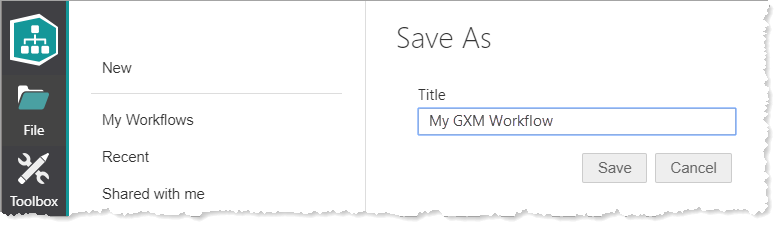
- Click Save.
To add the workflow to your app in Mobile Designer:
-
In Mobile Designer, in the Components panel, click I Want To Menu > +Add Menu Item.
A window appears that lets you select a command or workflow.
-
Click the Workflows tab.
-
Select a workflow.
By default, the title of the workflow is also the title of the menu item.
If you can't find the workflow, try using the Search box or, in the Filter by menu, select one of the other options.
-
Click Select.
The menu item for the workflow with is added to the I Want To menu.
-
Click the menu item named after the workflow.
The Menu Item panel appears.
-
In the Menu Item panel, in the Title box, type in a title for your workflow, for example, My Mobile Workflow.
This title appears in your app in the I Want To menu as an option. -
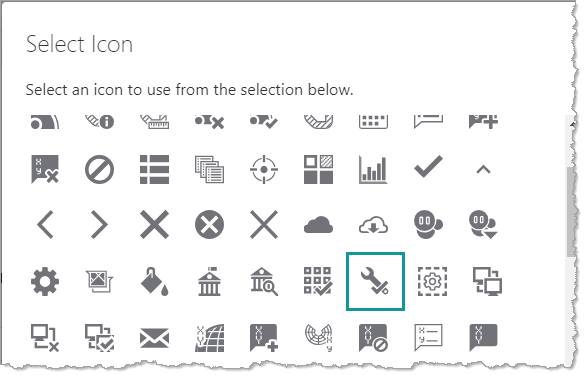
Click Select Icon and choose an icon to be displayed beside your menu option in the I want to menu.
-
In Mobile Designer, click File | Save to save the workflow option to your new app.
-
Return to VertiGIS Studio Go and in the I want to menu, click Refresh App.
The map refreshes.
The new workflow appears in the I want to panel as a new option.

-
When you click the new option in the I want to menu, you see the text you added to your workflow.
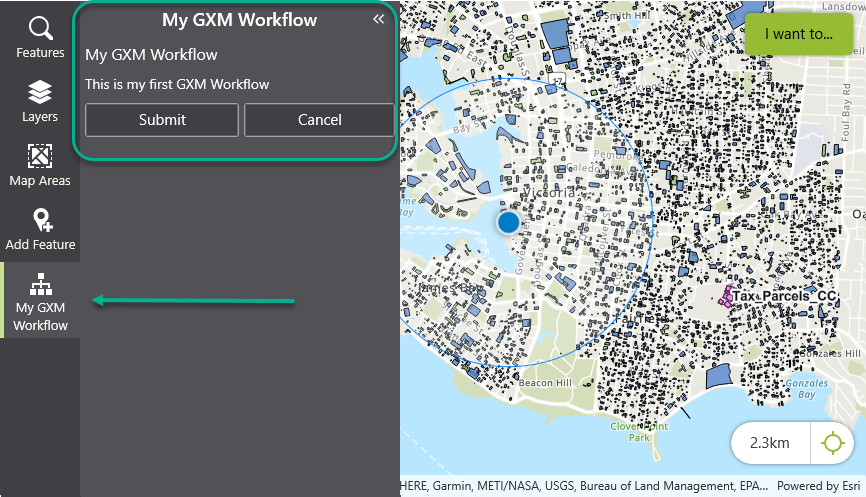 The new workflow has also been temporarily added to the taskbar.
You have successfully created a new Mobile app using Mobile Designer and VertiGIS Studio Go and even added a workflow to the app.