Work with Features
One of the strengths of Mobile apps is that they give you the ability to work with the features on a map - whether you are online or not. You can search for, and add features, attach photos or documents, or work with related records.
Search for Features
The Features search allows you to look for features on the map, for example, a particular airport, park, school, or building. Any search you make is limited to the area of the map that is currently visible, which means that zooming in or out to the right scale can make a big difference to the results you get when you click Search. If you don't get the results you expect, try zooming in or out to ensure that the type of feature you want is within the visible area and that those features are turned on in the Layers panel.
Find the Results you Want
The search is a full-term search only, which means that the search only finds the whole term that you type in.
For example, imagine you are looking for the Cowan Elementary school on the map:
- If you type "Cowan" in the Search box and that is the name of both a school and a park, you will see both those features in the results - if they are in the visible part of the map.
- If you type in "Cowan School" and the name is actually "Cowan Ave Elementary School", you will get no results. The search does not look independently for "Cowan" and "School" and give you results for both words.
Similarly, if you search for "hydrants", and they are named as a "hydrant" on the map, you will see no results unless you change your search to "hydrant" and then you will see all the hydrants in the visible area.
Only the first 50 results of any search are displayed by default, and the results are ordered by proximity to the center of your visible map area.
If you do not see the feature or features you expect, it may be any of the following issues:
-
A feature may be the 51st item in the results and you cannot see it. Try:
-
Changing to a slightly different term or spelling.
-
Panning or zooming in to a different area.
-
-
A feature may be outside the visible part of the map. Try zooming out so that more of the map is visible or pan the map, and then try the search again. To make this process faster, you can use the Search This Area button that appears at the top of the map when you pan it after a search. When you click the button, the app performs the same search in this new area of the map.
-
That feature may be on a layer that is currently turned off. Check to see that the layer is on.
-
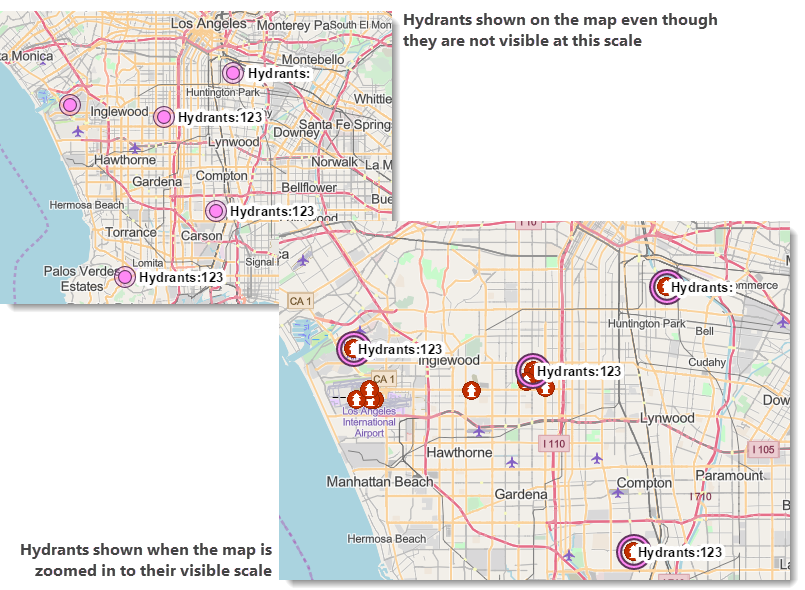
That features may not be visible at the scale the map is currently on. If the features you are looking for are present (the layer is on) but only visible at a different scale, the features appear as a dots with a label. When you see those dots, you can zoom in to the necessary scale. For example, if you were searching for Hydrants with a specific serial number and they were not visible at the current scale, you would see:
To search for a feature:
-
In the Mobile app, on the taskbar, click Features.

-
In the Search box, type in the name of the features you want to find, and then click the search icon or press Enter.
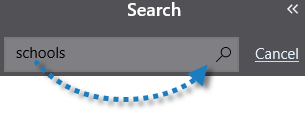
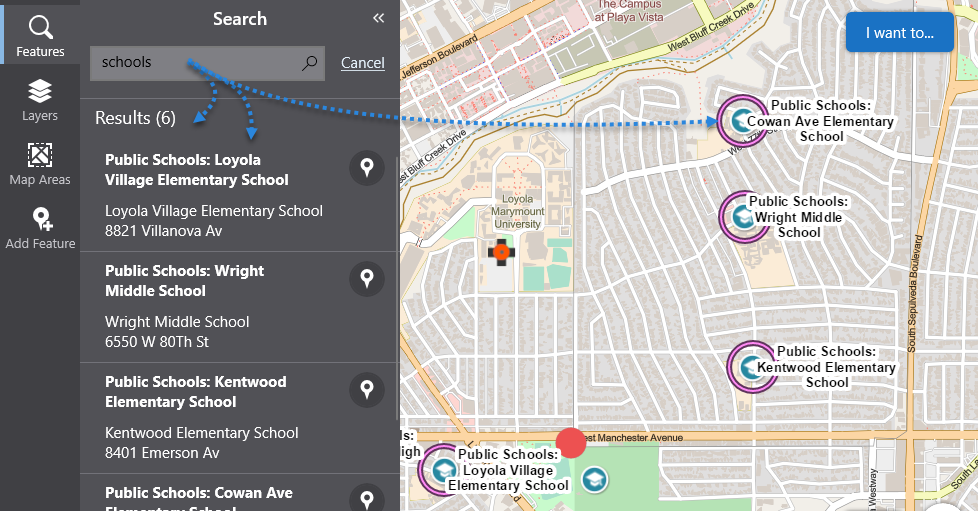
The features found in the visible area of the map are displayed in the Results list and each feature found on the map is highlighted and labelled with the feature name, if labels are configured for that layer.
Labels are not shown if they will collide with other features or their labels. This is done to avoid one label obstructing another feature or its label.In the screen shot below, for example, a real estate agent has searched for schools in an area for a couple thinking of buying a house within the area but they want to know what schools are available. The schools found are highlighted and have clear labels.
 If you want to find a single search result on the map, click the pin beside it
 . The map pans to that feature and centers it, so that you can easily see the feature.
 -
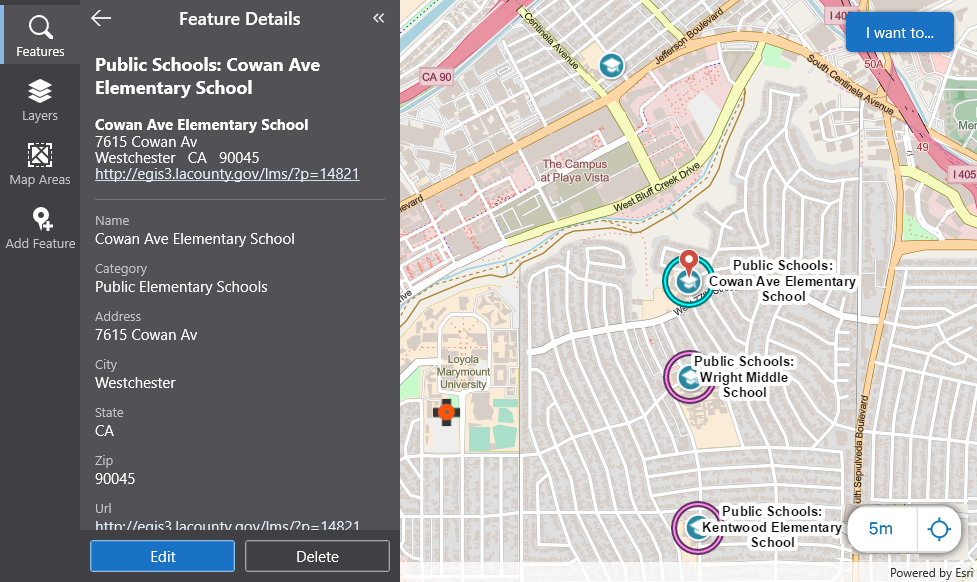
To see detailed information about a single feature in the Result list, tap a result in the list, or tap the result on the map.
The Results list changes to show details about that particular feature.
On the map, the selected feature usually has a different color highlight and a red location marker.
Click any result in the list and the map automatically pans to the feature and centers it,
View a Feature
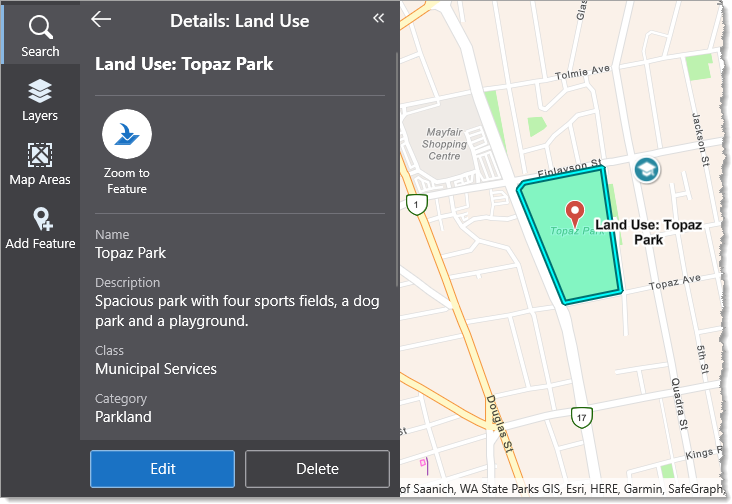
Each feature on a layer can be selected to view detailed information about it, usually including a title, feature actions icons that you can click to do something with the feature, as well as feature attributes. You can display a feature's attributes by clicking it on the map, or selecting a feature in the list of search results.
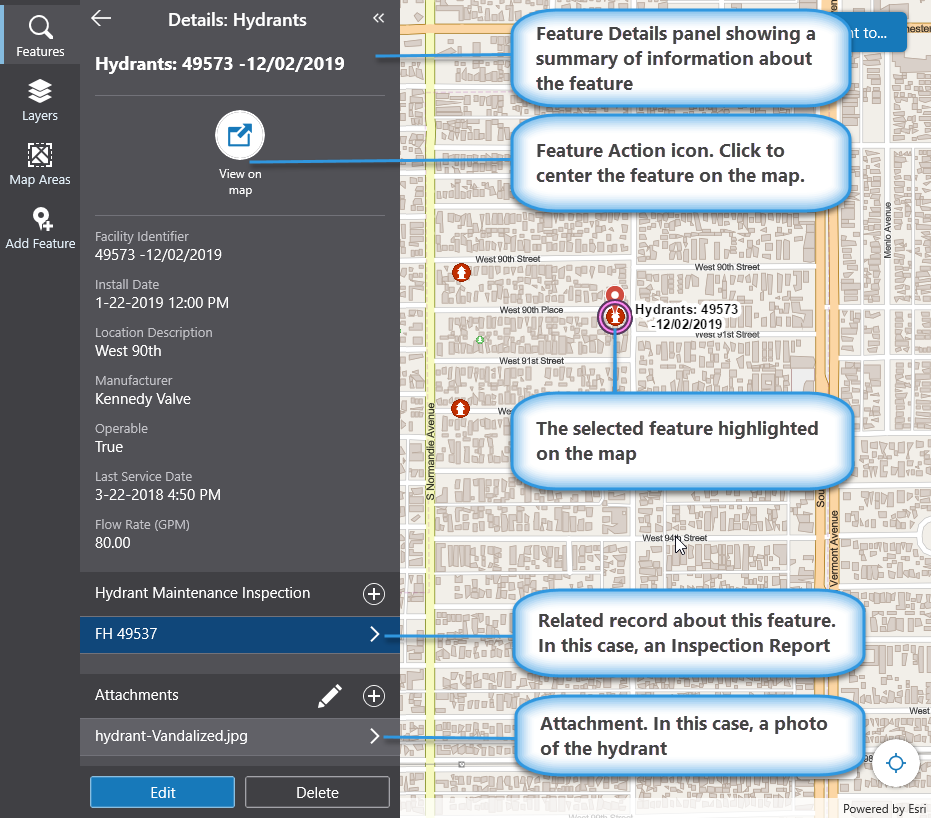
At the bottom of the feature Details panel, you may find attachments if they have been been added to this feature, for example, PDFs or photos. In addition, there may be related records that you can view. In the screen shot above, for example, there is an inspection report.
To view details about a single feature:
-
On the map, or in a list of search results, click a feature.
The feature Details panel opens with information about that feature.
If you happened to click on an area where two features are close or overlapping, the Results panel displays a list of all the selected features and you can then click on the feature you want and display its details.If a feature contains one or more attachments or related records, then you can click on each one to view them.
Add / Edit / Delete Features
If your app has been configured to allow it, and if you have permission, you can add, edit, and delete features in your app. In most cases, the information you can add about a particular feature is in a form that has been configured specifically to gather the required information about that feature. However, you can also add attachments to a feature, for example, photos, PDFs and multiple other formats.
To add a feature on the map:
-
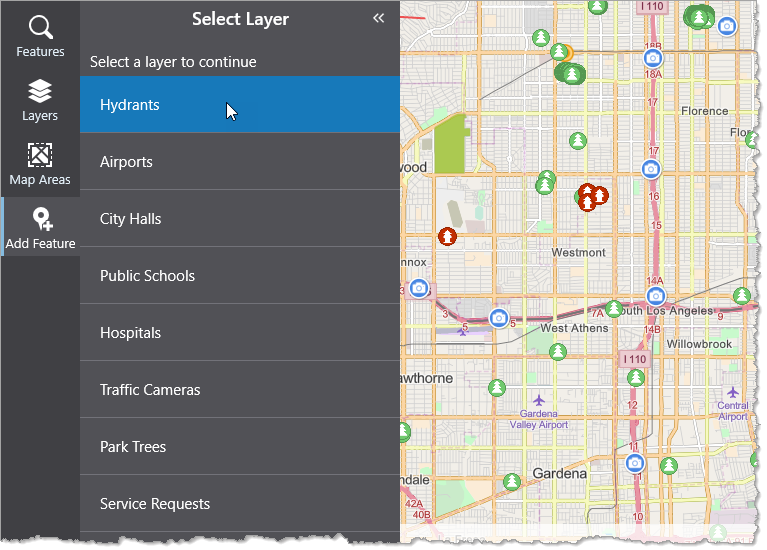
In the Task bar, click Add Features.
A list of layers in the map displays.
-
From the list of layers, select the layer you want.
A list of fields displays. Each field represents information that you can add about this feature.
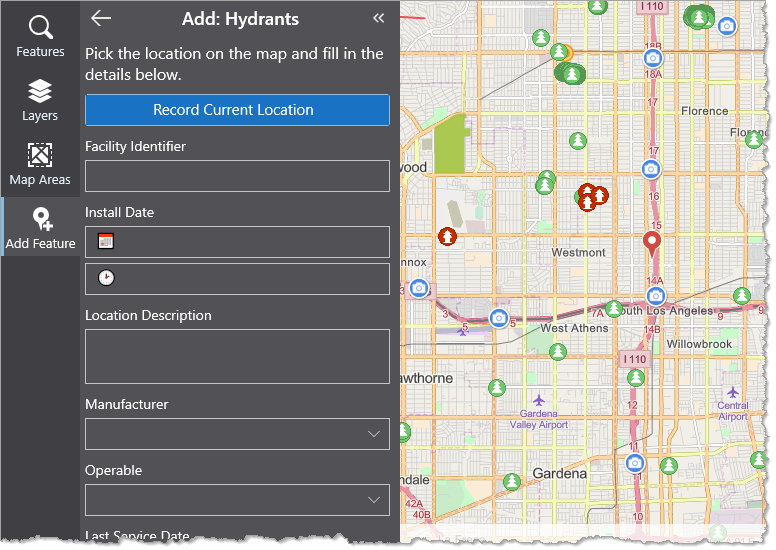
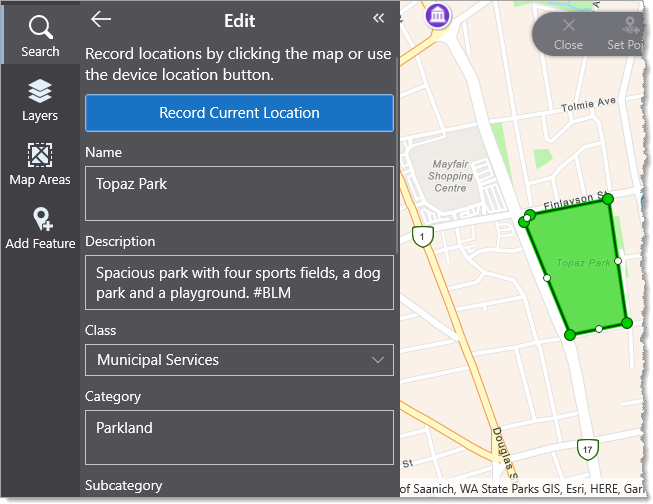
- In each field, type or select information about the feature you want to add.
- Set the location for your new feature. How you enter the location depends on the type of geometry your feature uses:
When using Crosshair mode, the next vertex is placed at the crosshair
 instead of where you click. The crosshair is always at the center of the map, so you must pan the map to choose a location. To enable Crosshair mode, click
  in the toolbar and then click Use Crosshair.
To undo a mistake while editing the geometry of a feature, click
in the toolbar and then click Undo. If you change your mind, click Redo. To start afresh, click Start New.By default, snapping to other visible features is enabled. To toggle snapping mode, click
in the toolbar and then click Snap to Features. Alternatively, press the F key.Points: Click the map to select the location of your new feature.
Alternatively, to set the feature's location as your current location, click Record Current Location at the top of the panel, or click
in the toolbar and then click Set Point at My Location. Mobile places the feature at the location your device reports.
Lines: Click repeatedly on the map to create a connect-the-dots line.
Alternatively, to create a vertex at key locations as you move around an area, click Record Current Location at the top of the panel, or click
in the toolbar and then click Set Point at My Location. Mobile places the vertex at the location your device reports.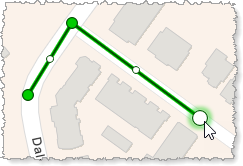
To display the length of each line segment as well as the whole line, click
in the toolbar and then select Show Measurements.To display the bearing angle of each line segment, click
in the toolbar and then select Show Bearing.Polygons: Click repeatedly on the map to create a connect-the-dots area around your feature.
Alternatively, to create a vertex at key locations as you move around an area, click Record Current Location at the top of the panel, or click
in the toolbar and then click Set Point at My Location. Mobile places the vertex at the location your device reports.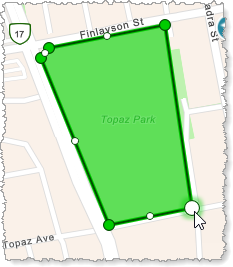
To display the length of each line segment as well as the perimeter and area of the polygon, click
in the toolbar and then select Show Measurements.To display the bearing angle of each line segment, click
in the toolbar and then select Show Bearing.
-
Click Save to commit your changes.
To edit a feature:
-
Do one of the following:
-
Click a feature listed in search results.
-
Click a single feature on the map.
The Features panel opens and displays details about the feature.
-
-
Click Edit at the bottom of the pane
The Edit button is only available if you have permissions to edit features.The Edit pane opens with a list of fields that you can edit.
-
Click in a field and change the existing information.
-
You can also edit the location of the feature. How you edit the location depends on the type of geometry your feature uses:
When using Crosshair mode, the next vertex is placed at the crosshair
instead of where you click. The crosshair is always at the center of the map, so you must pan the map to choose a location. To enable Crosshair mode, click in the toolbar and then click Use Crosshair.To undo a mistake while editing the geometry of a feature, click
in the toolbar and then click Undo. If you change your mind, click Redo. To start afresh, click Start New.By default, snapping to other visible features is enabled. To toggle snapping mode, click
in the toolbar and then click Snap to Features. Alternatively, press the F key.-
Points:
-
To move the feature to a new location, drag the feature.
-
To move the feature to your current location, click Record Current Location at the top of the panel, or click
in the toolbar and then click Set Point at My Location. Mobile places the feature at the location your device reports.
-
-
Lines:
-
To move the feature to a new location, click anywhere along the line that isn't a vertex to select the line, and then drag the line to the new location.
-
To move a vertex of the line, ensure
 is enabled in the toolbar, and drag the vertex
  to the new location.
 -
To add a vertex to the line, ensure Move mode is disabled
 in the toolbar, select the vertex to which you want to add the next vertex, and select a position for the new vertex.
Alternatively, drag a sub-vertex
 to a new position.
 -
To move a vertex to your current location, click the vertex you want to move and then either: click Record Current Location at the top of the panel, or click
in the toolbar and then click Set Point at My Location. Mobile places the vertex at the location your device reports. -
To delete a vertex, click the vertex you want to delete and then either: click
in the toolbar and then select Delete.
To display the length of each line segment as well as the whole line, click
in the toolbar and then select Show Measurements.To display the bearing angle of each line segment, click
in the toolbar and then select Show Bearing. -
-
Polygons:
-
To move the feature to a new location, click anywhere along the side of the polygon that isn't a vertex to select the polygon, and then drag the polygon to the new location.
You cannot select the polygon by clicking the area within it, you must click one of its sides before dragging the polygon to a new location. Due to a technical limitation, you cannot select the last side that completes the polygon.
-
To move a vertex of the polygon, ensure
is enabled in the toolbar, and drag the vertex to the new location. -
To add a vertex to the polygon, ensure Move mode is disabled
in the toolbar, select the vertex to which you want to add the next vertex, and select a position for the new vertex.Alternatively, drag a sub-vertex
to a new position. -
To move a vertex to your current location, click the vertex you want to move and then either: click Record Current Location at the top of the panel, or click
in the toolbar and then click Set Point at My Location. Mobile places the vertex at the location your device reports. -
To delete a vertex, click the vertex you want to delete and then either: click
in the toolbar and then select Delete.
To display the length of each line segment as well as the perimeter and area of the polygon, click
in the toolbar and then select Show Measurements.To display the bearing angle of each line segment, click
in the toolbar and then select Show Bearing. -
-
-
Click Save.
To delete a feature:
- Click the Delete button, which is visible if you have permission to delete a feature.
View / Add / Delete an Attachment
If a feature layer supports attachments, then the Details panel for any single feature has a section that lists any existing attachments. Mobile supports 2 types of attachments; photo attachments and non-photo attachments like PDFs. You can view an attachment of a feature as well as add or delete an attachment.
You can also delete an attachment that you no longer want.
GPS Metadata in Photo Attachments
Digital cameras automatically create and store data about each photo and store it with the photo as EXIF (Exchangeable image file format). Used by camera manufacturers to record information like exposure, shutter speed, focal length, EXIF also includes GPS information like Latitude and Longitude. When you take a photo within Mobile apps, this location data is managed in the following way:
- If you access the device camera directly and attach the resulting photo to a feature, then as long as the Mobile app has access to a location - either from the embedded device or an external GNSS receiver - that location is written into the EXIF metadata of the photo.
- If you access the camera directly, resize the output and attach the photo, then as long as the Mobile app has access to a location - either from the embedded device or an external GNSS receiver - that location is written into the EXIF metadata of the photo.
- If you select a photo from the device photo gallery and attach it to a feature, the Mobile app respects and preserves the EXIF data from the photo.
- If you select a photo from the device photo gallery, resize it and attach the resulting photo, the Mobile app respects and preserves the EXIF data from the photo.
To view an attachment:
-
In the Attachments section in the feature Details panel, click the attachment you want to open.
The attachment opens in it's own window.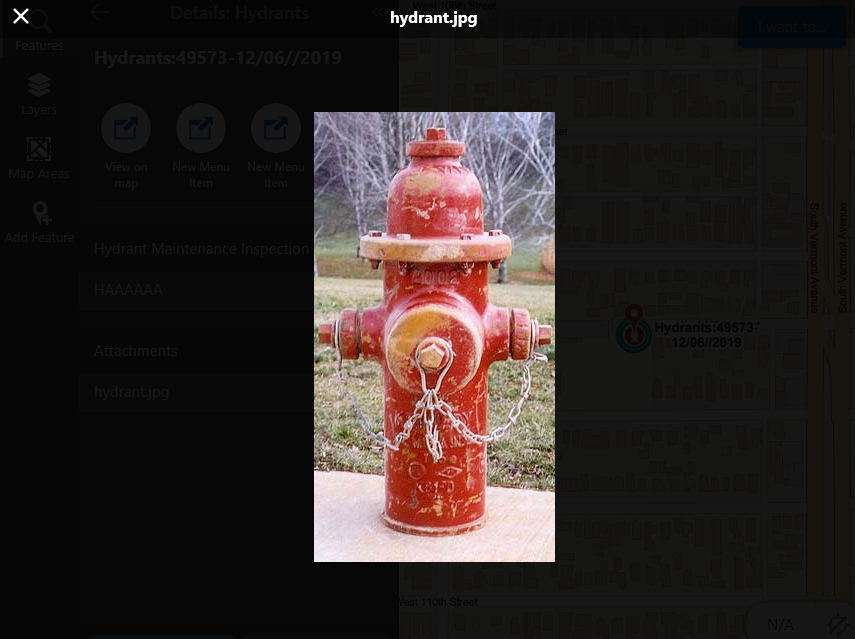
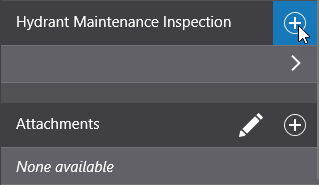
To add a new photo attachment:
-
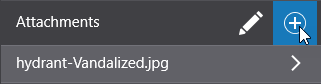
In the Attachments section in the feature Details panel, click +.
-
Do one of the following:
-
Select Attach File if you want to add a file on the device that is not a photo. Navigate to where the file is stored and click Open.
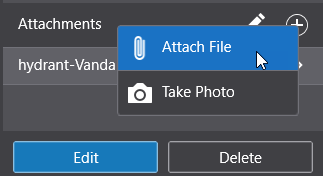
On iOS devices, you can also select a photo from the device’s Library.
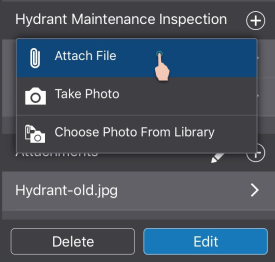
-
Select Take Photo if you want to use the device camera and attach a photo. When you take a photo, the file name of the photo automatically appears in the attachments list.
The first time you take a photo on a device, you will need to grant the app permission to access the device camera.
If you are using a device that does not have a built-in camera, you will need to plug a camera into the device.You can pre-configure a Mobile app to automatically resize photos when you add them as attachments. Under Settings, you can choose to leave the photo its original size or resize it to a Large, Medium, or Small .jpg file. For more information, see Change Your Options.
-
To delete an attachment:
-
In the Attachments section of the Details panel, click the edit icon.

The file name of the attachment moves to the left and the red Remove icon appears.
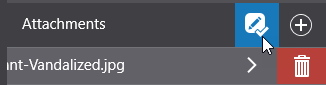
- Click the Remove icon to delete the attachment.
Add / Edit a Related Record
Some feature layers may be configured to use related records, for example, a series of Hydrant Inspection Reports that might have be added for a specific feature over several years. If related records are configured, there will be a section in the Details panel that lists previous records with a title to indicate the type of record they are.
If you have permission, you can add related records to a feature and delete them.
To add a new Related record:
-
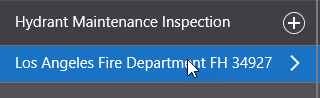
In the Details panel of the feature you want to add a record to, scroll down to the related records section, and then click +.
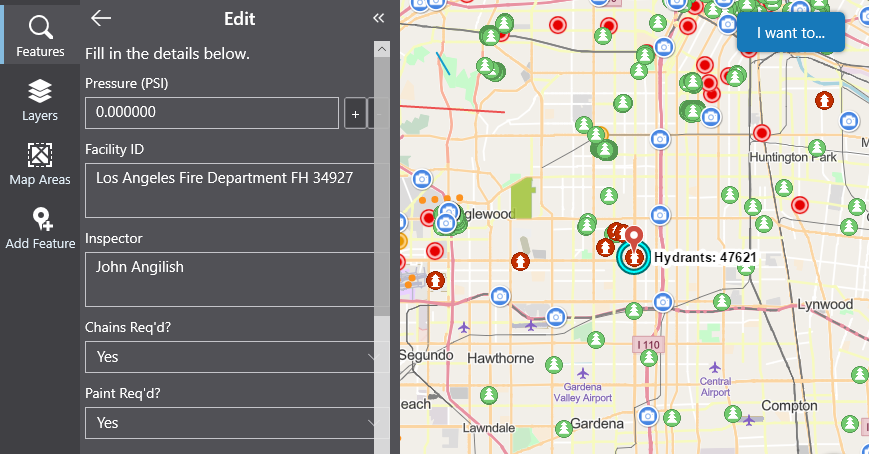
A form opens with a set of pre-configured fields for you to fill in.

- Fill in the information in the fields.
- Set a location for the record (if supported).
- Scroll to the bottom of the Details panel, and then click Save.
To edit a related record:
-
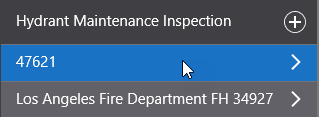
In the Details panel of the feature whose record you want to edit, scroll down to the related records section, and then click the related record to open it.
-
When the related record opens in the Details panel, click Edit at the bottom.

The Edit panel opens and displays the fields of this record that you can edit.
-
Edit any of the fields you want to change, and then scroll to the bottom of the panel and click Save.
If a geometry has been configured for the related record, you can also set the geometry.
To delete a related record:
-
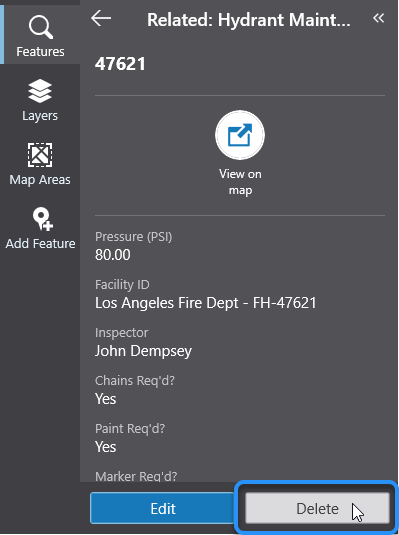
In the Details panel of the feature whose record you want to delete, scroll down to the related records section, and then click the related record to open it.
-
In the Related panel that opens, scroll to the bottom of the panel and click Delete.
-
When the Delete Feature dialog opens, click Delete to confirm the deletion.