After you have sideloaded one or more TPKs to your device, you can use them to define Custom map areas that you can activate and use offline. Your device must also have either VertiGIS Studio Go or a Custom Mobile app on it.
To create a Custom Map Area with a TPK:
1.On your device, open VertiGIS Studio Go or your Custom app.
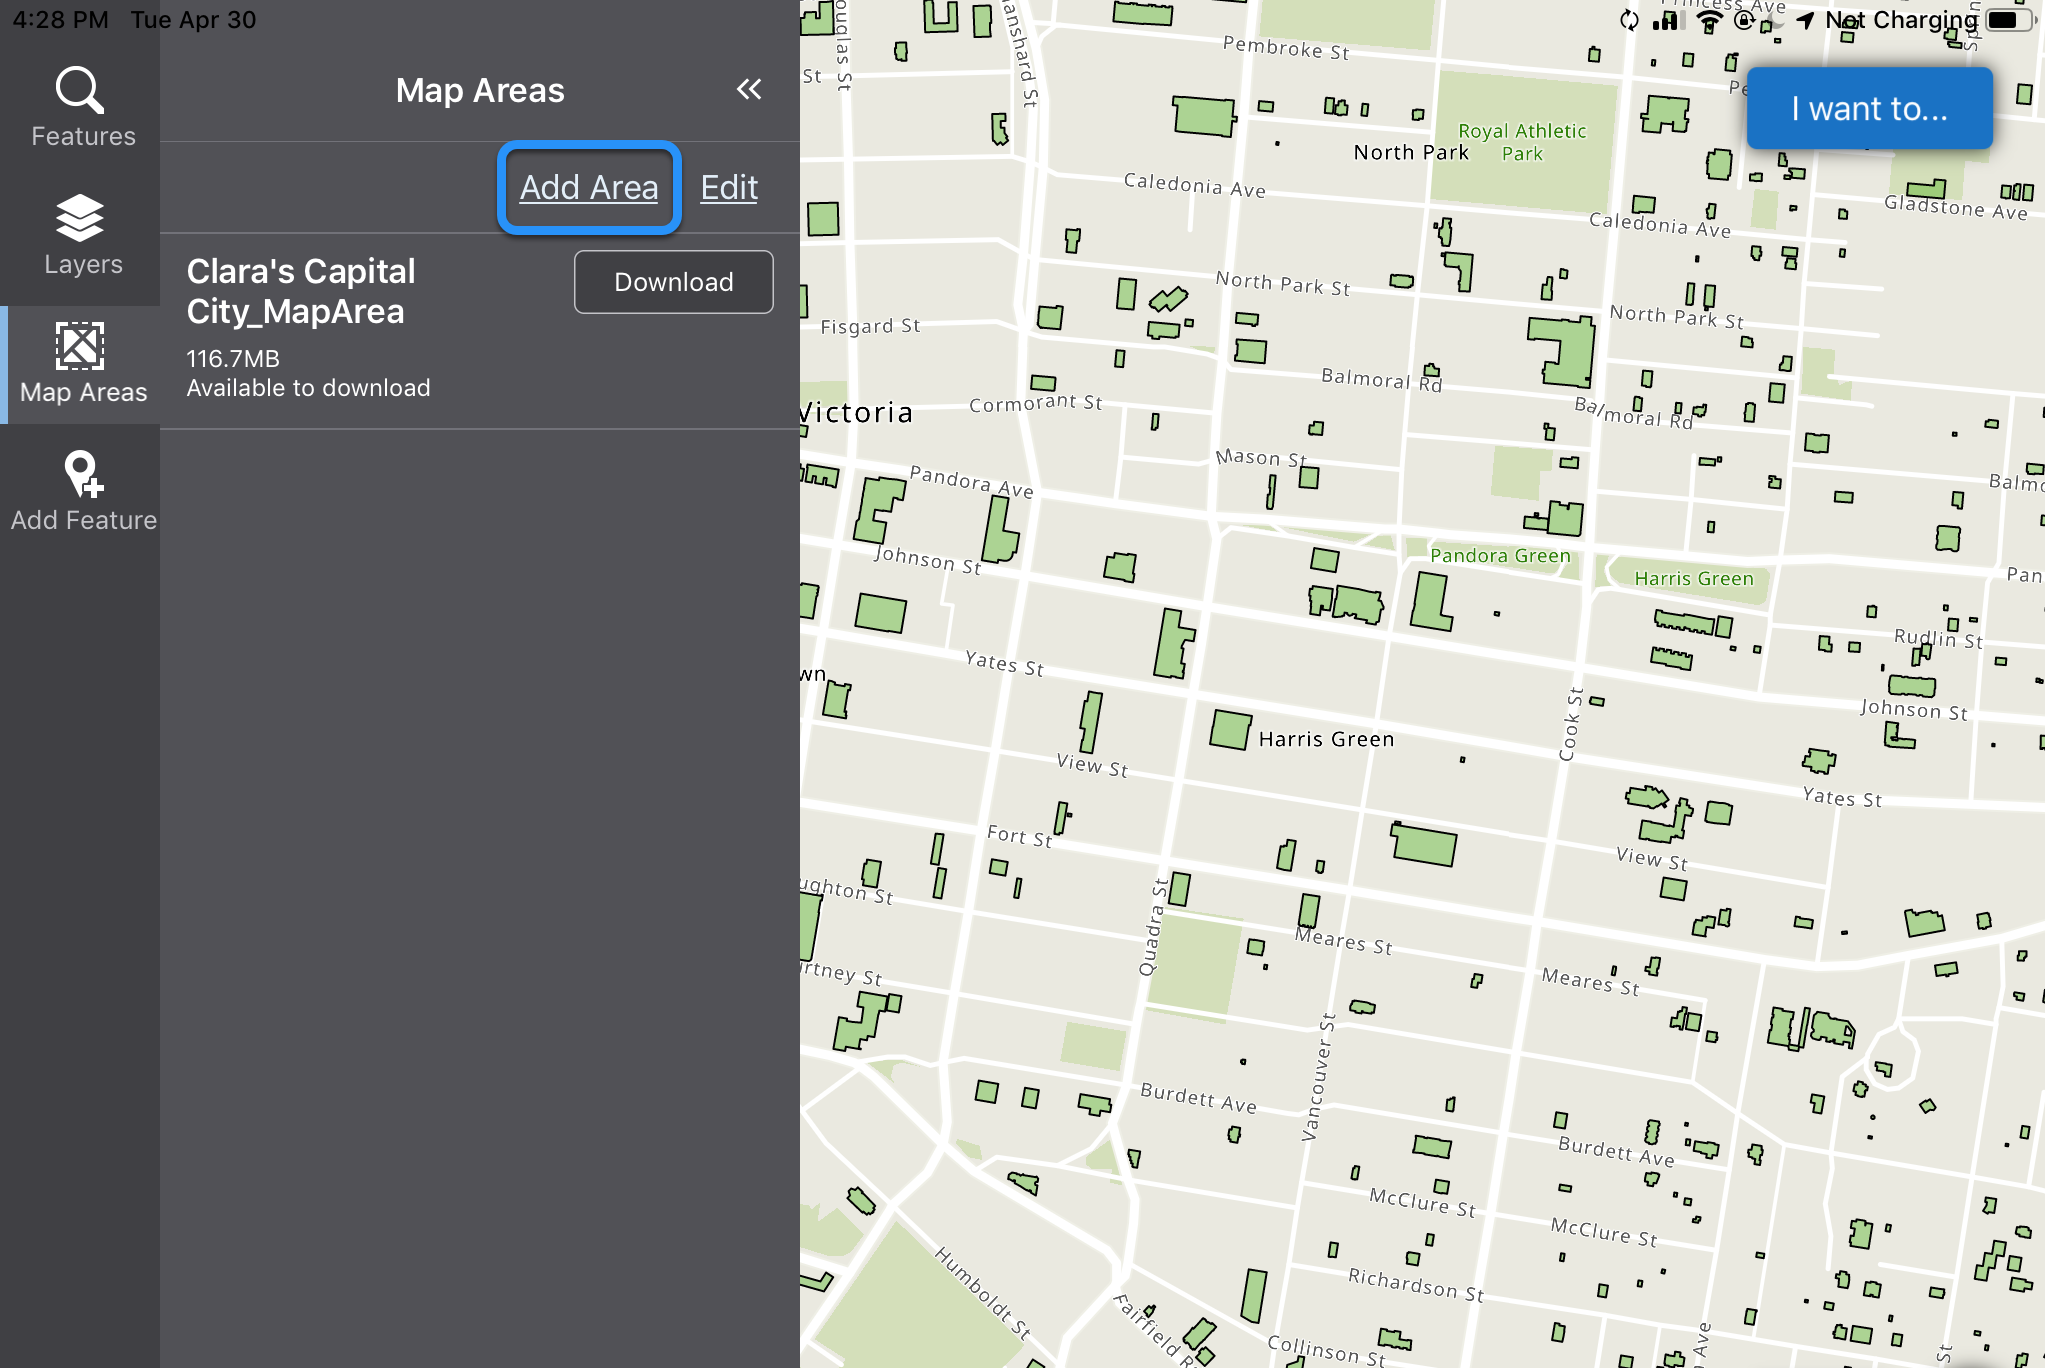
2.Click Map Areas on the toolbar, and then in the Map Areas panel, click Add Area.
The Create Area panel opens and a marquee appears on the map. The square marquee defines the area that will become your map area. You can pan or zoom or rotate the map to adjust the area that is within the map area box.
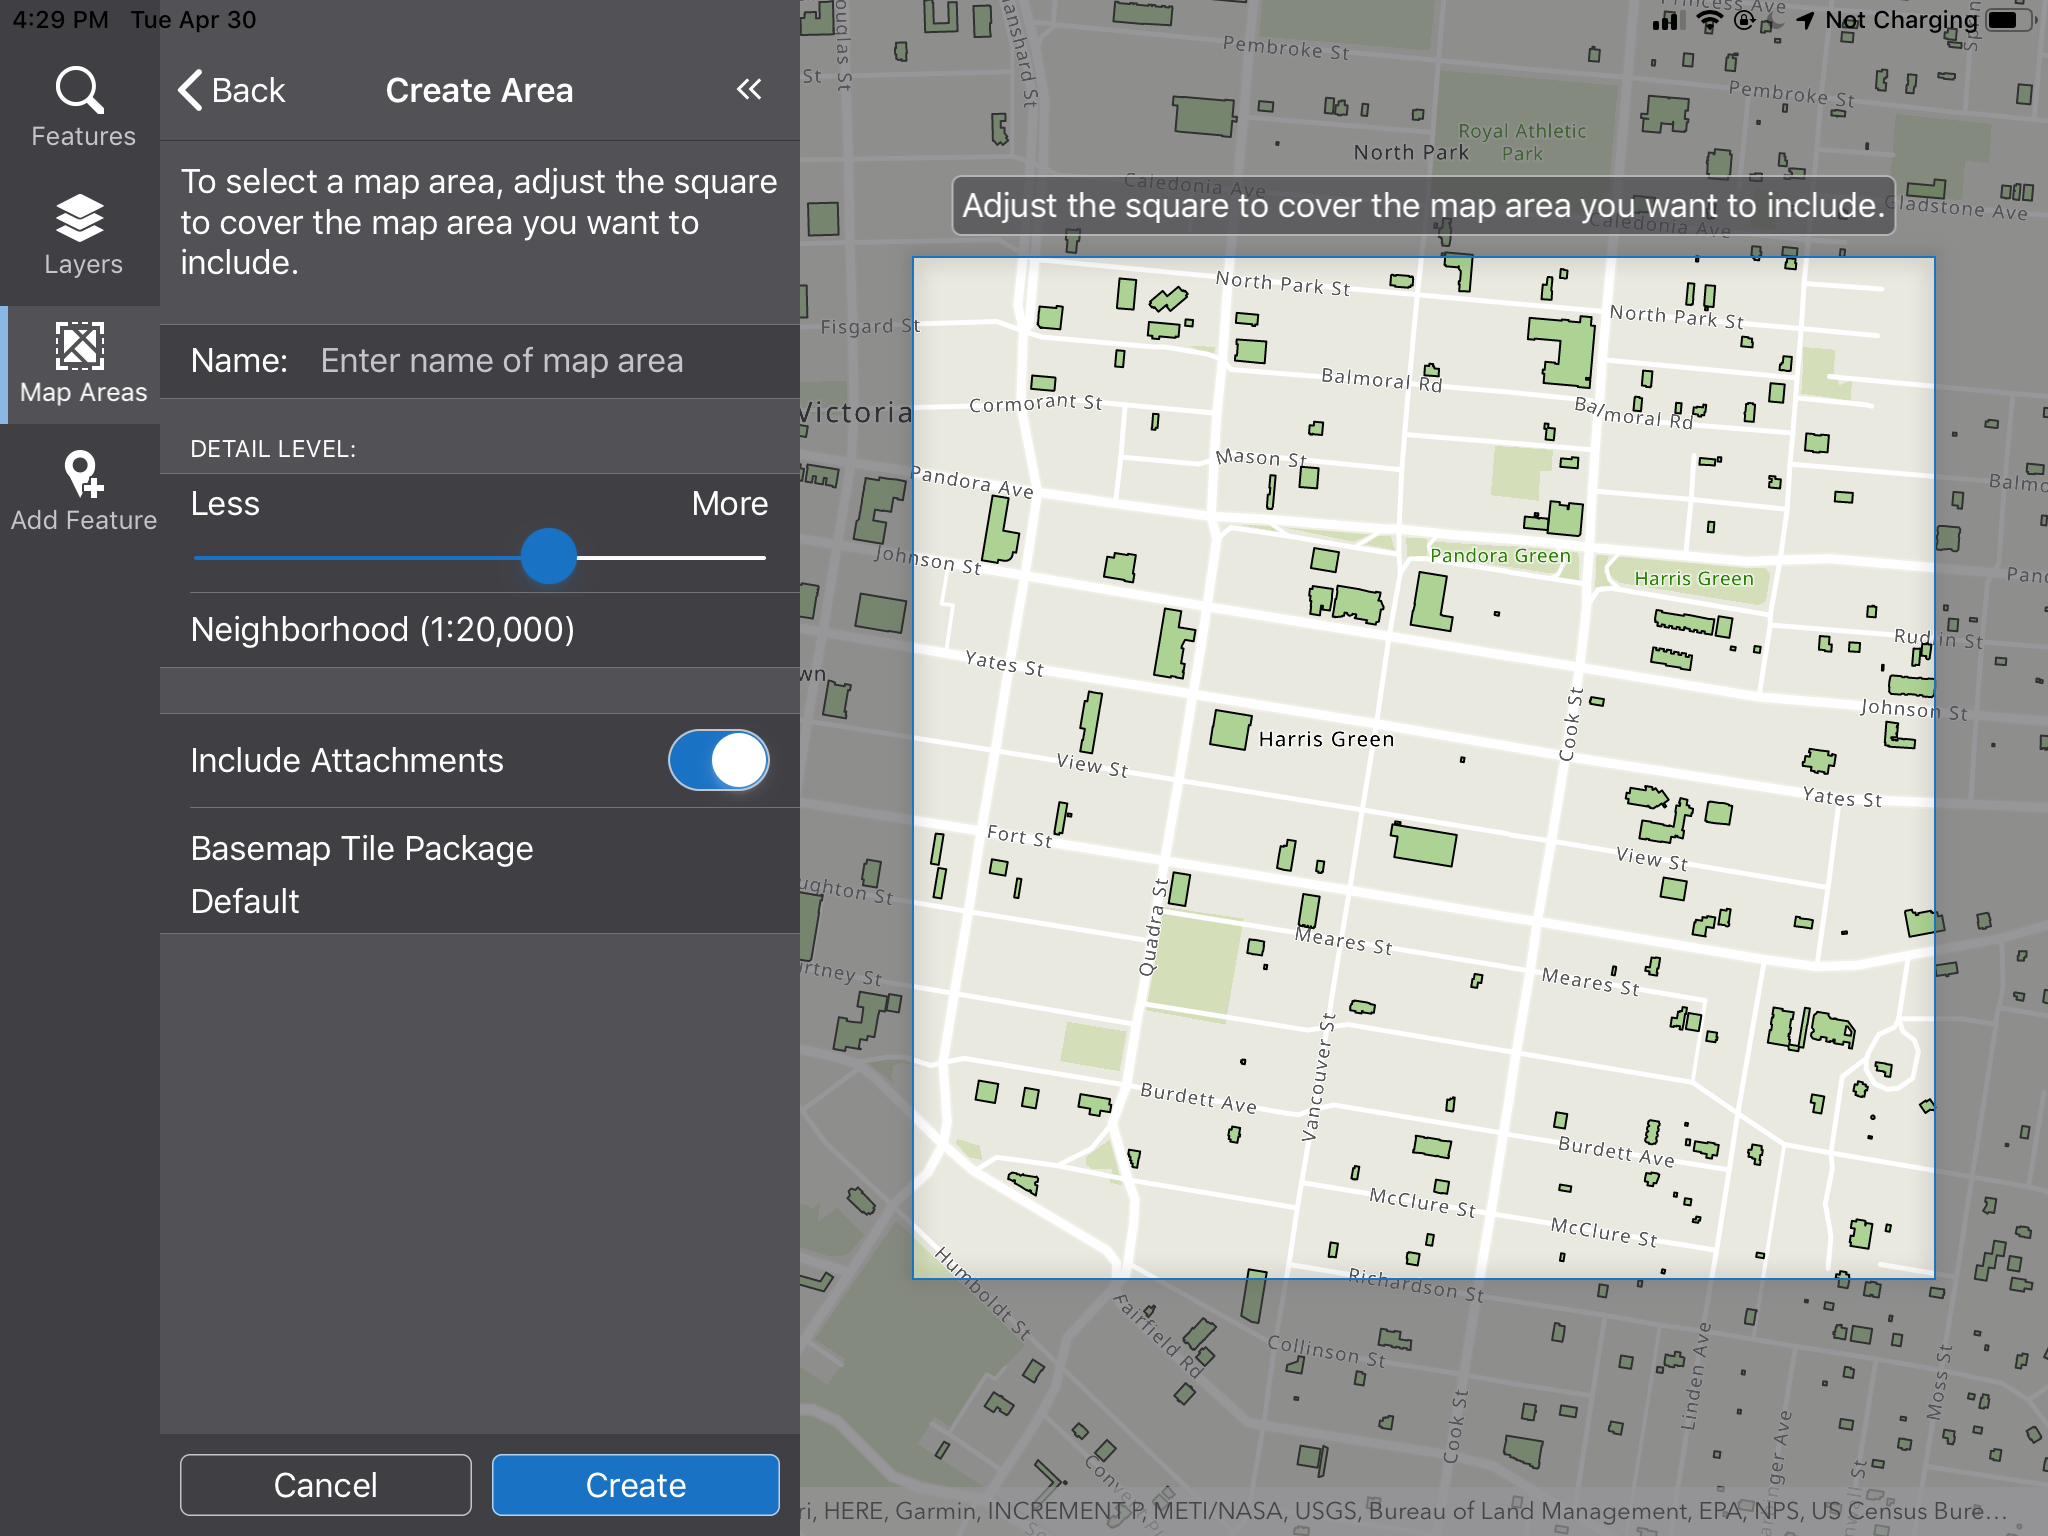
3.Adjust the map until the box contains the area you want included in your map area
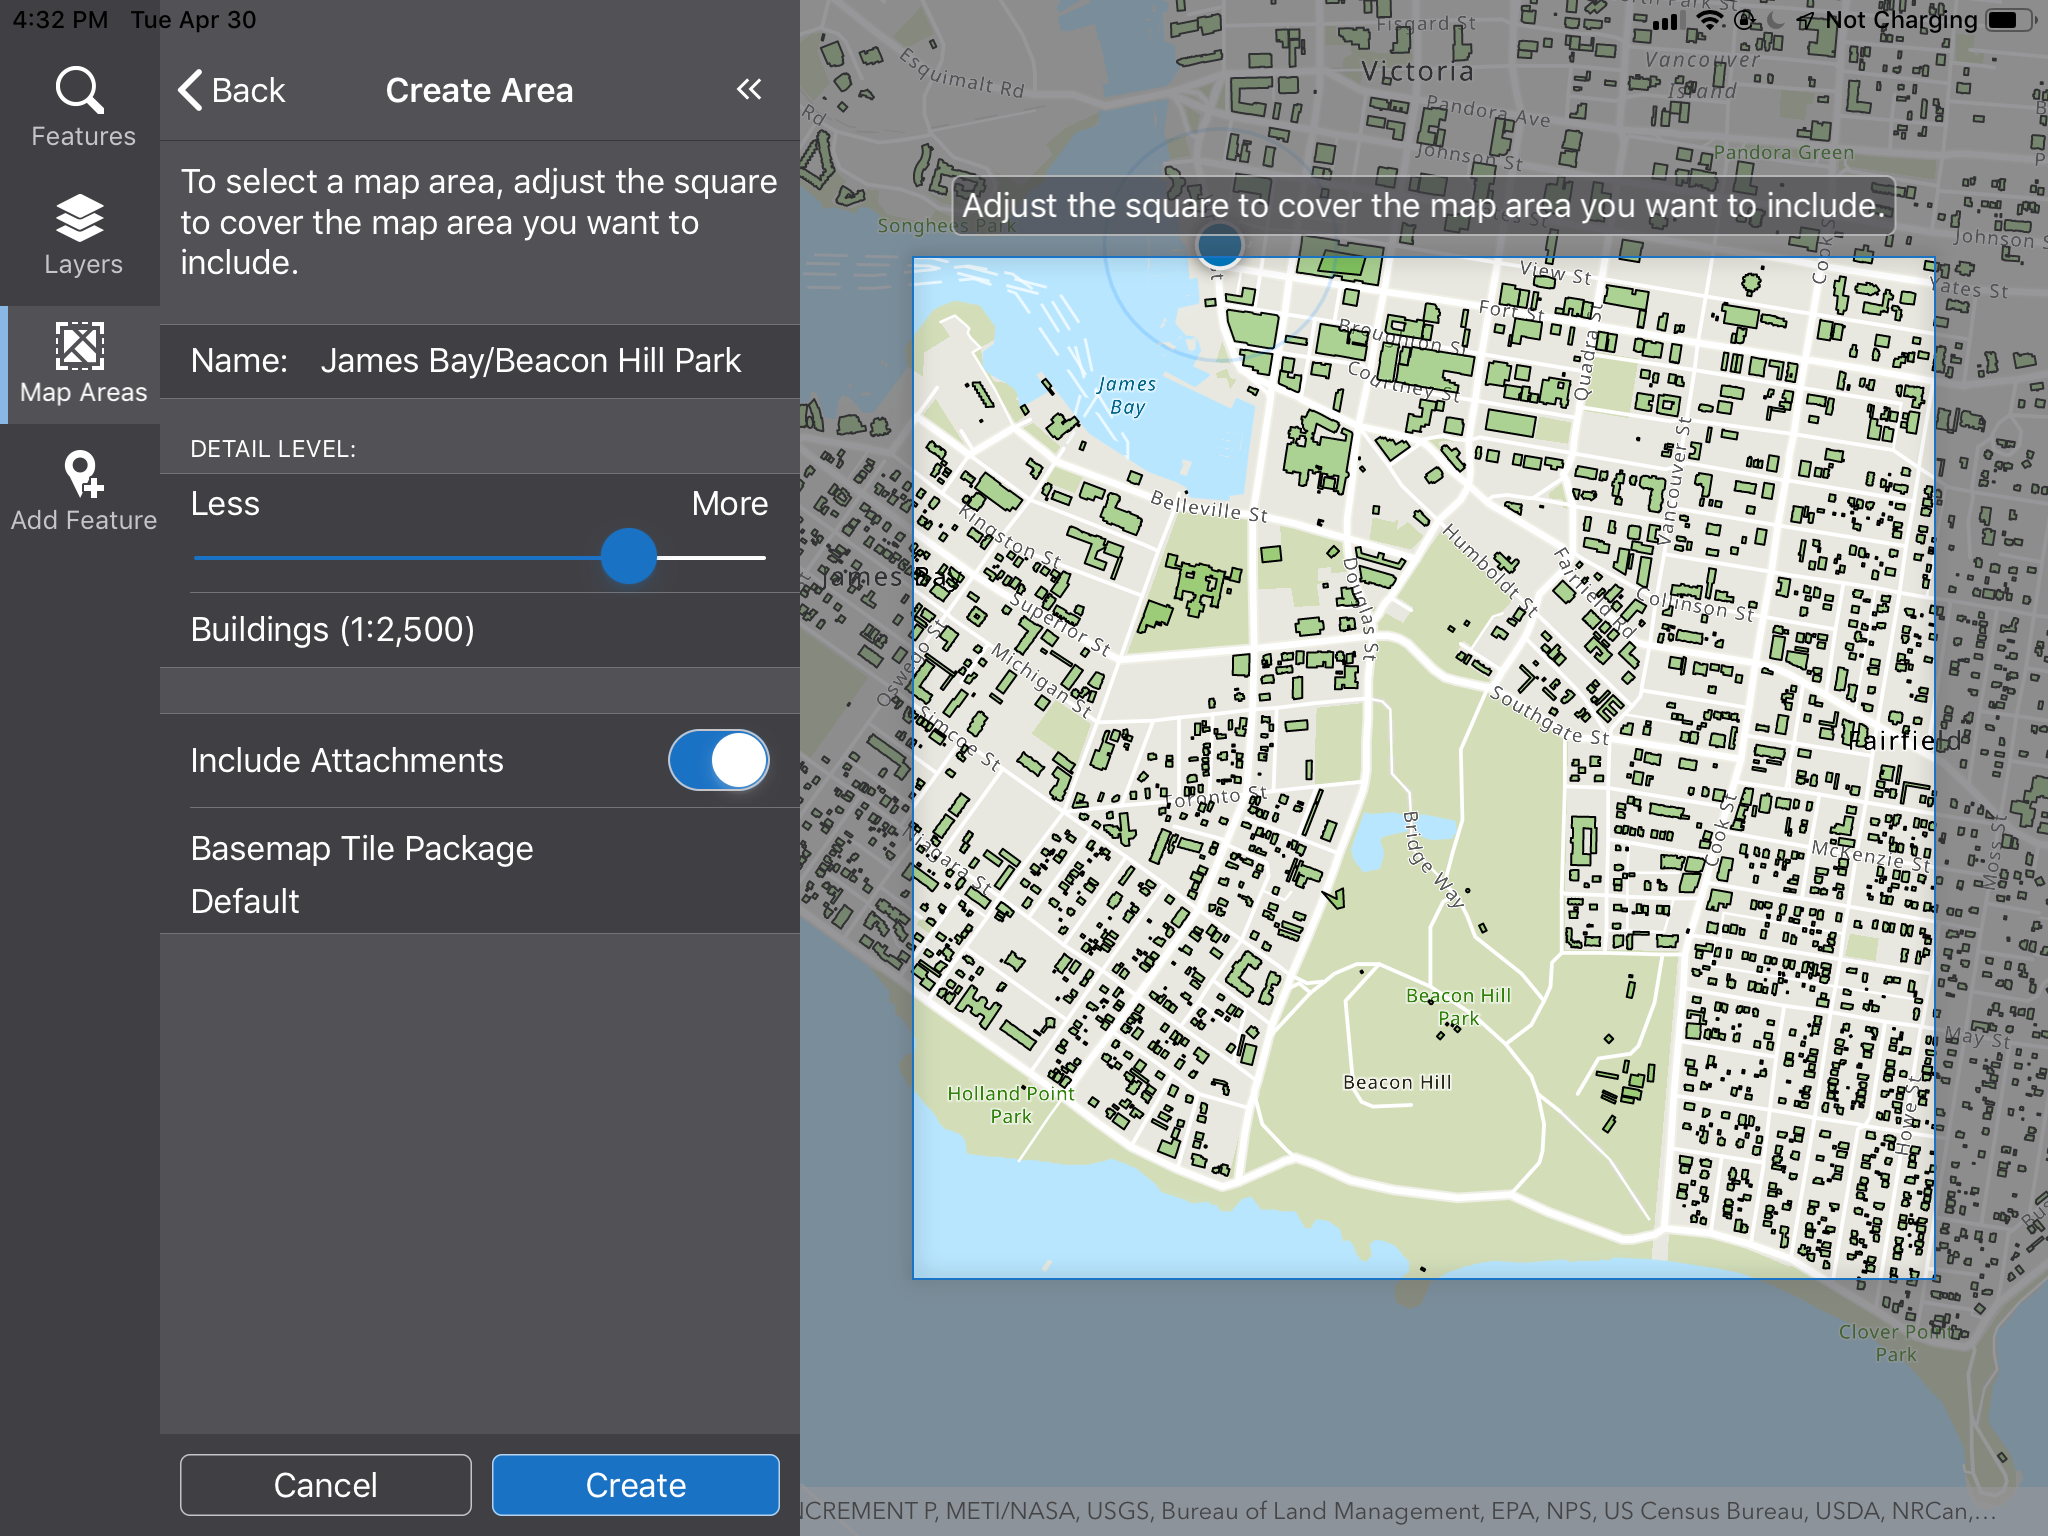
4.In the Name box, type in the name you want to give this map area. This name will appear in the Map Areas panel.
5.Adjust the DETAIL LEVEL slider to include less or more detail in your map area. The words indicate what you will see when you zoom in to the map at the level of the most detail. For example, at the Neighbourhood level, you will see buildings and roads.
6.Leave the Include Attachments if you want any attachments on the map to be included in the map area.
7.Click the Basemap Tile Package Default area in the Create Area panel.
The selection box opens at the bottom of the screen.
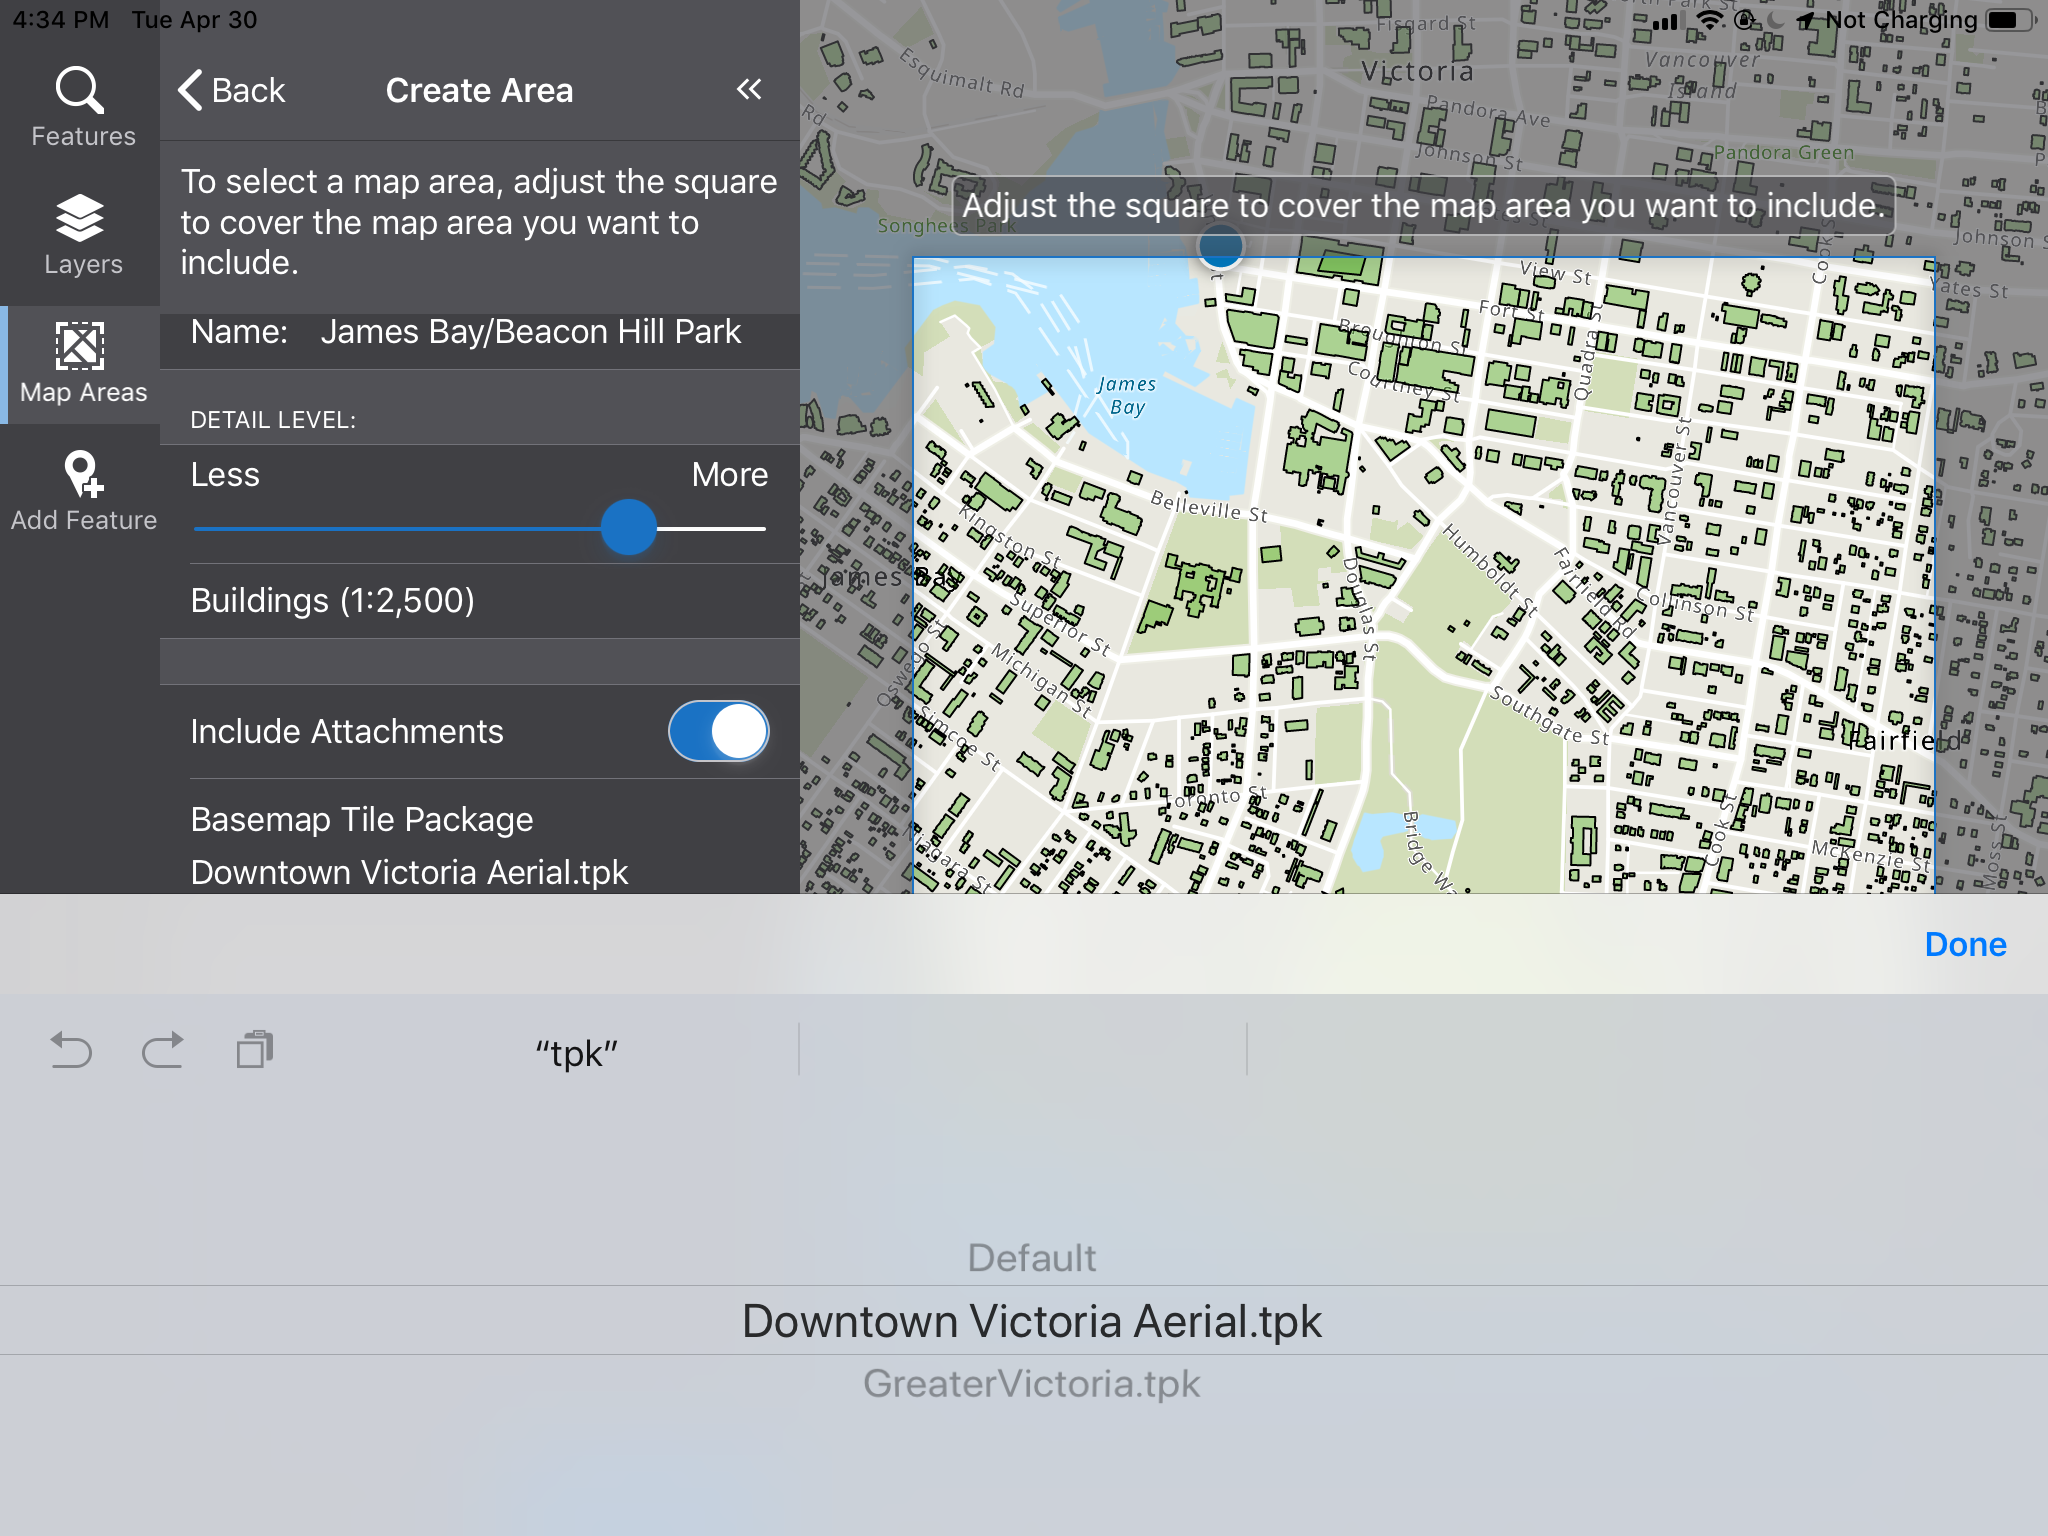
8.Scroll through the options until you have the tpk file you want to use within the lines, and then click Done.
(If you want to use the normal basemap, select Default.)
The name of the basemap is now listed in the panel.
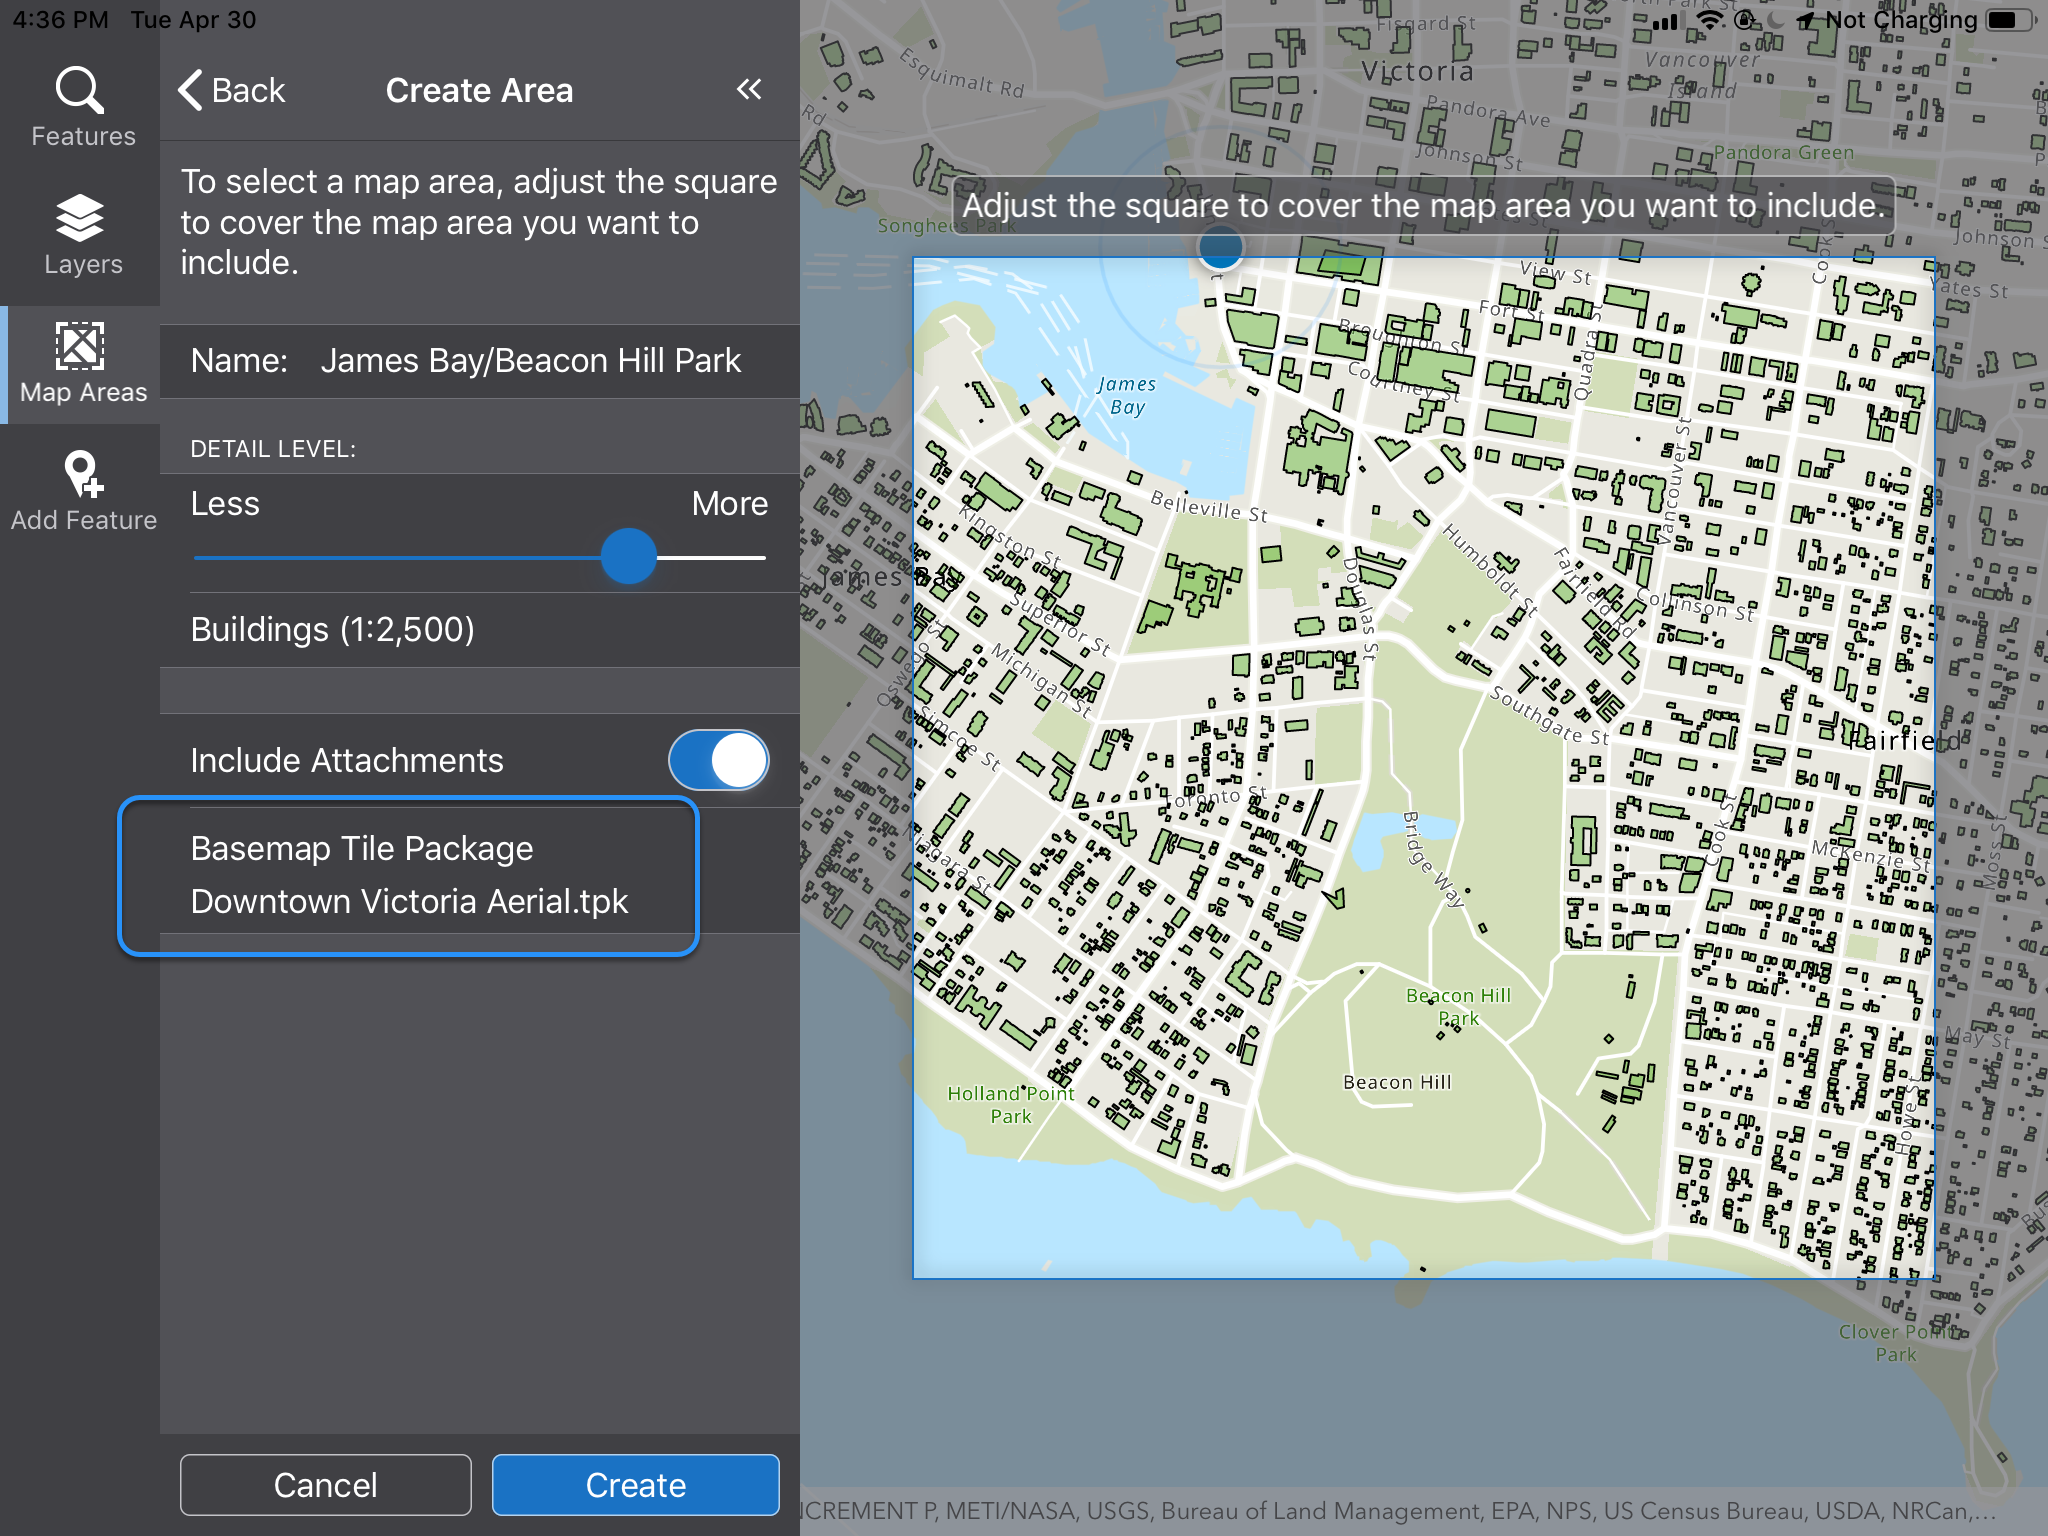
9.Click Create.
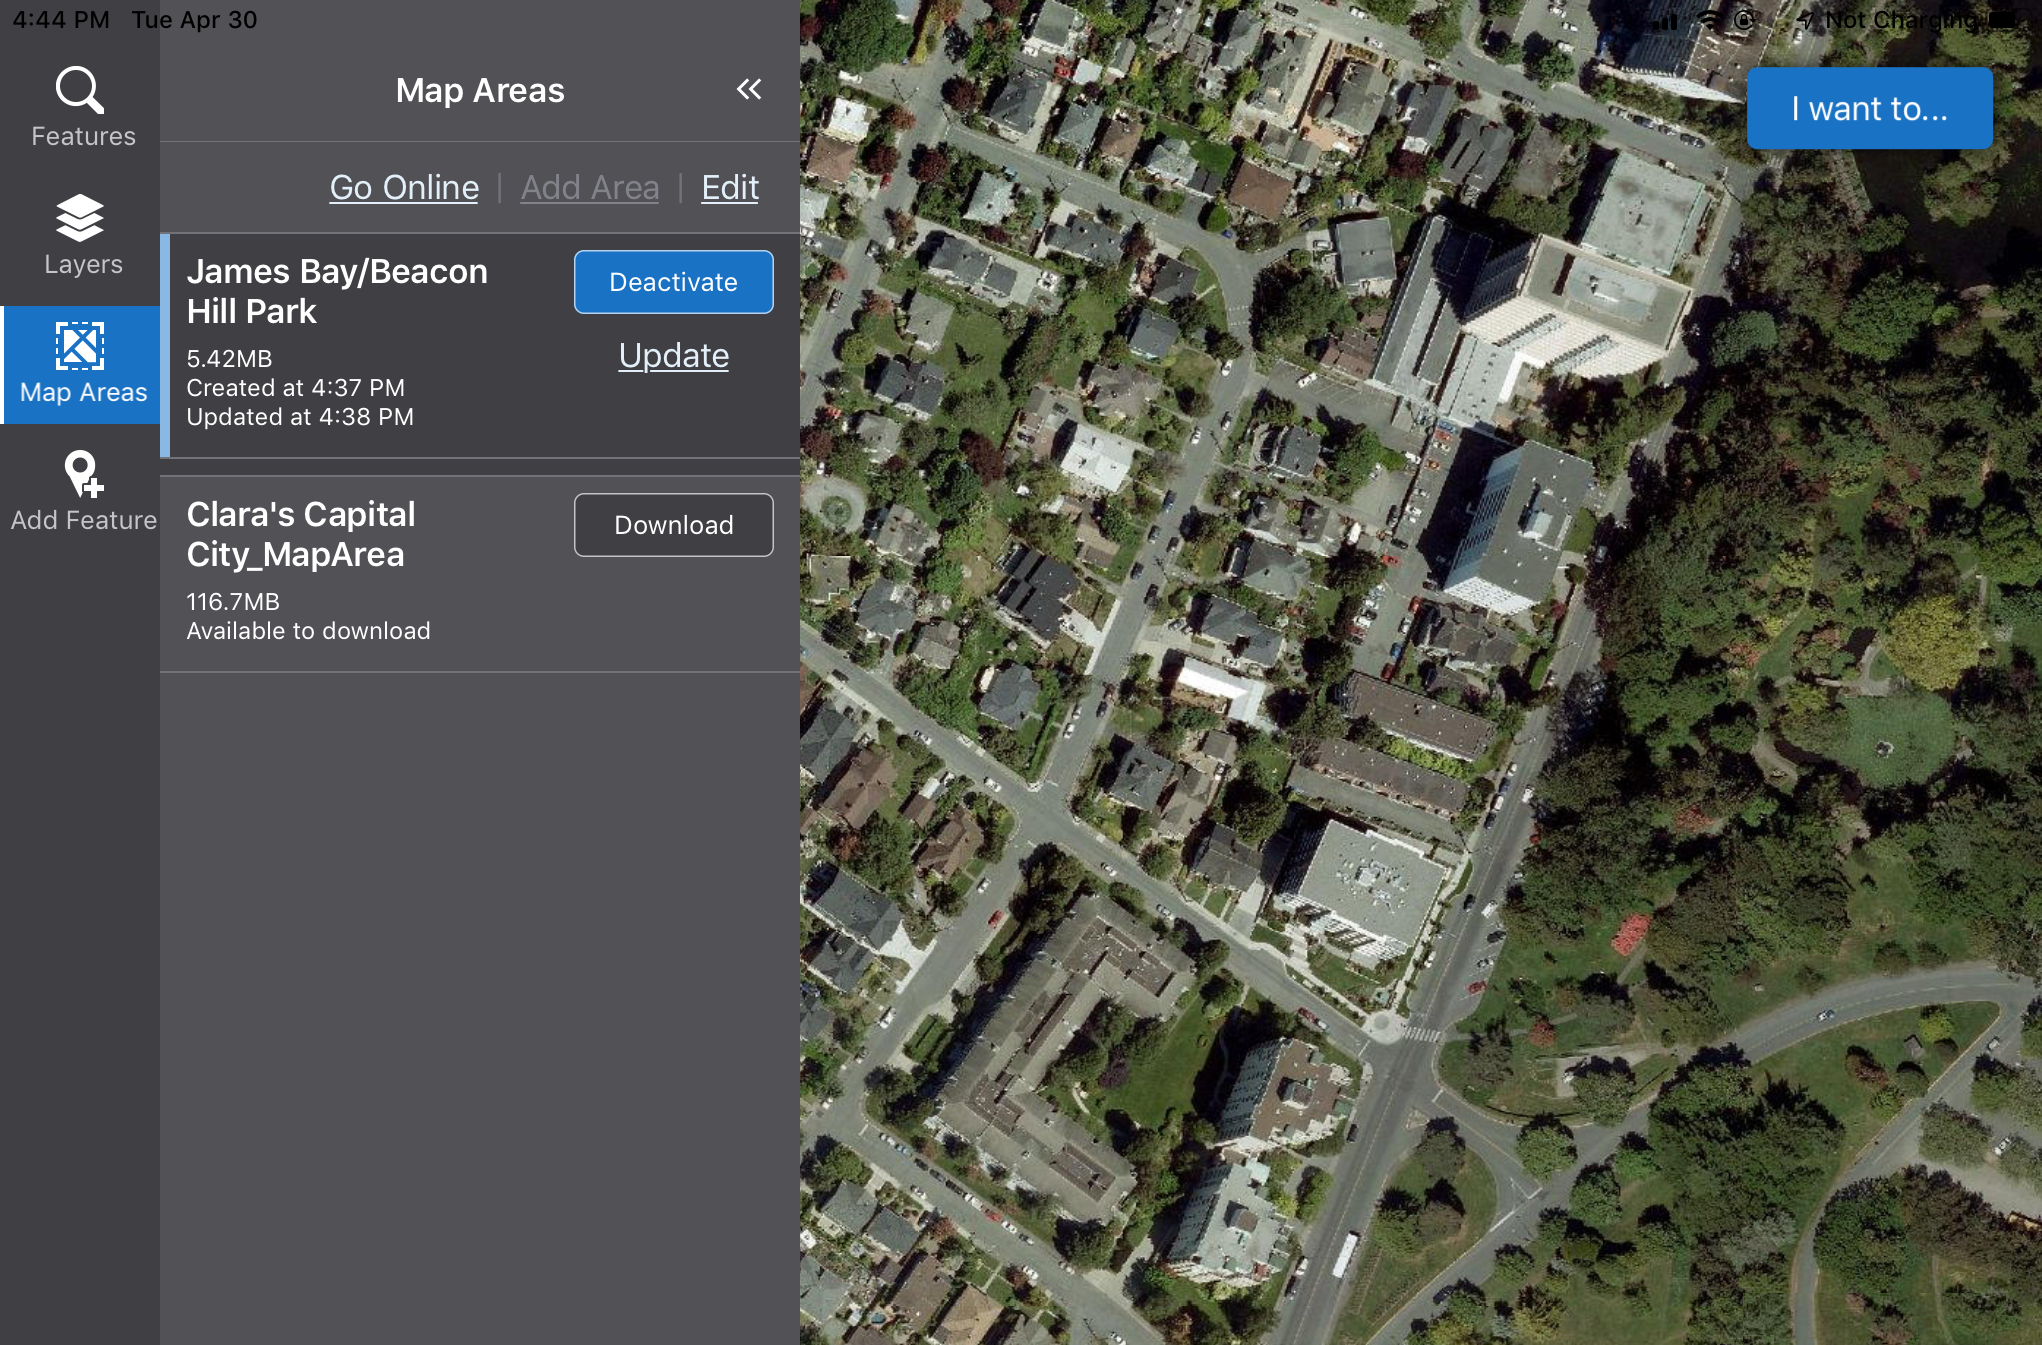
The name of the new map area appears in the Map Areas panel for you to download.
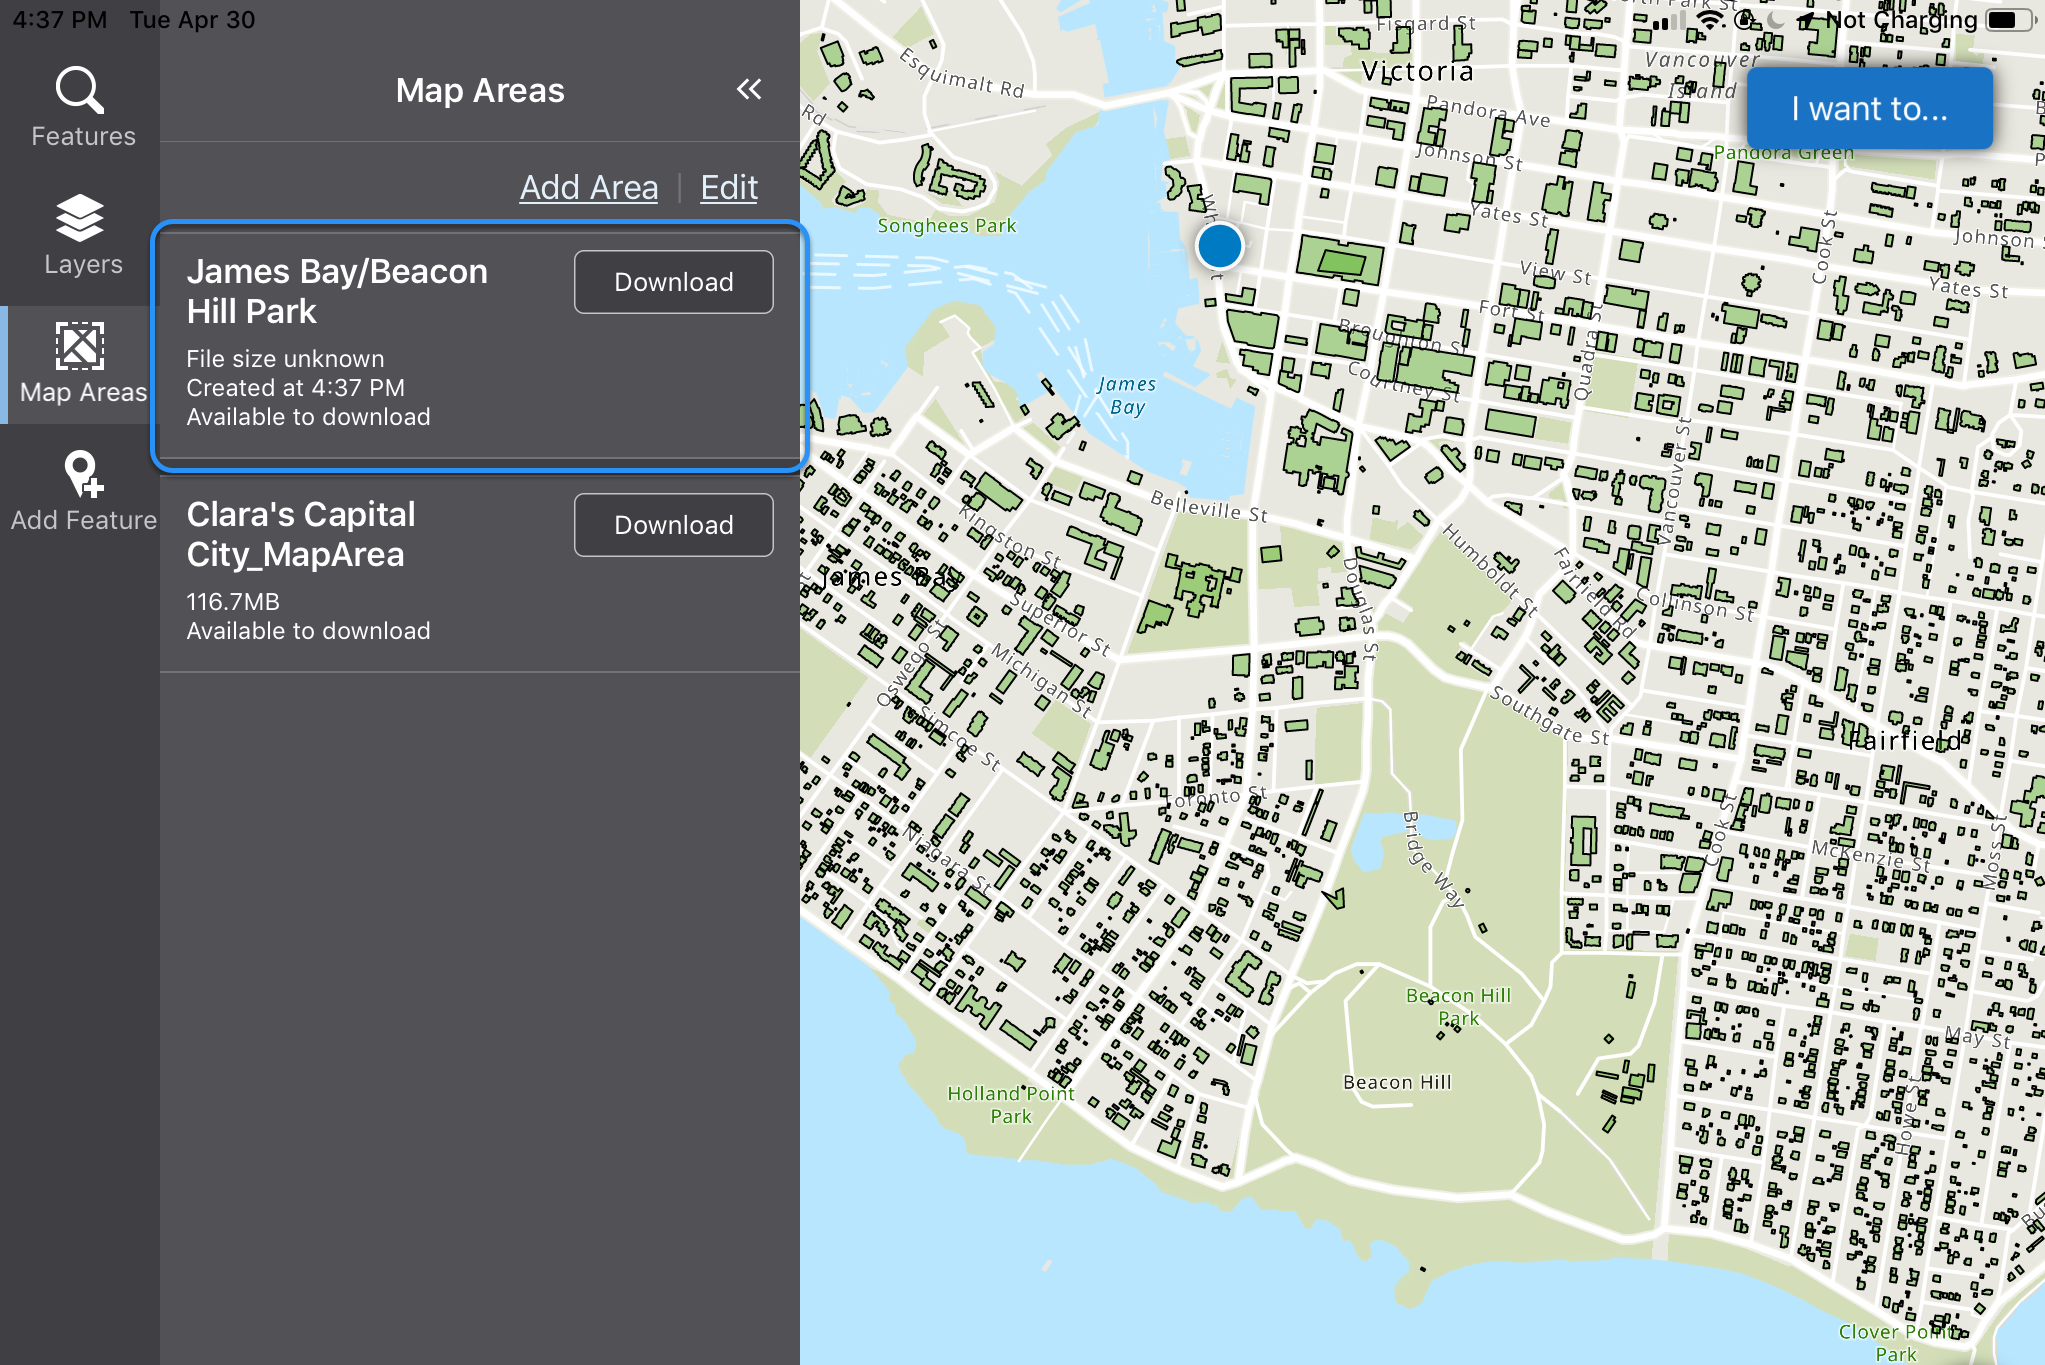
10.Click Download beside the new map area name.
A progress bar indicates that the map area is downloading. Depending on the size of the map area, the download can take a few minutes.
When the map has downloaded, you can take the device offline or use the map area while online.
11.Click Activate.
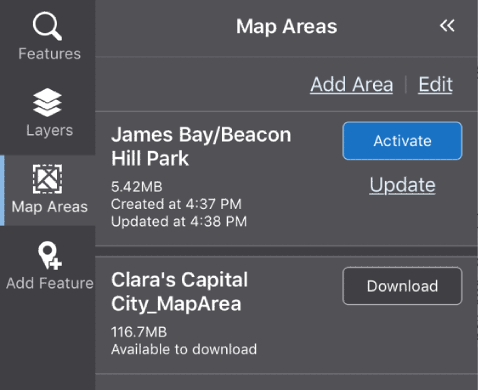
The default map is replaced with the TPK.
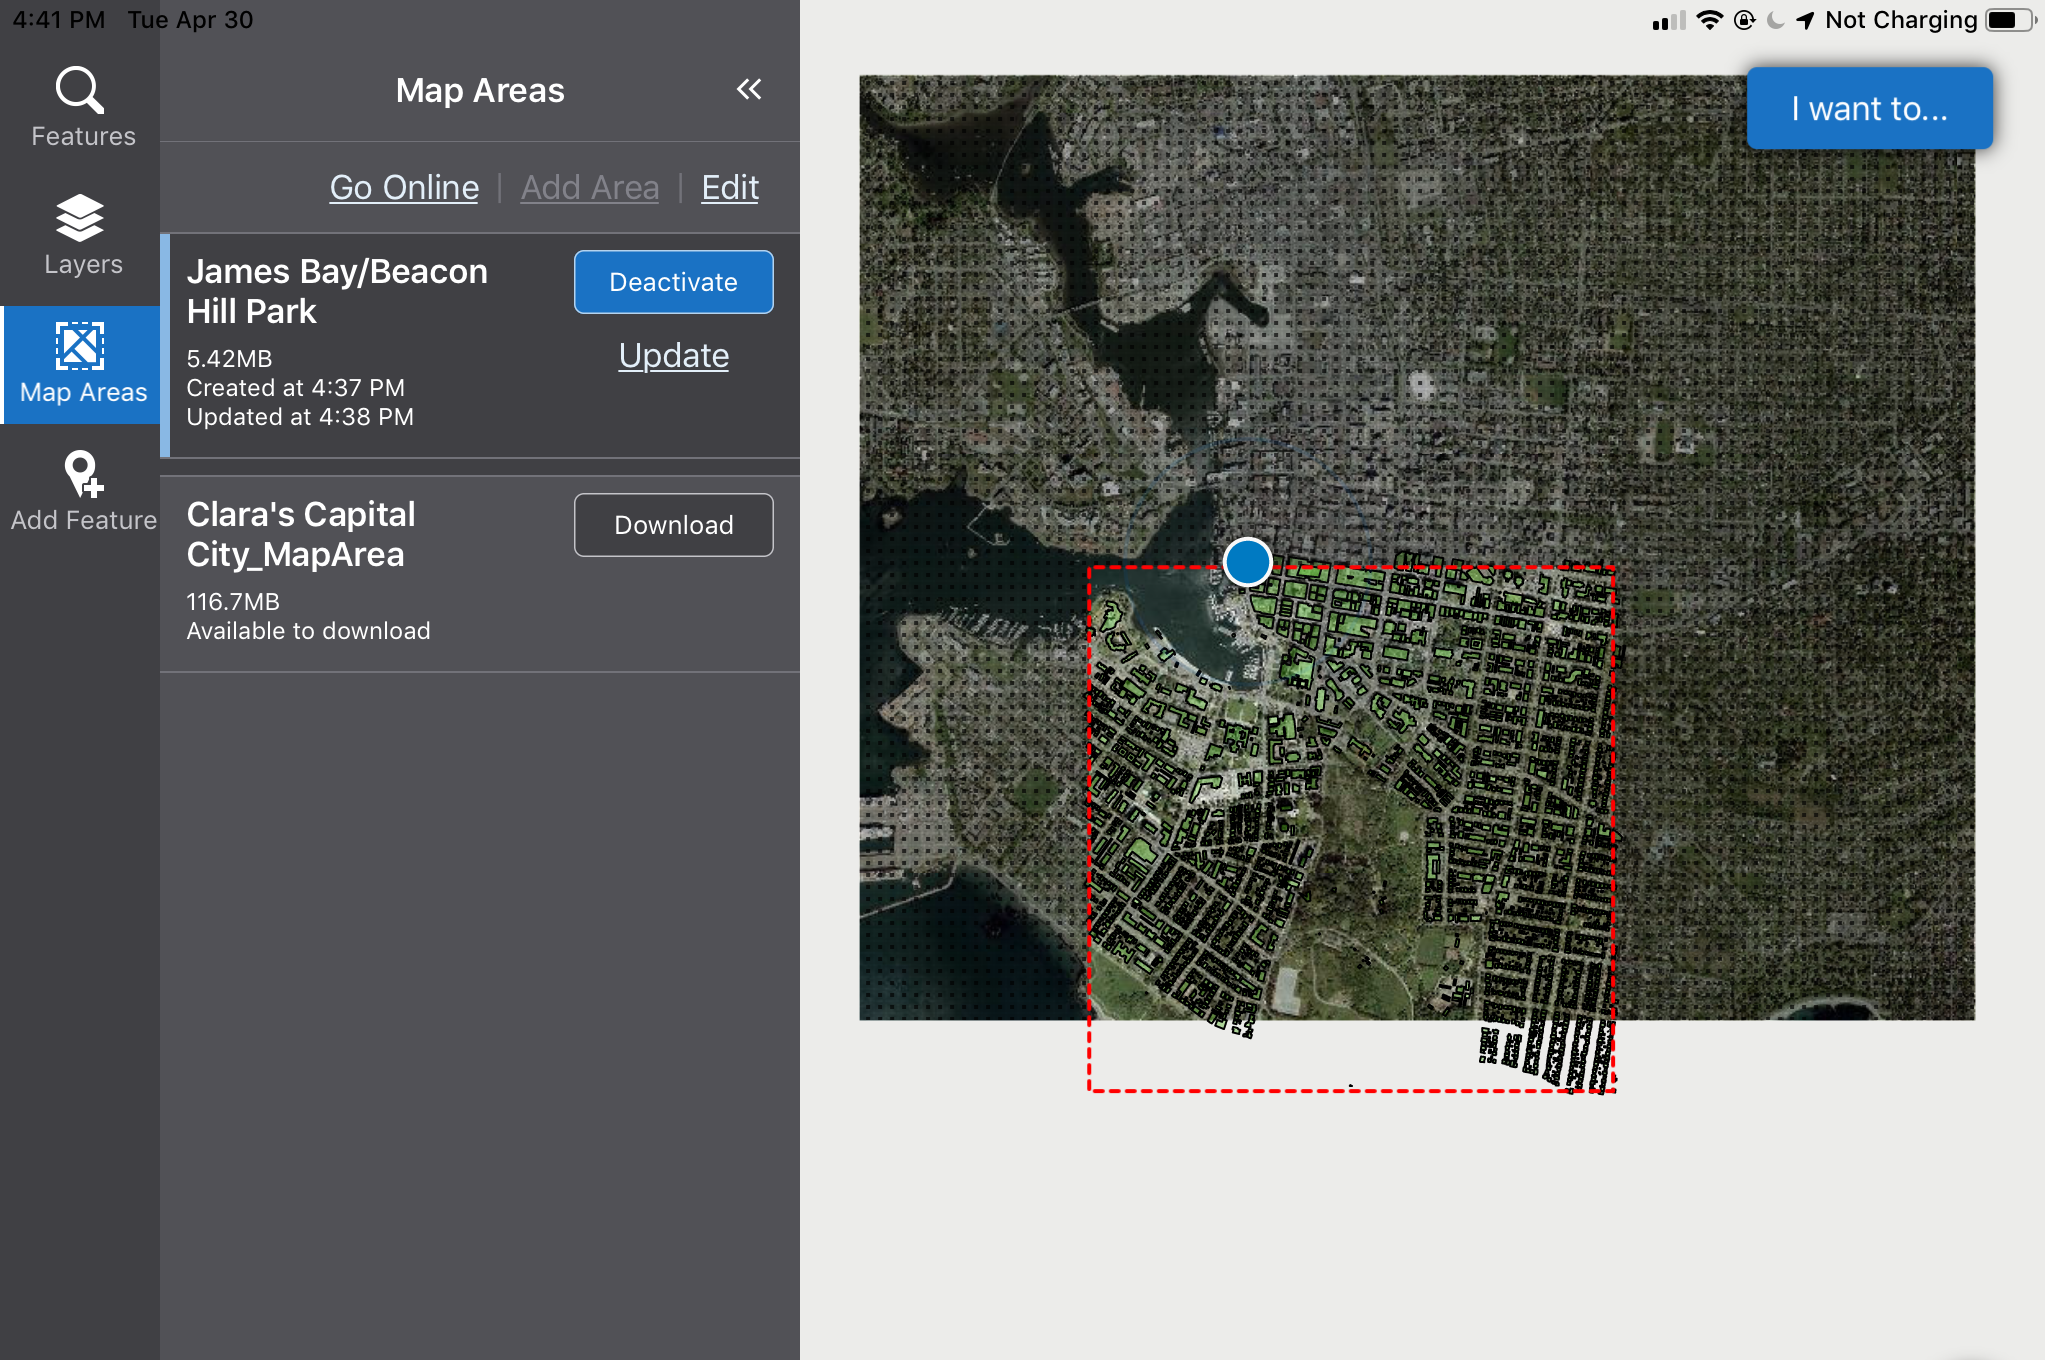
In the screen shot below, the map has been zoomed out to show the full TPK. The map area we defined is shown inside the red dotted box, which is indicating that there is a section of the map area that extends outside the bounds of the TPK at the bottom of the map. The area around the map area is grayed out to indicate that you are outside the defined map area.
In the screen shot below, the buildings layer on the map has been turned off. The map is zoomed in to the to show just how much detail is available using the high-definition TPK.