Pre-generated maps are usually available to you and listed in the Map Areas panel when you open the Mobile app on your device. You may have several map areas listed. If you plan to work with a map area, you have to download it to your device and then activate it. You can only work with one map area at a time.
To use a pre-generated map area:
1.In the Mobile app, click Map Areas.
2.Beside the name of your map area, click Download.
Once the map has downloaded, the Activate button and Update link appear.
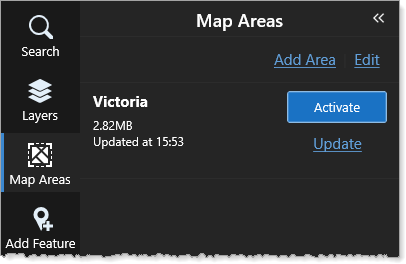
3.To use this map area, click Activate.
The map area replaces the online map. You can perform all the functions you could on the online map, including search for and add features. Your changes are stored locally on your device so that you can upload them later.
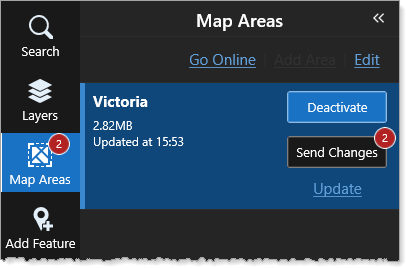
When you make a change to a map area like adding an attachment to an existing feature, or adding a new feature, the number of changes is tracked and displayed on the Map Areas icon in the task bar and beside the Send Changes button, which appears in the Map Area box.
4.Do any of the following:
•Click Send Changes: Your changes to the feature (added an attachment) or to the map (added new feature) are sent to the online map.
•Click Update: Any changes made by others to the online map since you last clicked Update, are pulled down and added to your map area.
•Click Deactivate: Closes the map area and returns to the online map. You can also click Go Online to return to the online map.
You can only remove a map area that has been deactivated.
To remove a map area:
1.To remove a map area, first click Deactivate, and then click Edit.
The Remove Data option appears beside the map areas.
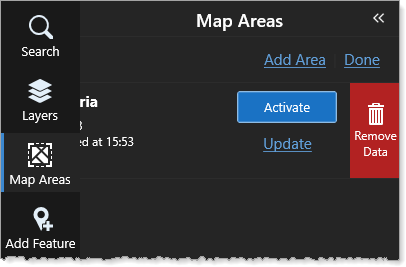
2.Click Remove Data to delete all the data related to the map area.
The Remove Map Area confirmation opens.
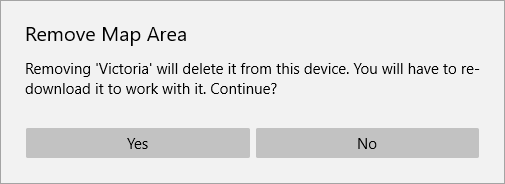
The map area and it's data are removed from the device, but you cannot delete the map area itself as this was set up in ArcGIS Online. So the map area remains available to download again.