Before installing VertiGIS Studio Printing, you must create and register a Printing app in your organization's Esri portal. During installation, you will need the app's App ID and Redirect URL. Depending on your organization's policies, only an administrator may have permission to register apps.
Esri periodically updates the ArcGIS Online and ArcGIS Enterprise Portal user interfaces. If your portal version differs from the version used in the procedure below, some screens and workflow steps may vary.
To create an application in a portal:
1.Sign in to your organization's Esri portal.
•If your organization uses ArcGIS Online, the URL should look similar to this:
https://MyCompany.maps.arcgis.com
Note that this URL uses arcgis.com as its domain.
•If your organization uses Portal for ArcGIS, the URL may look something like this:
https://MyCompany.com/arcgis
Note that this URL uses MyCompany.com as its domain.
2.Click the Content tab > New Item > Developer credentials.
The Create developer credentials dialog opens.
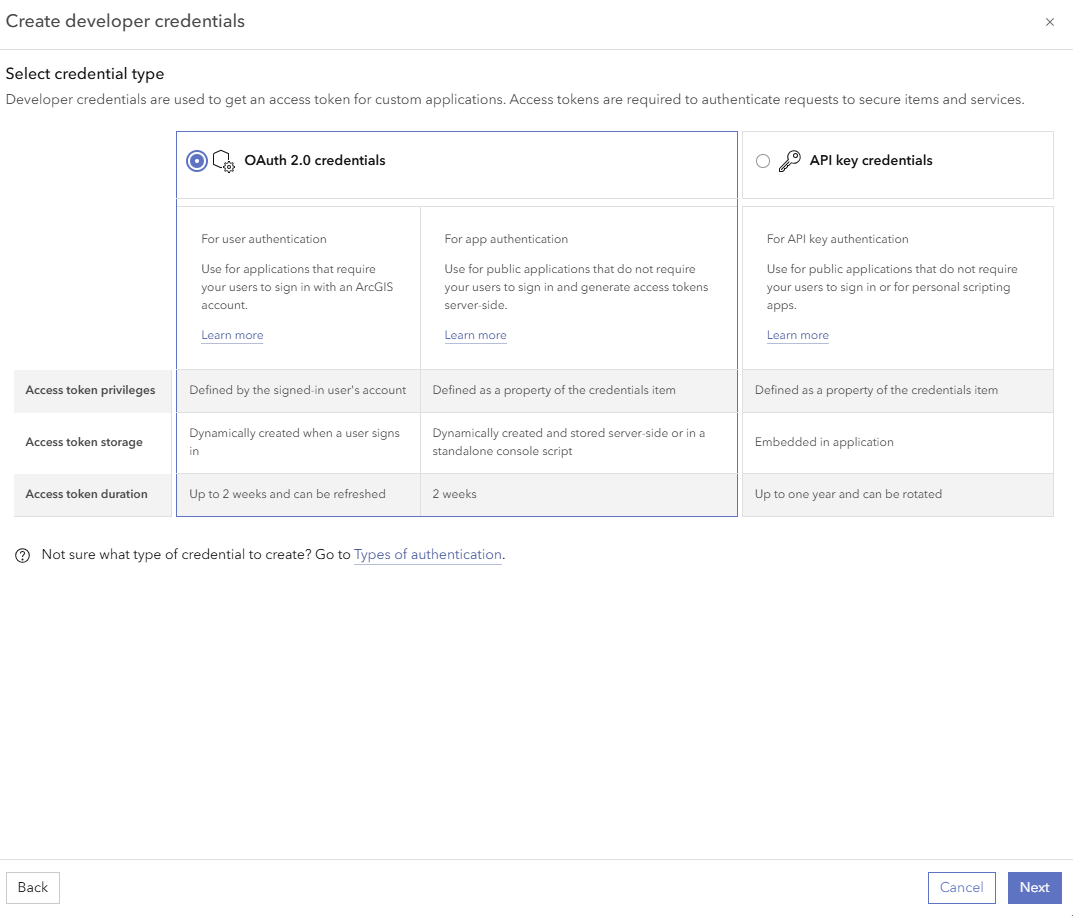
3.Select OAuth 2.0 credentials and click Next.
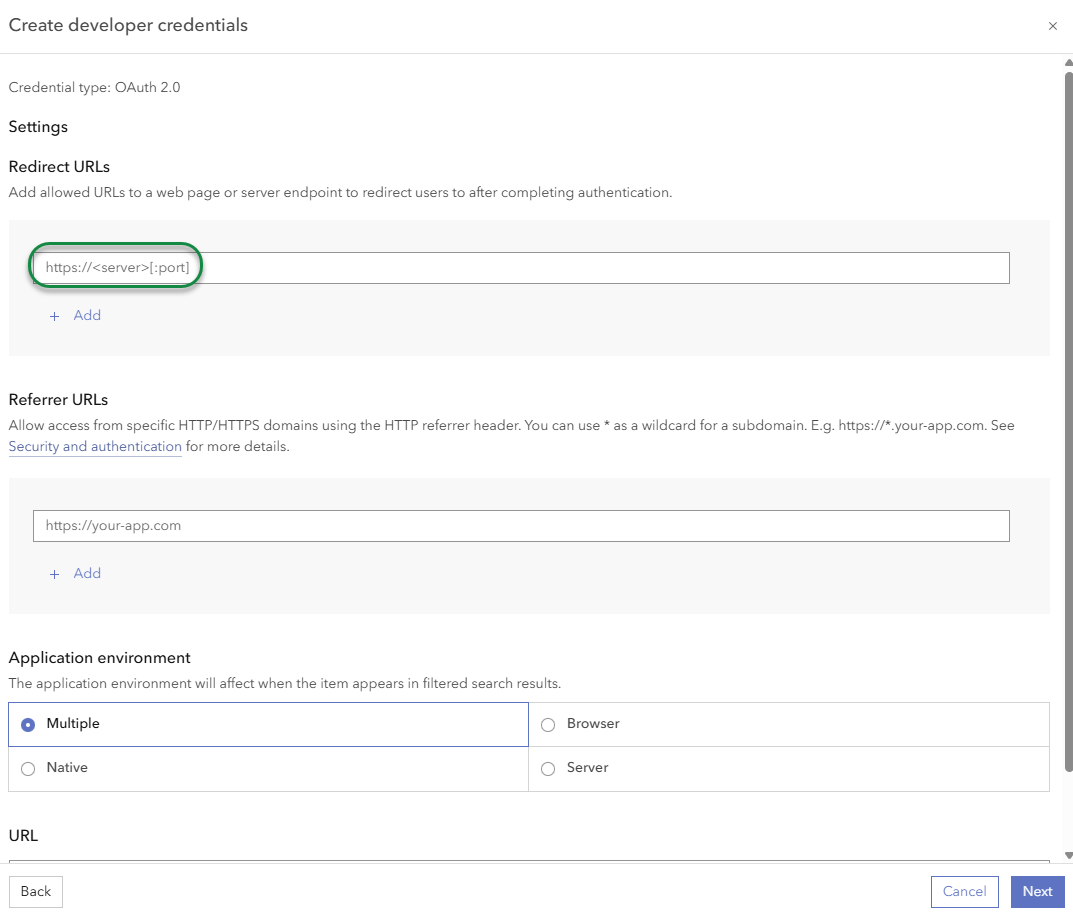
4.Add a Redirect URL (for example., https://myServer.myDomain.com/VertiGIS/Studio/Web/sign-in-handoff.html) and click Next.
5.Select the privileges required for you application and click Next.
Privileges are optional and can be left disabled.
6.Review your selected privileges and click Next.
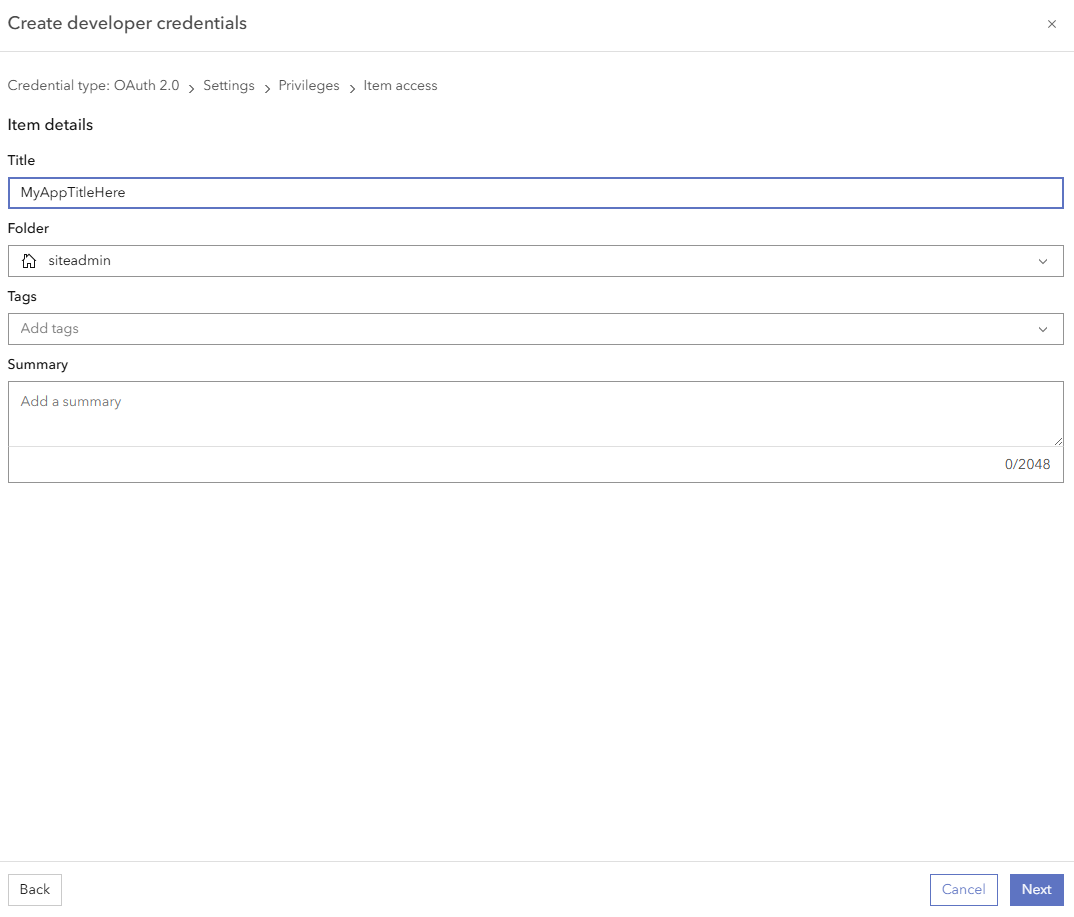
7.Add a title for your application and click Next.
The title should help identify the application and its purpose so it is easy to find at a later date.
8.Review your application settings and click Create.
The application has been created and registered. You can copy the Client ID (App ID) to register Printing with your Esri portal.
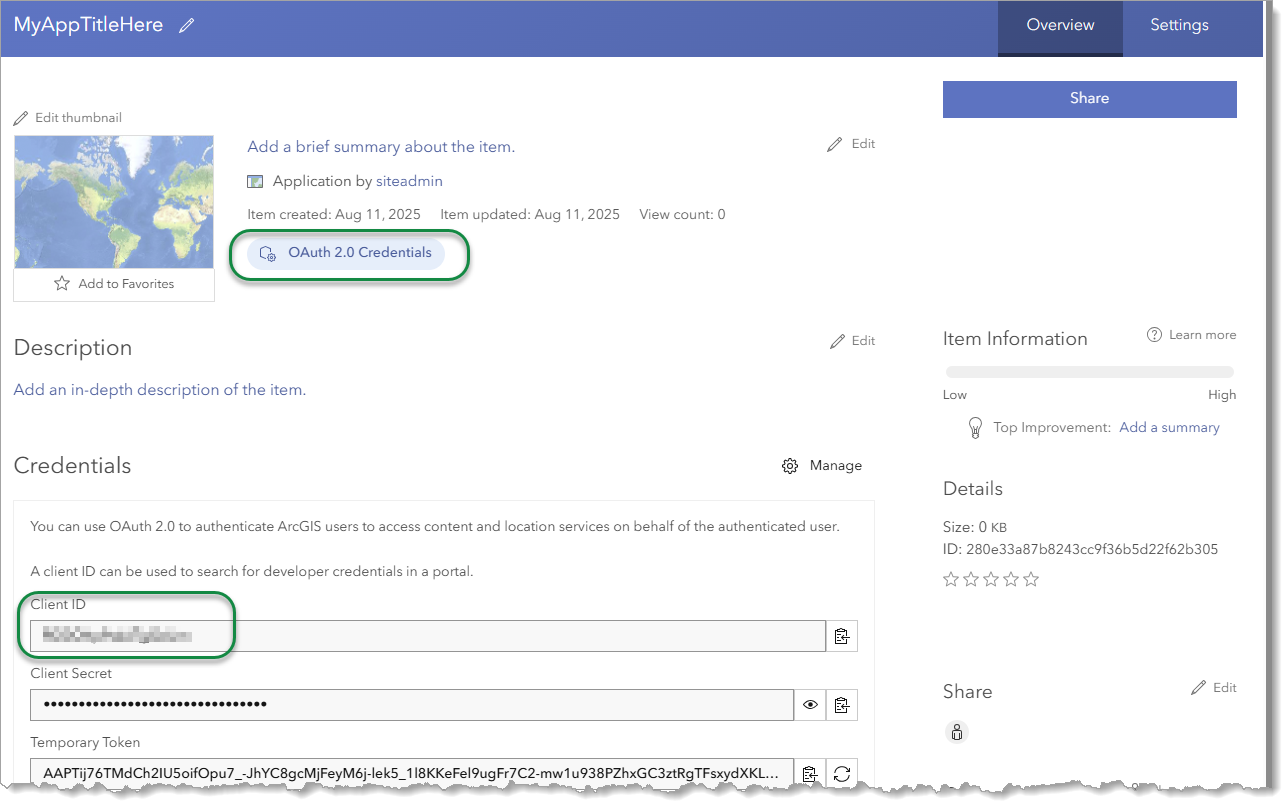
In different versions of Esri software, the terms App ID and Client ID, as well as App Secret and Client Secret, are used interchangeably.
You can leave the portal open in the browser so that you can copy and paste the Client ID, Client Secret, and the URL when you need them.
