To run a print in VertiGIS Inline, the steps are as follows:
•Add the print template to an Inline view.
Create a Print Template for Inline
To create a print template for Inline:
1.Create a new print template for your Inline view.
2.Add a parameter for the print template to take inputs at run time.
3.Add a Picture Box control where you want your Inline view to go.
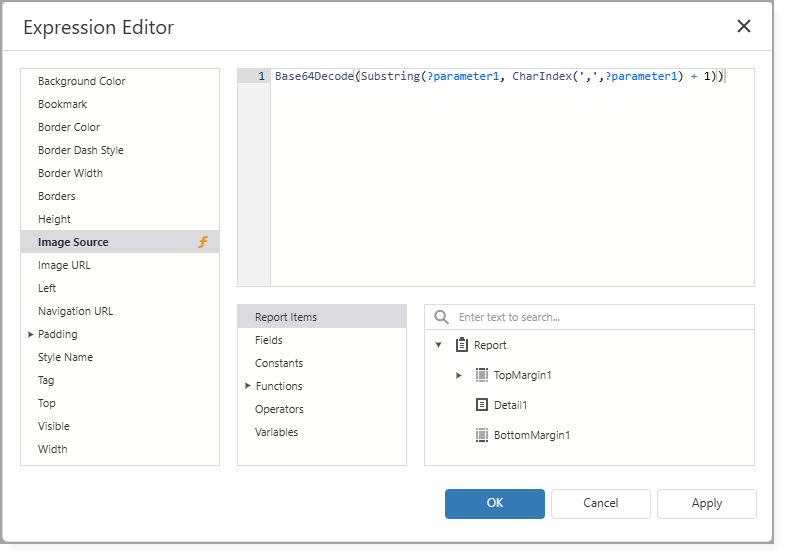
4.Open the Expression Editor ( ).
).
5.Configure the Image Source to include the function below, replacing "parameter1" with the name you assigned the parameter in step 2.
Base64Decode(Substring(?parameter1, CharIndex(',',?parameter1) + 1))
6.Click OK.
7.Save the template.
Add the Print Template to an Inline View
After you create a print template for Inline, you must add the print template to an Inline view.
To add the print template to an Inline view:
1.Open a view in the Inline Designer.
2.Go to Viewer Options > Print Options.
3.Click Add Print Template.
4.Select the Inline print template you created.
5.Click Select.
You can now run a print in Inline.
Run a Print in Inline
After you add the print template to an Inline view, you can run the Print action.
To run a print in Inline:
1.Open the Inline view.
2.Populate the Route and the Range (Start and End).
3.Click the Tools menu (the three-dot menu).
4.Click Print.
The Print Inline window opens with the settings described below.
Field |
Description |
Template |
Shows the selected Inline print template. |
Scale |
Shows the current scale of the Inline view. |
Rotation |
Set the angle (in degrees) at which you want to print the main map image. |
Inline Parameter |
Select the parameter you configured in the print template. This is where the Inline view will show when printed. |
5.Click Submit.
A notification appears when the print job is complete.
6.Click the download link to open the PDF of the Inline view.