Run a Print in an HTML5 Viewer
Users run prints using the HTML5 Viewer's Print tool, which generates printable maps based on Geocortex print templates. Each of the HTML5 Viewer's built-in toolbar formats includes the Print tool by default. If you have removed the Print tool from the toolbar, you can add it back.
![]()
Print tool
Clicking the Print tool opens the Print Map panel, where the user selects the print template to run and configures other settings, such as the map scale and resolution to use for the print output. There may also be settings for arbitrary text inputs, for example, Title or Notes. These inputs are configured in the template using parameters. For information on configuring input parameters, see Configure Parameters.
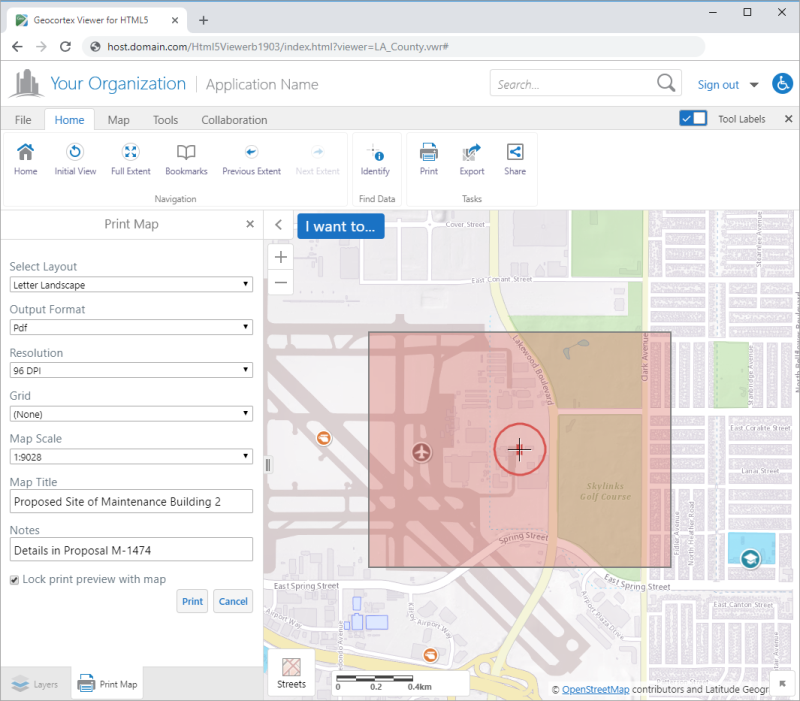
Example of an HTML5 viewer in Desktop mode, configured to use the Letter Landscape template to print the area under the overlay
To run a print in a Geocortex HTML5 viewer:
-
Click the Print tool in the toolbar to open the Print Map panel.
In the Desktop and Tablet interfaces, the Print tool displays an overlay on the map. The overlay represents the area to print.
-
Configure the settings in the panel:
-
Select Layout: If the viewer hosts more than one print template, select the template to use.
-
Output Format: The output format is PDF.
-
Resolution: Select the resolution to use for the print output, in dots per inch (DPI).
The Resolution setting only shows if you have configured resolutions for the template in Geocortex Essentials. If there are no resolutions configured for the template, the print will generate at 96 DPI.
-
Grid: By default, the map image does not include a measured grid or graticules. To print a measured grid on the map, select Map Units. To print latitude and longitude lines (graticules), select Latitude / Longitude. The coordinates print around the perimeter of the map image.
-
Map Scale: Select the scale to use for the print output. By default, the print is generated at the current scale. The Current Extent option calculates the scale necessary to fit the current extent into the Map control. If you have configured map scales, the configured scales also show in the drop-down list.
-
Run-Time Inputs: If the template contains controls that take inputs at run time, enter the text for each input. The text will be included in the print output.
-
-
Select the area to print:
-
Desktop or Tablet Interface: In the Desktop or Tablet interface, adjust the position of the map under the overlay to indicate the area to print. Clearing the Lock print preview with map checkbox allows the map to move independently of the overlay.
-
Handheld Interface: In the handheld interface, pan and zoom the map to center the area of interest in the map viewport and then click Center print here.
-
-
Click Print to submit the print request to VertiGIS Studio Printing.
-
When the Print Map panel indicates that the print is ready, click Open File to view the PDF.
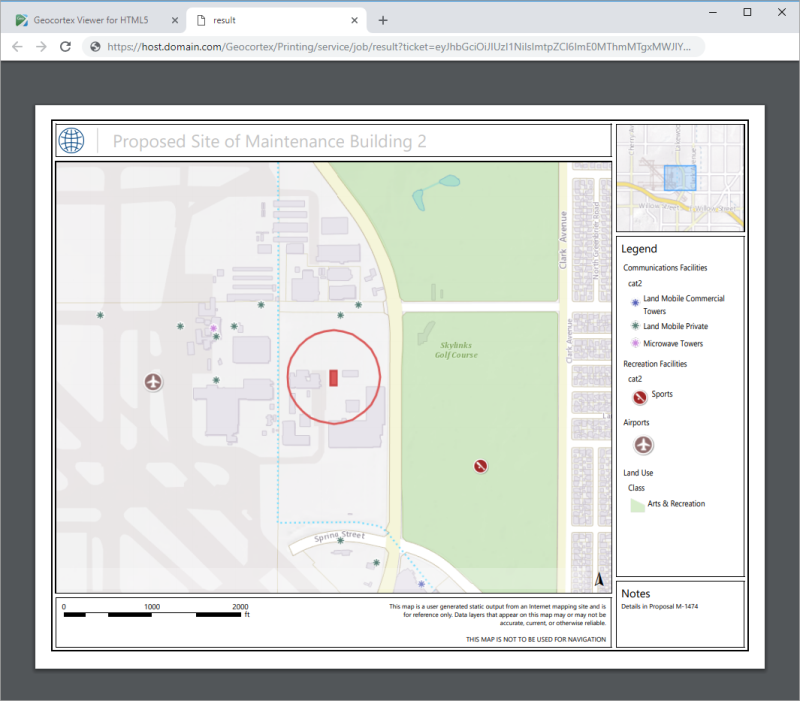
Print output, showing the user's markup
For more information about printing in the Geocortex Viewer for HTML5, see Printing Module.