Configure a Query
To generate a report that includes data, VertiGIS Studio Reporting queries the report's data sources for the data. In the simplest case, a report includes data from a single table in a data source. This requires a single query. In more complex cases, a report may include data from multiple tables in the same or different data sources. This requires multiple queries, one for each table.
Configuring a query can occur in several steps. At the very least, you must:
-
Add a data source to the report
This creates the query. In this step, you specify which fields you want the query to return so that you can include those fields in the report. If you select an entire table, then the query will return all the fields. You can modify the fields later if necessary.
By default, a query returns all the records in the data source. In other words, the query is not filtered. You can restrict which records a query gets as follows:
-
Add filter conditions to the query
Filter conditions restrict the records returned by the query. For example, you could filter for records in which the value of the
POPULATIONfield is greater than 100 000 and less than 500 000.Another method to restrict the records returned by a query is to configure the report to take inputs. To do this:
-
Report parameters are input parameters. You can use a report parameter to pass ArcGIS feature IDs into a report at run time.
-
Add a filter condition for the report inputs
In order for a report parameter to affect which records are returned by the query, you must bind the report parameter to a query parameter in a filter condition.
For more information about report inputs, see Use the Current Features as Report Inputs.
If you know in advance that you want a report to take inputs, you can optimize the steps shown above as follows:
- Add the data source.
- Configure the report parameter.
- Add all the filters conditions at once.
Filter Conditions
Filter conditions are Expressions that restrict the records that are returned by a query. They do this by comparing the value of a particular field in the table that is being queried to some value. The value that the field is compared to can be:
-
Value: A literal value, like
'Clarke'or152. -
Property: The value of a field, for example,
[Waterways.Name]. -
Parameter: The value of a query parameter that is calculated when the report runs. This option is used for reports that take inputs. See Use the Current Features as Report Inputs.
To define filter conditions on a query , you use the Filter Editor. There are two ways to configure a filter expression using the Filter Editor:
-
Default Mode: The default mode allows you to define the filter expression as a hierarchy of conditions grouped by operators. The Filter Editor offers auto complete suggestions so you can select fields, properties, and query parameters, instead of having to type them in.
Initially, the expression consists of a single operator:
 . Hovering the pointer to the right of the operator shows the plus icon
  that you click to add groups (operators) and conditions.
Example of an operator that groups three conditions
-
Advanced Mode: Advanced Mode allows you to type in the filter expression. To show the editing area for Advanced Mode, select the Advanced Mode checkbox.
The syntax to use a field in an expression is
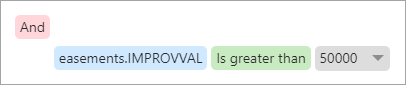
[table.field]. Some examples of query filters are:[Counties.POPULATION] > 100000 And [Counties.POPULATION] < 500000
[states.POP2000] > [states.POP2007]
[Waterways.Name] = 'Nile'
You can use the
==operator instead of the=operator:[Waterways.Name] == 'Nile'
Open the Filter Editor
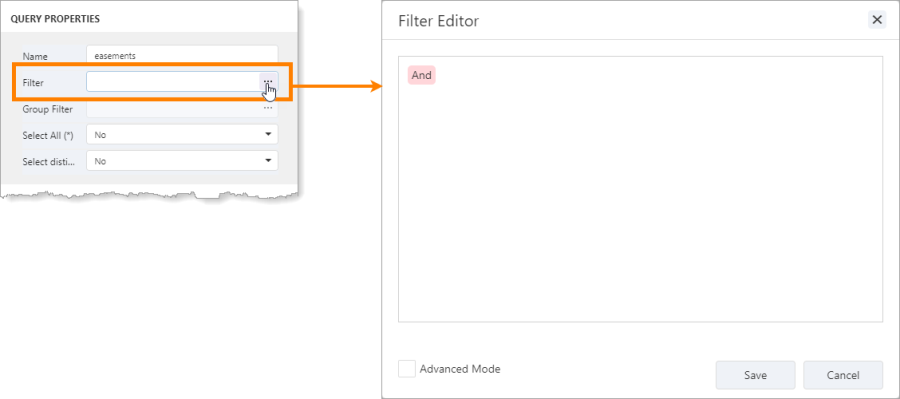
Open the Filter Editor from the Query Properties panel in the Query Builder
To open the Filter Editor:
-
In the Field List
 , expand the data source.
 -
Click the table to show the management buttons.
-
Click Edit Query
 to open the Data Source Wizard.
 -
Click Run Query Builder.
-
In the Query Properties panel, click the
 icon in the Filter box.
The Filter Editor opens.
Add a Data Source to a Report
Use the Data Source Wizard to add a configured data source and create a query that returns the specified fields when you run the report. You can modify the query later to return different fields if necessary.
To add an ArcGIS or SQL data source to a report:
-
Click Add Data Source
 to open the Data Source Wizard.
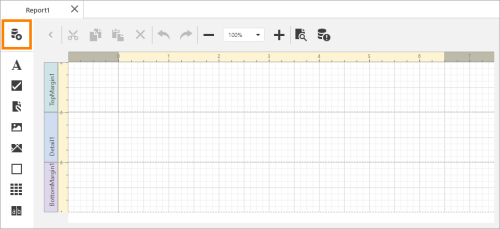
Location of the Add Data Source button
-
Select ArcGIS and SQL as the data source type and click Next.
-
Select the data connection from the list of configured data sources.
-
Expand Tables to show the tables in the data connection.
If the data source is a map service or feature service, the service's layer and tables are listed under Tables.
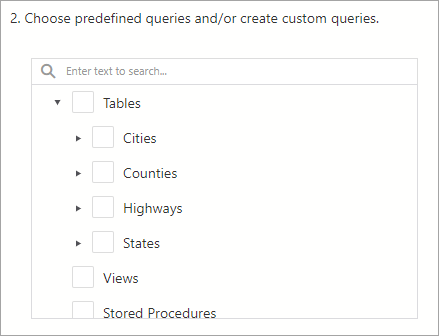
Example of a data connection with four tables
-
To show the fields in a table, expand the table.
If the data source is a map service or feature service, the fields are feature attributes.
-
Select the checkbox for each field that you want to include in the query when you run the report.
-
Click Finish to close the wizard.
-
To verify that the data source has been added to the report, open the Field List
, expand the data source, and expand the table.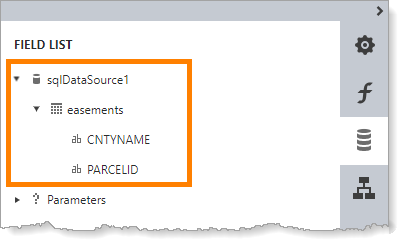
Data source in the Field List
To add a JSON data source to a report:
-
Click Add Data Source
to open the Data Source Wizard.
Location of the Add Data Source button
-
Select JSON as the data source type and click Next.
-
Select the data connection from the list of configured data sources.
-
Expand root to show the features in the data connection.
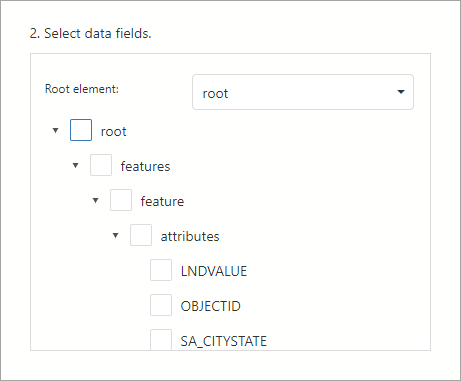
Select the checkbox for each feature that you want to include in the query when you run the report.
-
Click Finish to close the wizard.
-
To verify that the data source has been added to the report, open the Field List
, expand the data source, and expand the features.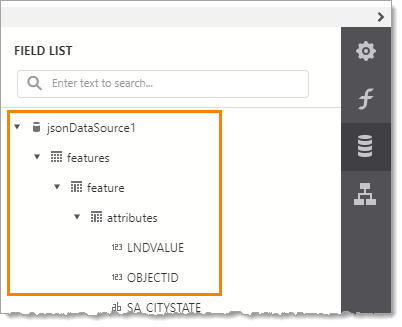
JSON data source in the Field List
Add Filter Conditions to a Query
To add filter conditions to a query:
-
In the Field List
, expand the data source. -
Click the table to show the management buttons.
-
Click Edit Query
to open the SQL Data Source Wizard. -
Click Run Query Builder.
-
In the Query Properties panel, click the
icon in the Filter box to open the Filter Editor. -
Add a condition using the desired mode:
-
Default Mode:
-
Click the plus icon beside the And operator and select Add condition.
New condition, ready to be configured
-
Click the blue box, expand the table, and select the field that you want to use as the condition's first term.
-
Click the green box and select the operator for the condition.
-
To compare the field value to a literal value, type the value in the gray box.
To compare the field value to another field's value, click the arrow
 in the gray box, select Property, and select the field.
 -
Click away from the condition.
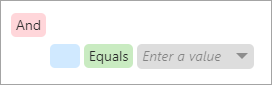
The filter expression looks similar to this in the default mode:
Example of a condition that compares to a literal value
-
-
Advanced Mode:
-
Select the Advanced Mode checkbox.
-
Type the filter condition in the box.
The filter expression looks similar to this in the advanced mode:

-
-
-
Repeat the previous step to add as many conditions as you want.
-
Click Save.
The filter expression appears in the Filter box in the Query Properties panel.
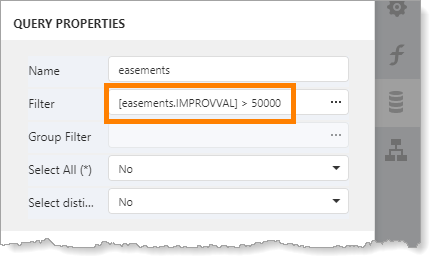
-
Click OK to close the Query Builder.
-
Click Finish to close the SQL Data Source Wizard.
Modify a Query to Return Different Fields
To modify a query to return different fields:
-
In the Field List
, expand the data source. -
Click the table to show the management buttons.
-
Click Edit query
.The SQL Data Source Wizard opens.
-
Click Run Query Builder.
The Query Builder opens. The table is shown at the left of the Query Builder.
-
Select the checkboxes for the fields that you want the query to return. Clear the checkboxes for the fields that you don't want the query to return.
-
Click OK to close the Query Builder.
-
Click Finish to close the SQL Data Source Wizard.
Modify a Report to Use a Different Table in the Same Data Source
This procedure shows you how to change a report to use a different table within the same data source. To do this, you add the new table to the report and then remove the original data source. If the new fields have different names than the original fields, you will have to update the report's layout.
To modify a report to use a different table in the same data source:
-
Add the new table:
-
In the Field List
, expand the data source.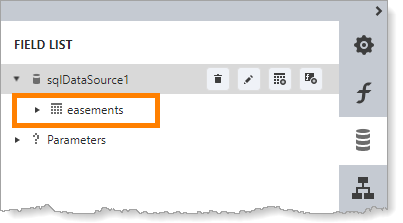
Data source with one table called easements
-
Click the data source to show the management buttons.
-
Click Add query
 to open the SQL Data Source wizard.
 -
Click Run Query Builder to open the Query Builder.
-
Drag the table you want to query from Available Tables and Views and drop it in Query Builder.
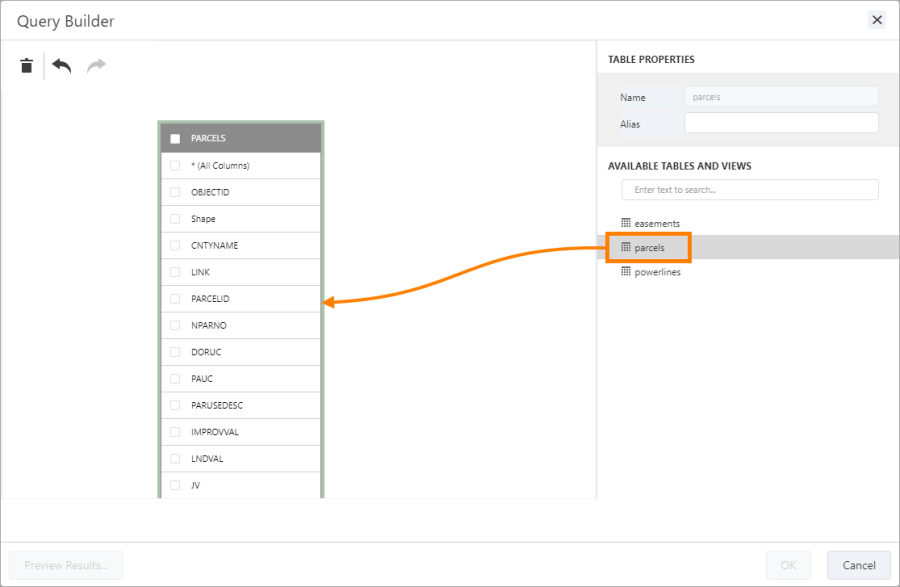
Add the new table
-
Select the checkboxes for the fields that you want returned in the query.
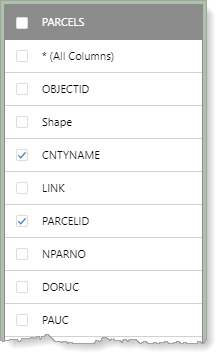
Fields to return in the query
-
Click OK to close Query Builder.
-
Click Finish to close the SQL Data Source Wizard.
The data source now has two tables.
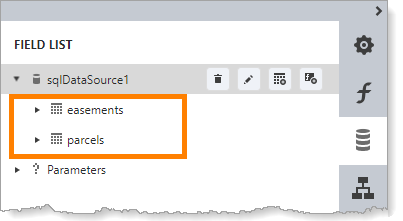
Data source with two tables
-
-
If you want, configure filter conditions on the query. See Add Filter Conditions to a Query.
-
Update the fields in the report's layout, if the field names are different.
-
Configure the report to use the new table:
-
Click Properties
 to open the Properties panel.
 -
Select the report (XtraReport) from the Properties drop-down list.
-
Expand Data and set Data Member to the new table.
The Data Member property appears in both Data and Actions. You can set the property in either location.
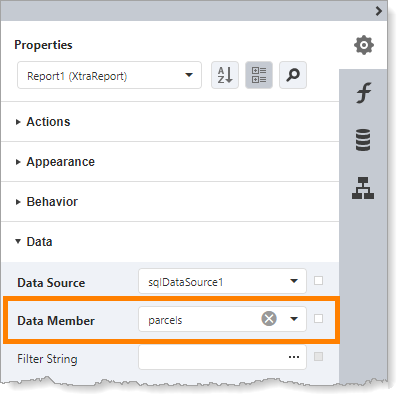
Data Member configured to use the new table
-
-
Remove the original table:
-
In the Field List
, expand the data source if necessary. -
Click the original table to show the management buttons.
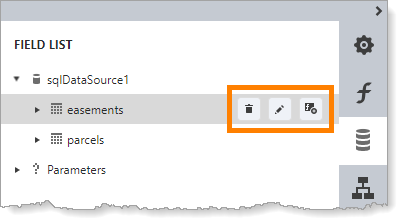
Management buttons for the original table
-
Click Remove query
 to remove the table.
-
-
Press Ctrl+S to save the report.
-
To verify the report, preview it
 .
.
Modify a Report to Use a Different Data Source
This procedure shows you how to change a report to use a different data source. To do this, you add the new data source to the report, configure it, and then remove the original data source. If the fields in the new data source have different names than the original fields, you will have to update the report's layout.
To modify a report to use a different data source:
-
Configure the connection information for the new data source, if necessary. See Configure a Data Source.
-
Add the new data source to the report. See Add a Data Source to a Report.
-
If you want, configure filter conditions on the query. See Add Filter Conditions to a Query.
-
Update the fields in the layout, if the field names are different.
-
Remove the original data source:
-
In the Field List
, expand the data source. -
Click the original data source to show the management buttons.
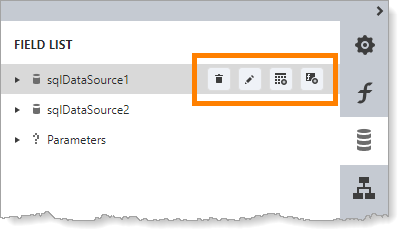
Management buttons for the original data source
-
Click Remove Data Source
.
-
-
Press Ctrl+S to save the report.
-
To verify the report, preview it
.