This procedure is only possible if you have saved the app at least once.
To configure sharing permissions:
1.In the taskbar, click Deploy.
The Deploy panel appears.
2.Beside the deployment stage for which you want to change sharing permissions, click the three-dot menu ![]() and Sharing Permissions.
and Sharing Permissions.
You can only configure sharing permissions if the deployment stage has been deployed. For example, you must deploy to the Production stage before you can configure its sharing permissions.
The Sharing Permissions window opens.
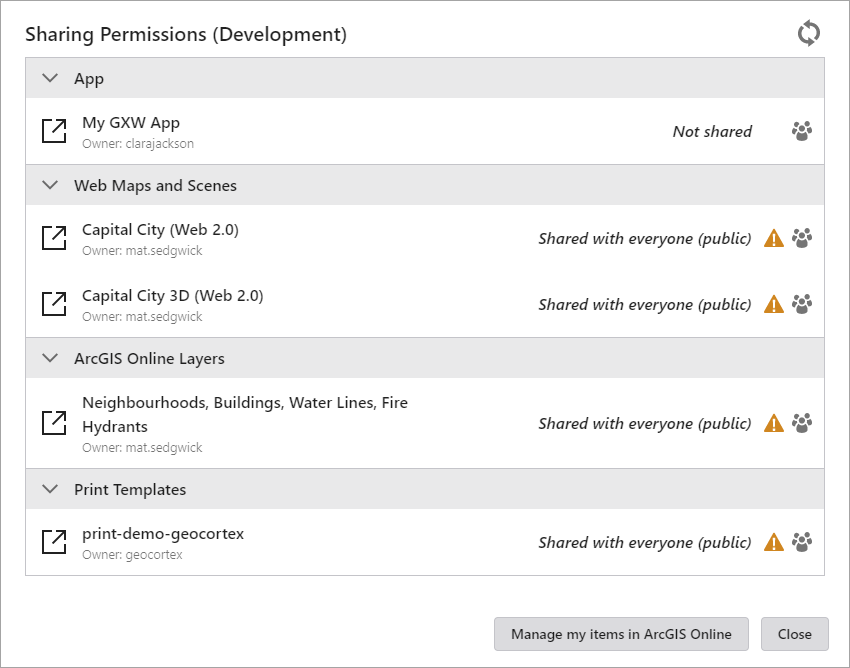
The ![]() icon appears beside items you do not own. To see the groups with which an item is shared, click the Shared Groups button
icon appears beside items you do not own. To see the groups with which an item is shared, click the Shared Groups button ![]() .
.
You cannot use this method to change the permissions of layers that are not managed by an ArcGIS portal.
Secured workflows cannot be viewed or modified.
3.Click the item or items for which you want to change sharing permissions.
The item or items open in ArcGIS Online.
To manually manage your items in ArcGIS Online, click Manage my items in ArcGIS Online.
4.In the panel on the right, click Share.
The Share window appears.
5.Set the sharing permissions you want for the item. You can set the sharing level as:
•Owner
•Organization
•Everyone (public)
6.You can also share to predefined Groups.
Sharing permissions are applied instantly even if you do not save the app.
For more information, see Share items.
7.Verify the new sharing permissions by clicking the Refresh view button ![]() .
.