The Guided Add Layer from File command provides you with an interface to help you upload layer data from an external file. This guided approach is particularly helpful when retrieving data that does not adhere to the required input file format. The interface automatically detects and populates the file data so you can verify the source of the information.
Before you begin, check the Data Requirements for the file you are using to upload the layer data.
Although the interface may resemble a wizard, it is essentially a series of the following micro-interfaces:
•Upload Settings
•Layer Settings
•Edit Symbol
You can use these micro-interfaces independently and choose which to include in the guided interaction for your user. For example, if you do not want to include the step for editing the symbology, you can remove it from the command chain (Layer List > Layer Actions > Guided Add Layer from File > Edit Custom Command).
For our example in the procedure below, we configure the Guided Add Layer from File command to appear in our Layer List so we can upload the Buildings-2000.csv file.
To add layer data via the Guided Add Layer from File command:
1.In the Layer List component, configure the Layer Actions to include the Guided Add Layer from File menu item.
2.Navigate to the Layers tab, click the three-dot menu, and select Guided Add Layer from File.
A window appears for you to either drag and drop a file or click Upload to navigate to the file in Windows Explorer. In our example, we upload the Buildings-2000.csv file.
Supported file types are CSV, Excel, and shapefiles, in zip files or folders.
3.Click OK.
The Upload Settings window opens, auto-populated with the file data.
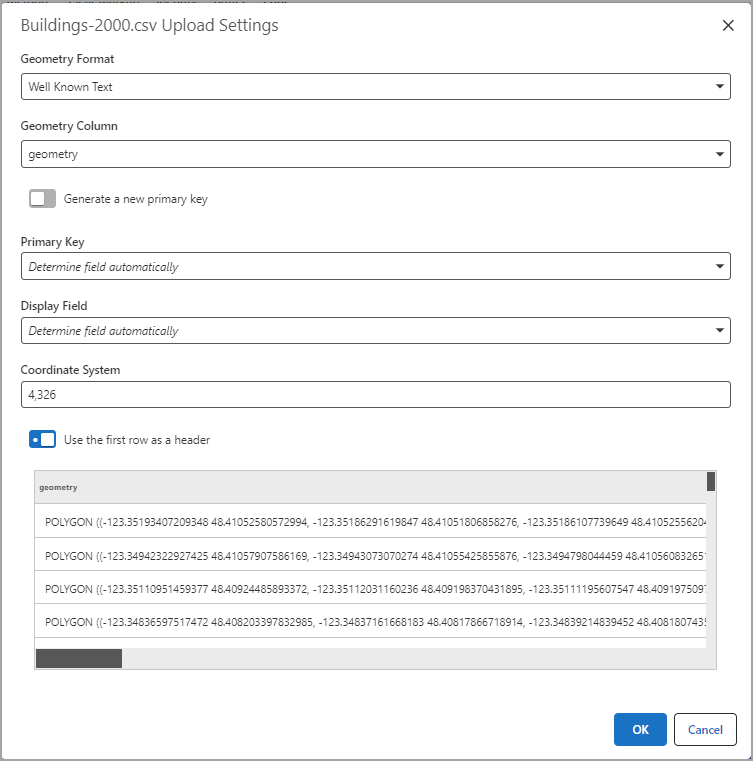
4.Review the fields for accuracy. You can leave most fields as the default, but can make changes if something is incorrect.
5.Click OK.
The Layer Settings window opens.
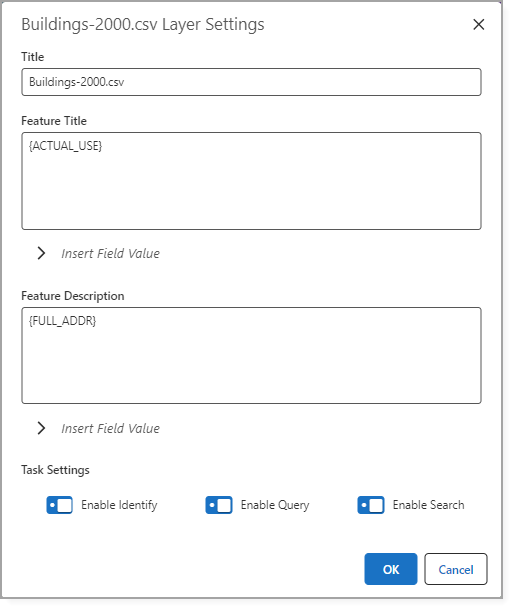
6.Review the fields for accuracy. You can leave most fields as the default, but can make changes if something is incorrect.
7.Click OK.
The Edit Symbol window opens.
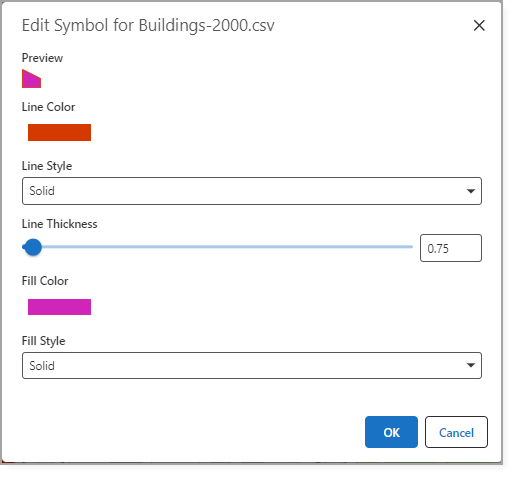
8.Select the colors you want to represent your layer data. In our example, we choose a solid red line and a solid pink fill to represent the buildings.
9.Click OK.
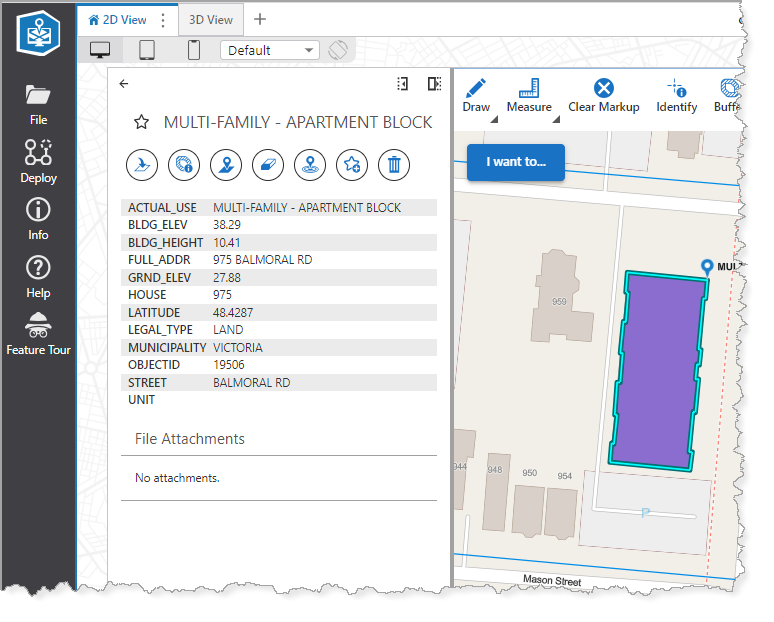
The new layer is added to the Layers list. When you select a feature on the map, you can also see its details imported from the file.
To edit the symbology, you can configure the layer's three-dot menu to include the Layer Style command. See Symbology for more information.