Some menus have a context in which they are used. You can pass the context of the menu as the value to a workflow input. For example, a menu item in the Results List passes the results as the input to a workflow.
The following table indicates the types of context of each kind of menu.
Component Menu Types and Contexts
Component Menu |
Type |
Context |
|---|---|---|
I Want To menu |
null |
None |
Map > Events > Map Initialized |
null |
None |
Launch Link Workflows |
null |
None |
Toolbar |
null |
None |
User |
Feature[] |
None |
Result Details* |
Feature[] |
An array of Feature objects representing the result in the Result Details panel. These are not Esri Graphics. To convert them, see Convert Features to Esri Graphics. |
Result Summary * |
Feature[] |
An array of Feature objects representing the result in the Result Details panel. These are not Esri Graphics. To convert them, see Convert Features to Esri Graphics. |
Results List * |
Feature[] |
An array of Feature objects representing the results in the search results. These are not Esri Graphics. To convert them, see Convert Features to Esri Graphics. |
Results Table * |
Feature[] |
An array of Feature objects representing the results in the search results. These are not Esri Graphics. To convert them, see Convert Features to Esri Graphics. |
Map > (Specific layer) * |
Feature[] |
An array of Feature objects representing the results from the specified layer in the search results. These are not Esri Graphics. To convert them, see Convert Features to Esri Graphics. |
Map (Context Menu) |
Geometry |
The Esri Geometry object representing the point on the map where the user activates the context menu. |
Layer List |
Layer |
A Layer object representing layer from which the menu was activated in the layer list. |
* The Result Details, Result Summary, Results List, and Results Table component menus all share the same menu items. The Map > (Specific layer) component menu also shares the same menu items for results from the specified layer. |
||
To use the menu context as a workflow input:
This procedure adds a menu item to the Results List menu that runs an existing workflow with the results in the Results List as its input.
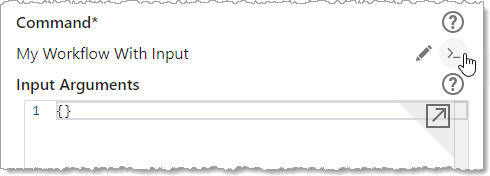
1.Click Results in the Components panel.
2.Click +Add Menu Item.
A window appears that lets you select a command, workflow, or report.
3.Click the Workflows tab.
4.Select a workflow.
By default, the title of the workflow is also the title of the menu item.
If you can't find the workflow, try using the Search box or, in the Filter by menu, select one of the other options.
5.Click Select.
6.In the Results panel, click the new menu item to edit it.
7.Navigate to the command and click Customize. See Modify a Command for more information.
8.Find the code box below the command.
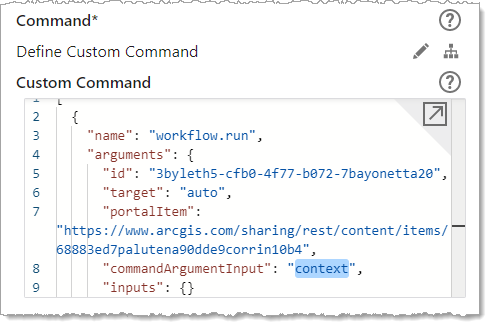
9.Set the commandArgumentInput property to the name of the workflow input you want to pass the menu's context to. For example, MyFeaturesWorkflowInput. By default, this property is set to context, which only works if that is the name of your workflow input.
For a workflow to properly receive information from a component menu in VertiGIS Studio Web, the data type of the workflow's input must match the data type of the menu's context.
For example, if you want a workflow to use the features from a "Results List", the workflow needs to be set up to accept an array of "Feature" objects, because that is the data type of the context provided by the Results List menu. See Component Menu Types and Contexts.
When a context is passed into a workflow, the context is passed in via the inputs object under the value specified by commandArgumentInput. For example, if the value of commandArgumentInput is "map-context", then the workflow input arguments will contain a property called map-context whose value is the context.
The workflow menu item appears in the Results List menu.

10.Save the app.
If you want the workflow to be available to other users, see Configure Sharing Permissions.
Convert Features to Esri Graphics
The Feature objects passed in the context are specific to VertiGIS Studio Web and Workflow and are not the same as Esri's Graphic objects. All Workflow activities that use features expect Esri Graphic objects as Features. You can use the results.to-graphics operation within a Run Operation activity to convert the array of VertiGIS Feature objects into an array of Esri Graphic objects. This will make the features compatible with a wider range of workflow activities that expect Esri Graphics as input.