Description
Sets the rendering options of an ArcGIS image layer in the currently selected map.
Inputs
Layer Id |
Required The ID of the imagery layer to update. If the workflow will run in VertiGIS Studio Web, VertiGIS Studio Mobile, or Web AppBuilder, you can either set Layer Id to the ID from the layer object or to the layer name from the web map of the currently selected map. To run the workflow in the Geocortex Viewer for HTML5, set Layer Id to the map service ID. Get the map service ID from Geocortex Essentials Manager or from the Geocortex Essentials Sites Directory. |
Mosaic Rule |
Optional Type: esri.MosaicRule (3.x, 4.x)* | Object The mosaic rule to apply to the imagery layer. |
Rendering Rule |
Optional Type: esri.RasterFunction (3.x, 4.x)* | Object The raster function used to render the imagery layer. |
Pixel Filter |
Optional Type: Function The filter used to process the pixel data of the imagery layer. |
* VertiGIS Studio Workflow uses different versions of Esri's ArcGIS API for JavaScript depending on the type of host application. See Underlying Technologies for information.
Outputs
mosaicRule |
Type: esri.MosaicRule (3.x, 4.x)* The mosaic rule used. |
renderingRule |
Type: esri.RasterFunction (3.x, 4.x)* The rendering rule used. |
pixelFilter |
Type: Function The pixel function used. |
* VertiGIS Studio Workflow uses different versions of Esri's ArcGIS API for JavaScript depending on the type of host application. See Underlying Technologies for information.
Properties
For information about the ID, Display Name, and Description properties, see Properties Common to all Activities.
Connectivity Requirements
This activity works when the device has intermittent connectivity to the network.
Example
This example presents the user with a drop-down list of available raster functions and applies the selected rendering rule to an imagery layer each time the form is submitted.
The imagery layer used in this example is the CharlotteLAS image service. To find which raster functions your image service supports, check the rasterFunctionInfos property in the service's REST endpoint.
For this example, use https://sampleserver6.arcgisonline.com/arcgis/rest/services/CharlotteLAS/ImageServer
Set Up the Form
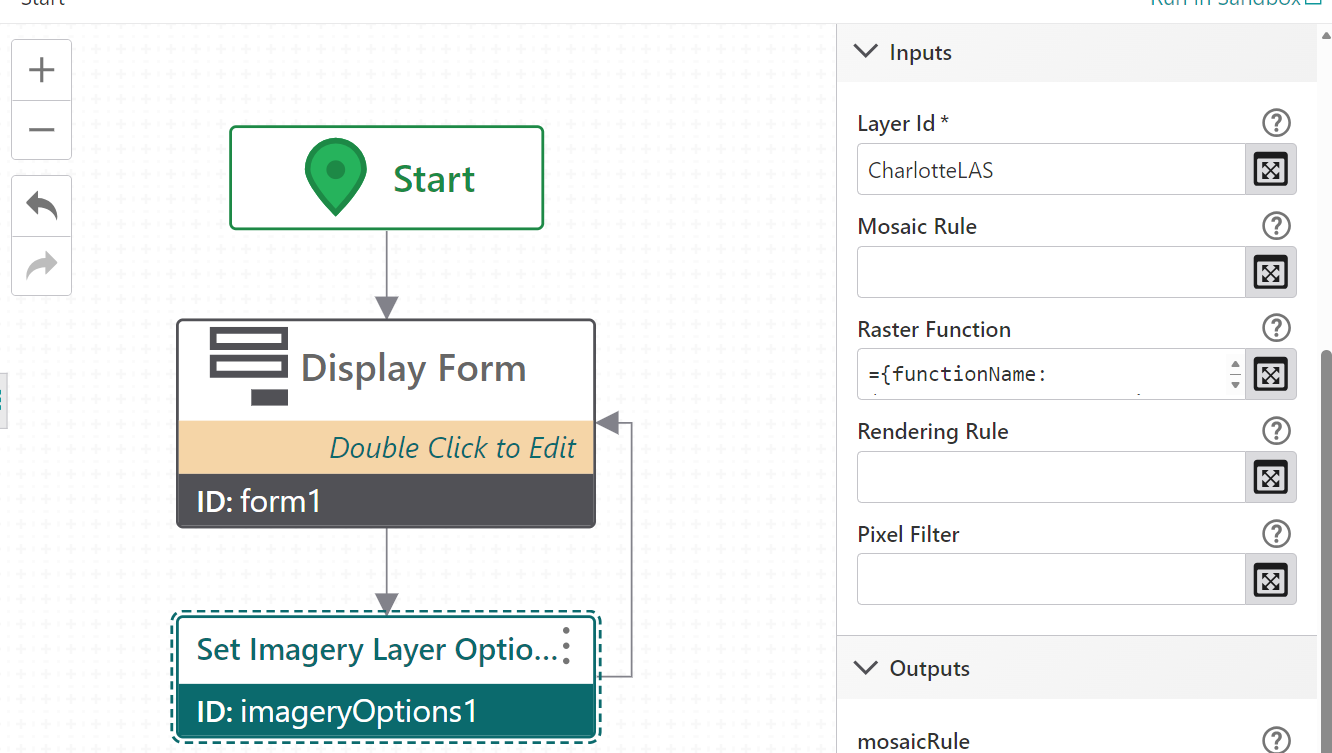
1.Add a Display Form activity after the Start activity.
2.Open the form editor.
3.Add a Drop Down List element and set its Title to Pick a rendering rule.
4.Add items to the drop-down list, one per available raster function on the image service. Set each item's Label and Value to the raster function name exactly as it appears in the service.
oNone
oRFTAspectColor
oRFTHillshade
oRFTShadedReliefElevationColorRamp
Apply the Rendering Rule
1.Add a Set Imagery Layer Options activity after Display Form.
2.Set Layer Id to the name of the imagery layer as it appears in the web map. In this case, it is "CharlotteLAS".
3.Set Rendering Rule to:
={ functionName: $form1.state.dropDownList1.value }
This constructs a raster function object using the value selected in the drop-down list.
4.Connect the output of imageryOptions1 back to the input of form1.
This creates a loop so the user can pick a different rendering rule and reapply it without restarting the workflow.
Test the Workflow
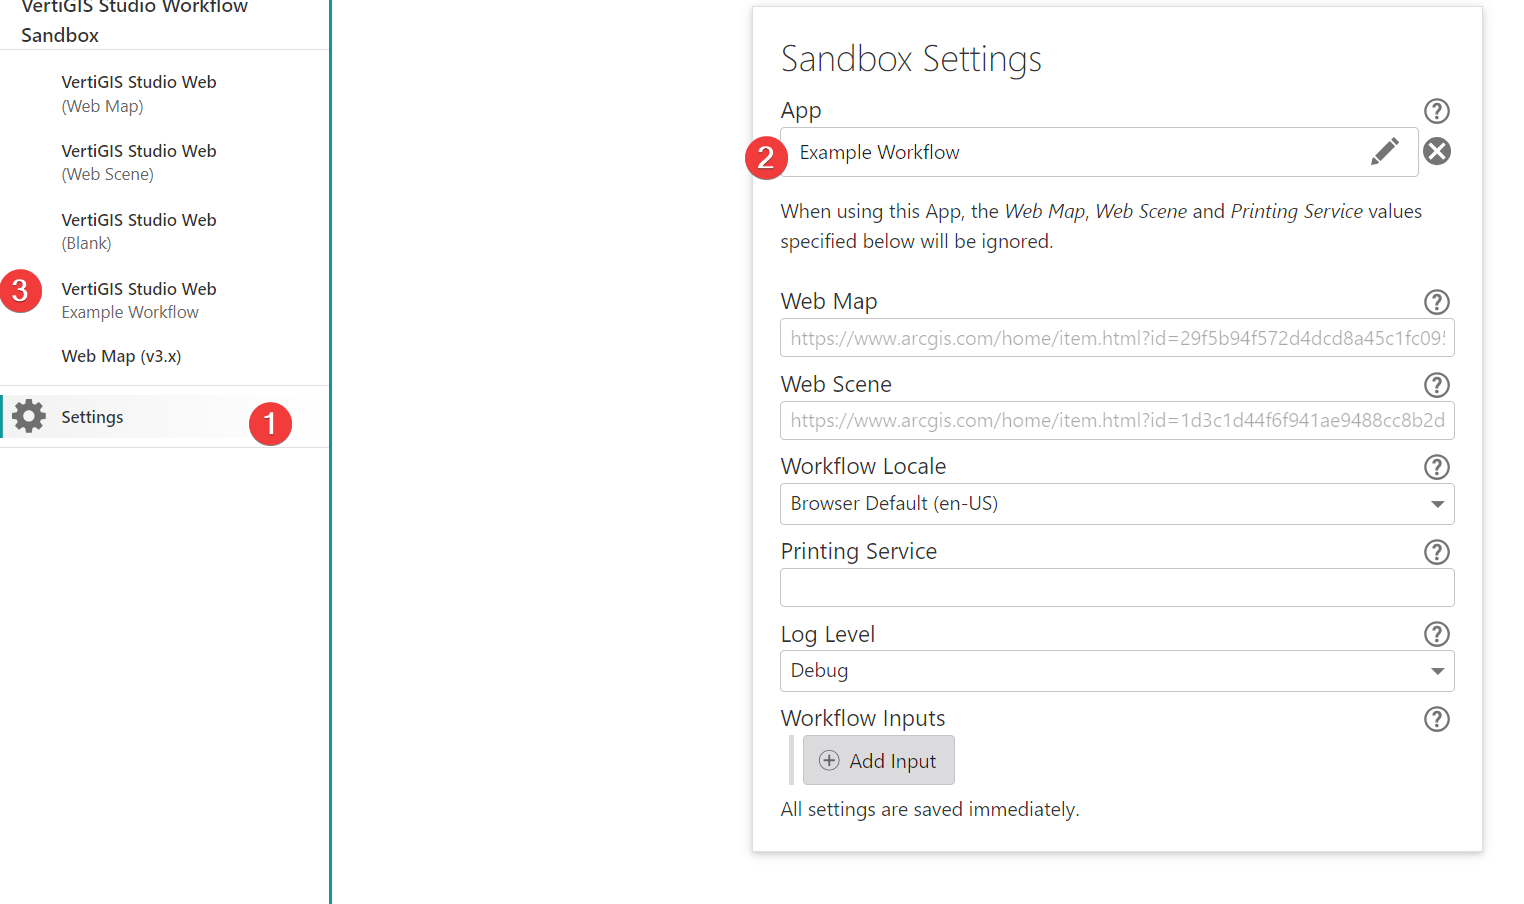
1.Select Run in Sandbox.
2.Select the custom VertiGIS Studio Web option from the sidebar - the app to which you can add the layer.
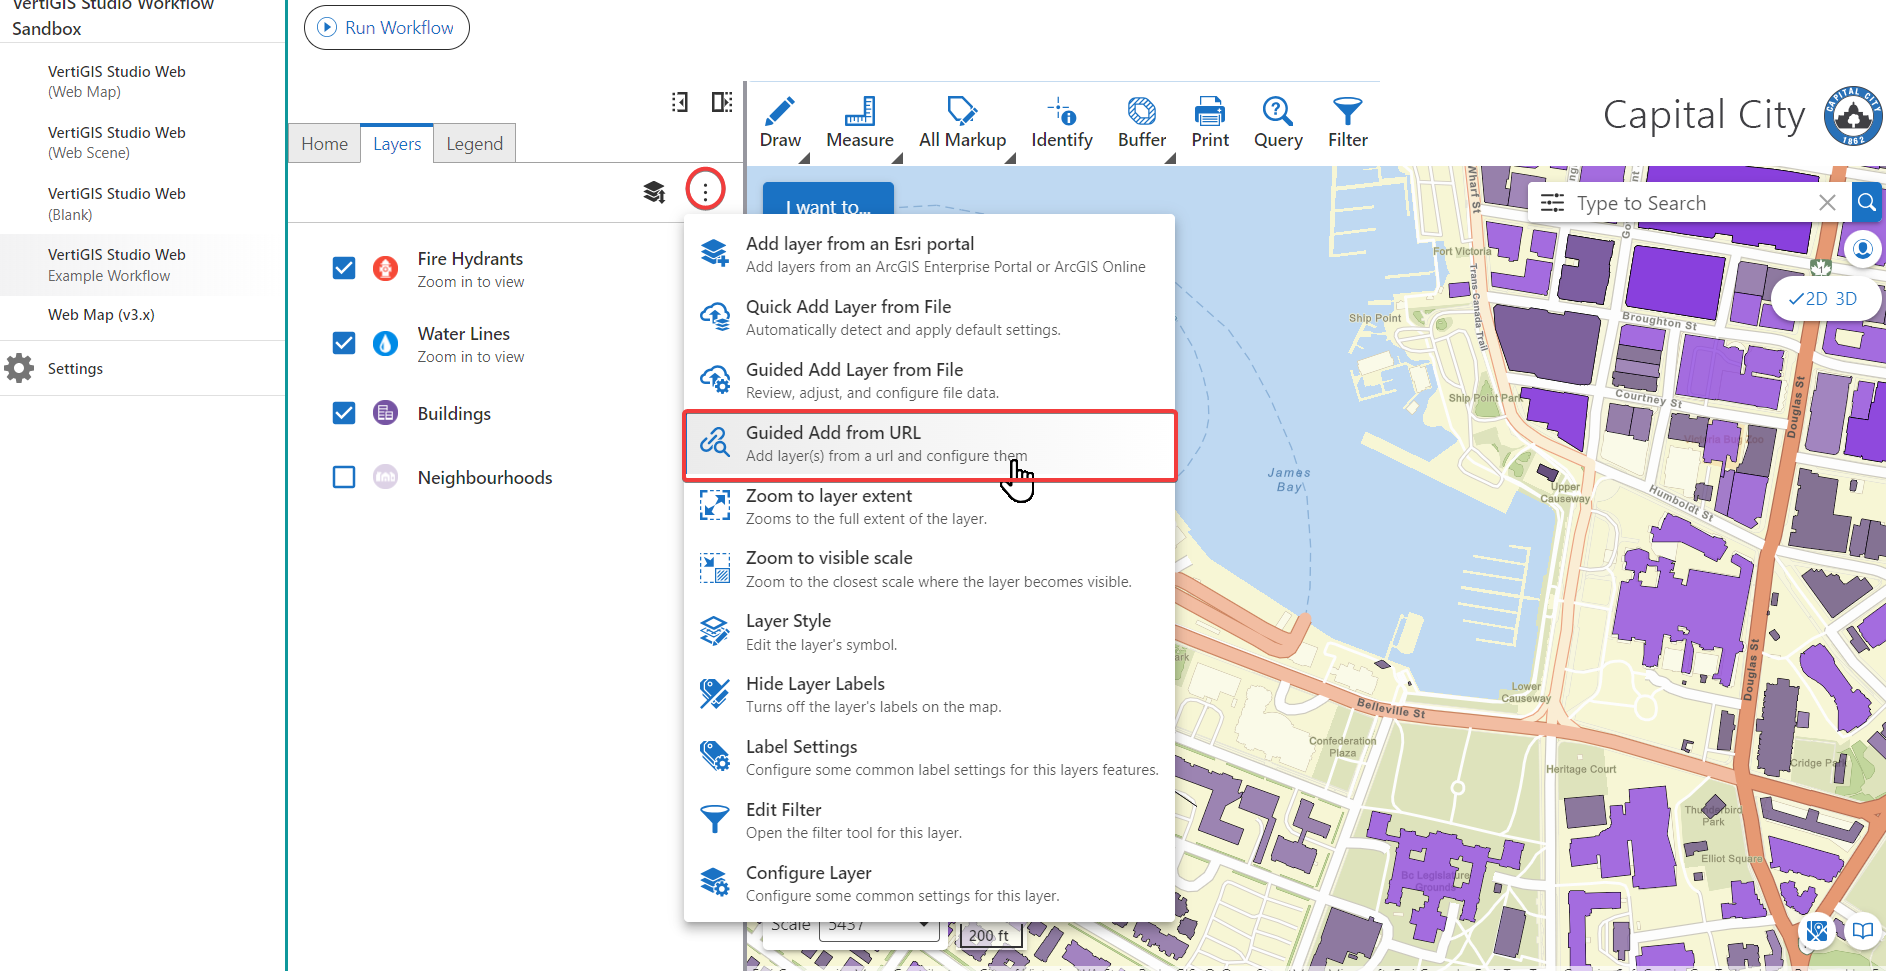
3.Go to Layers > Context Menu > Guided Add From URL.
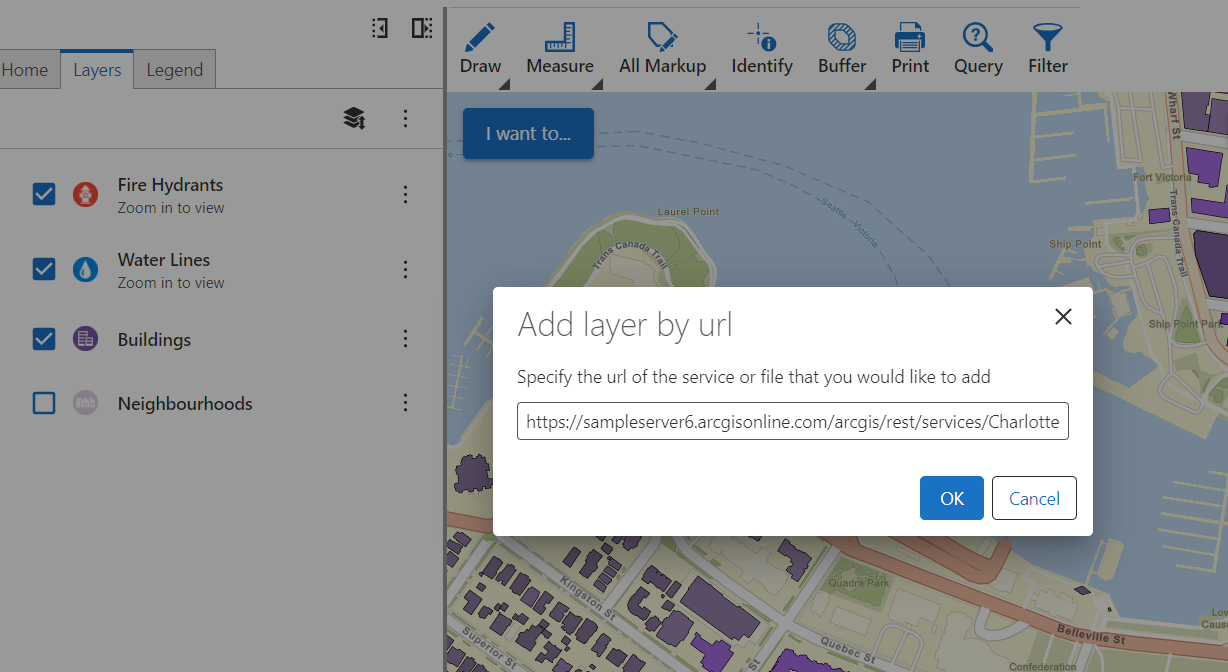
4.Add the Layer without modifying its settings. For this example, use https://sampleserver6.arcgisonline.com/arcgis/rest/services/CharlotteLAS/ImageServer
5.From the context menu of the CharlotteLAS layer, select Zoom to Layer Extent.
6.Select Run Workflow.
7.The form appears with the drop-down list. Select a rendering rule and click Submit.
The imagery layer updates to display the selected raster function.