Run Workflows in the Sandbox
The Sandbox is VertiGIS Studio Workflow's built-in test environment. It is used to run workflows from the Designer when the workflow is being created.
Typically, workflows are created in stages to make authoring easier. The Sandbox plays an important role in this process:
- Add activities to perform one part of the workflow's overall task.
- Test the workflow by running it in the Sandbox. Use your browser's console to verify values within the workflow.
- Make any necessary corrections and re-run the workflow in the Sandbox. Repeat this step until the workflow works the way you want.
- Repeat these steps until the workflow is complete.
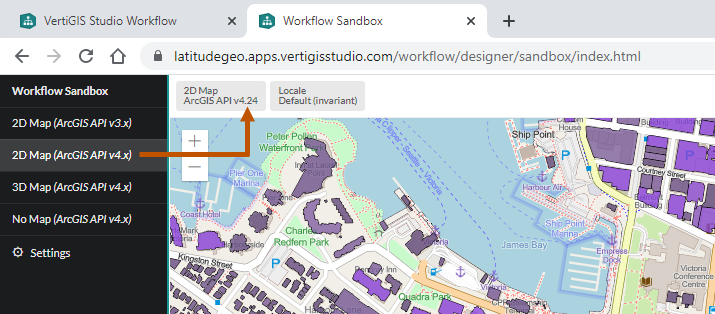
To open the Sandbox, click Info in Workflow Designer's sidebar, and then click Run in Sandbox. The Sandbox opens in a new browser tab.
Sandbox Environments
The Sandbox allows you to select the environment you want to use to run the workflow:
-
2D Map (ArcGIS API v3.x): This option runs the workflow using a 2-dimensional map and version 3 of the ArcGIS API for JavaScript. This is the default option.
-
2D Map (ArcGIS API v4.x): This option runs the workflow using a 2-dimensional map and version 4 of the ArcGIS API for JavaScript.
-
3D Map (ArcGIS API v4.x): This option runs the workflow using a 3-dimensional map and version 4 of the ArcGIS API for JavaScript.
-
No Map (ArcGIS API v4.x): This option runs the workflow without a map using version 4 of the ArcGIS API for JavaScript. This option is useful for testing workflows that don't interact with the map.
Select an environment in the Sandbox to see the exact version of the ArcGIS API for JavaScript that the Sandbox uses.
When you run a workflow in the Sandbox, you want to choose the environment that best matches the environment in which the production workflow will run. The table below outlines which Sandbox environment to use for different production environments. For example, if the workflow uses a 2D map and will be hosted in VertiGIS Studio Web, use the 2D Map (ArcGIS API v4.x) option in the Sandbox.
Recommended Sandbox environments
|
Production Environment |
Map |
Sandbox Environment |
Notes |
|---|---|---|---|
|
VertiGIS Studio Web |
2D 3D |
2D Map (ArcGIS API v4.x) 3D Map (ArcGIS API v4.x) |
|
|
VertiGIS Studio Mobile
|
2D |
2D Map (ArcGIS API v4.x) |
VertiGIS Studio Mobile actually uses the ArcGIS Runtime API for .NET. The 2D Map (ArcGIS API v4.x) environment is the closest match in the Sandbox. |
|
Geocortex Viewer for HTML5
|
2D |
2D Map (ArcGIS API v3.x) |
|
|
ArcGIS Web AppBuilder
|
2D 3D |
2D Map (ArcGIS API v3.x) 3D Map (ArcGIS API v4.x) |
|
|
VertiGIS Studio Workflow Server
|
None |
Any |
The Sandbox environment has no effect on server workflows. When you run a server workflow in the Sandbox, the workflow actually runs in VertiGIS Studio Workflow Server. The Sandbox communicates with Workflow Server over the network to run the workflow. |
Sandbox Settings
The Sandbox allows you to configure:
- Custom Maps: You can use a custom web map and/or web scene instead of the Sandbox’s default 2D and 3D maps. See Use a Custom Map in the Sandbox for information.
- Locale: You can specify the language to test your translations. See Configure the Locale in the Sandbox for instructions.
- Values for Workflow Inputs: You can configure test values to use when running workflows that take design-time inputs. See Run a Workflow in the Sandbox for instructions.
To open the Sandbox's settings, click Settings in the Sandbox's sidebar. To exit the settings, click an environment in the sidebar.
Run a Workflow in the Sandbox
The following procedure shows how to run a workflow in the Sandbox. If your workflow takes design-time inputs, make sure you complete the step to configure workflow parameters.
To run a workflow in the Sandbox:
-
Open the workflow in Workflow Designer.
-
Make sure that the tab for the workflow you want to run is selected in Designer.
The Sandbox runs the active workflow. You do not need to save the workflow before you run it.
-
Click Info in the sidebar, and then click Run in Sandbox.
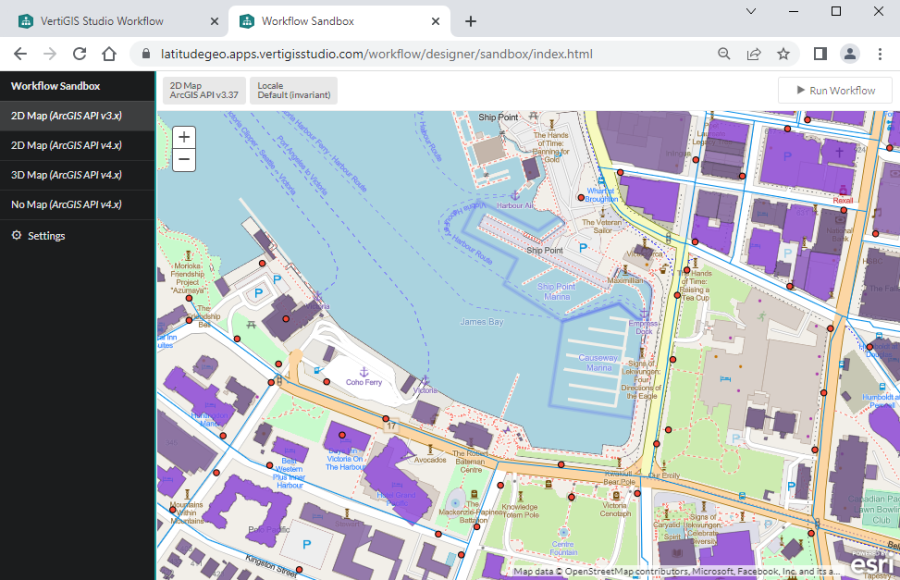
The Sandbox opens in a new browser tab. The first time you run the Sandbox, it shows the default 2D map. See Use a Custom Map in the Sandbox for instructions on configuring the Sandbox to use a custom ArcGIS web map or scene.
Sandbox, showing the default 2D map
-
If the workflow takes design-time inputs, configure values for the workflow to operate on when it runs in the Sandbox:
-
Click Settings in the Sandbox's side panel.
-
Click Add Parameter.
-
In the name box, enter the name of the input, as defined in the workflow.
-
In the value box, enter a valid value for the input.
-
Continue to add parameters until you have added one for each design-time input.
-
Click Save.
-
-
In the sidebar, select the environment that you want the workflow to run in.
If you are prompted to sign in to access the item in ArcGIS, refresh Workflow Designer and sign back in. Return to the Sandbox.
-
Click Run Workflow.
The workflow runs in the Sandbox. You can interact with the workflow the same way an end user would, filling out and submitting forms, interacting with the map, and so on.
Tips for Using the Sandbox
-
General:
-
The Sandbox runs the active workflow. If you have multiple workflows open in the Designer, the Sandbox runs the workflow whose tab is selected.
-
You don't need to re-open the Sandbox from the Info panel every time you want to re-run the workflow. Simply switch to the Workflow Sandbox tab in your browser, cancel the running workflow if necessary, and then click Run Workflow to run the workflow with your latest changes.
-
You can cancel a running workflow in the Sandbox. The Run Workflow button changes to Cancel Workflow when you run the workflow.
-
You only need to set the Sandbox's settings once. The Sandbox will remember your settings across sessions.
-
-
Client Workflows:
-
You don't need to save a client workflow before running it in the Sandbox. The Sandbox always runs the workflow in its current state in Designer.
-
Verbose logging is turned on by default in the Sandbox. This allows you to use your browser's console to help debug client workflows.
-
If you are working on multiple client workflows that take design-time inputs, you can configure values for all the inputs in the Sandbox settings, provided they have unique names. Having "extra" values configured does not affect a running workflow.
-
-
Server Workflows:
-
You must save a server workflow before you can run it in the Sandbox.
-
You cannot use the console to debug server workflows. When a server workflow has a run-time error, the console provides a link to a separate log to help you debug the workflow.
-
Running a client workflow that runs a server workflow not only tests the client workflow, it also tests the server workflow in the context of the client workflow. Use your browser's console to see the inputs that are passed to the server workflow and the outputs that the server workflow returns.
-
Use a Custom Map in the Sandbox
The Sandbox has default maps (2D and 3D) that it uses with running workflows. You can configure the Sandbox to use a custom ArcGIS web map and/or web scene instead of a default map. This is useful for testing workflows that manipulate the map or require the user to interact with the map.
If you configure a custom web map, the Sandbox will use it whenever you run a workflow in one of the Sandbox's 2D environments, 2D Map (ArcGIS API v3.x) or 2D Map (ArcGIS API v4.x).
If you configure a custom web scene, the Sandbox will use it whenever you run a workflow in the 3D environment, 3D Map (ArcGIS API v4.x).
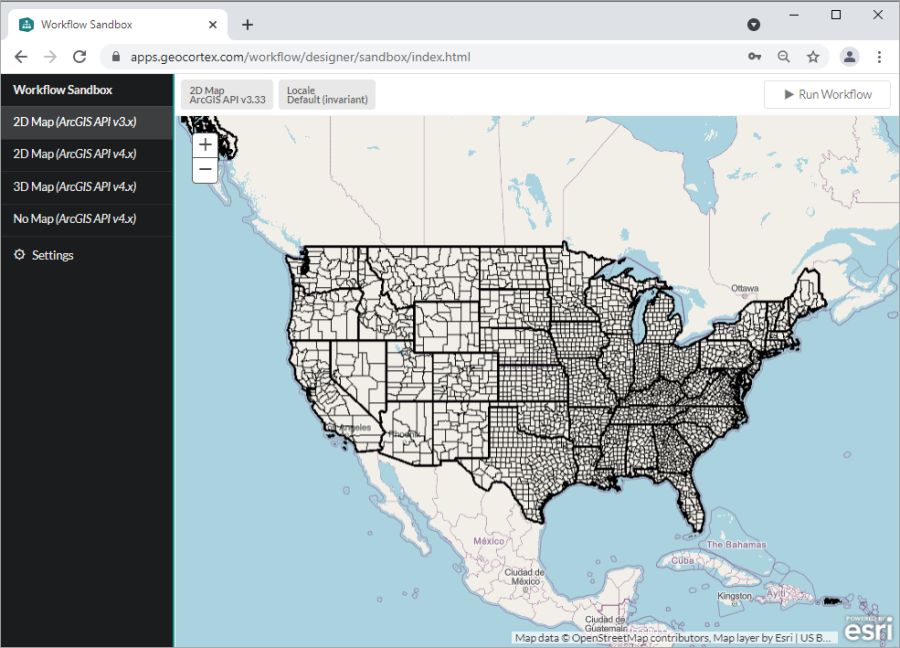
Sandbox with a custom web map
To configure a custom web map or web scene for the Sandbox:
-
Open Workflow Designer.
-
Click Info in the sidebar, and then click Run in Sandbox.
The Sandbox opens in a new browser tab.
-
Click Settings in the Sandbox's side panel.
The Sandbox Settings panel opens.
-
Configure a 2D web map, 3D web scene, or both:
- 2D: To use a custom web map in the Sandbox's 2D environments, enter the URL for the web map's ArcGIS item in the Web Map box.
- 3D: To use a custom web scene in the Sandbox's 3D environment, enter the URL for the web scene's ArcGIS item in the Web Scene box.
-
Click Save.
The Sandbox Settings panel closes.
-
Make sure your custom map(s) load by selecting an environment:
- 2D: If you configured a web map, select one of the 2D environments.
- 3D: If you configured a web scene, select the 3D environment.
Configure the Locale in the Sandbox
The following procedure shows you how to configure the Locale setting in the Sandbox. This allows you to test your translations. For more information, see Translate Workflows.
To configure the locale in the Sandbox:
-
Open the Workflow Sandbox.
-
Click Settings in the Sandbox's side panel.
The Sandbox Settings panel opens.
-
Click in the Workflow Locale box and select from the list of available languages.
-
Click Save to apply the specified language to your workflow translations.
The Locale setting is always visible in the Sandbox so you can see which language is currently configured.
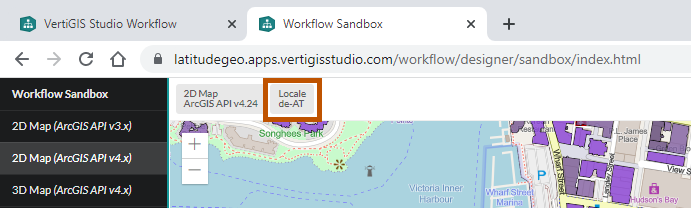
Locale setting displayed in the Sandbox