Translate Workflows
If your user base includes speakers of different languages, you may want to translate your workflows. VertiGIS Studio Workflow's Translation feature enables you to present a single workflow in different languages depending on the user's preference.
When a host application like VertiGIS Studio Web or ArcGIS Web AppBuilder runs, it checks the user's language settings to determine the user's preferred language. Workflows inherit this information from the application and use it to decide which language to use for the workflow. If the workflow is available in the user's preferred language, then the workflow appears in that language.
For example, suppose you have made a workflow available in Spanish and Dutch. A user whose browser is set to Spanish sees the workflow in Spanish. A user whose browser is set to Dutch sees the workflow in Dutch.
Locales
In software, a locale is a set of user preferences that the software applies to the user interface. These preferences can include the language, currency formats, date/time formats, and other things that vary across regions. In the context of translating workflows, it is the language that is relevant.
Locales are specified using codes like "en" (English), "nl" (Dutch), or "pt" (Portuguese). When you translate a workflow, you associate the appropriate code with each translated string. To determine which strings to display at run time, the workflow tries to match the user's preferred locale to the locale code you assigned. If there is a match, then the workflow displays in the user's preferred language. If there is no match, then the locale that you have chosen as the default locale is used.
Variants
Some locales have variants. For example, in addition to English (en), VertiGIS Studio Workflow supports Australian English (en-AU) and British English (en-GB). Translating a workflow into multiple variants allows you to support users of a particular language in different parts of the world.
If the user's locale is set to a variant and the workflow is not available in that variant, the workflow looks for the non-variant version of that locale. For example, if the user's locale is set to Brazilian Portuguese (pt-BR), the workflow first looks to see if you have provided a Brazilian Portuguese translation. If not, then the workflow looks for a Portuguese (pt) translation. If that also fails, then the workflow uses the default locale.
Note that this only works in one direction—a workflow will look for the non-variant version of the user's locale, but a workflow will never look for a variant of the user's locale. For example, if the user's locale is set to Portuguese (pt) and the workflow is available in English (the default locale) and Brazilian Portuguese (pt-BR), the workflow will appear in English, not Brazilian Portuguese.
Text Items
To translate a workflow, you configure text items. Each text item corresponds to a particular fragment of text in the workflow's user interface.
To configure a text item, you configure a translated string for each locale you want to support. For a text item that is associated with an activity, you must also configure the activity to use the text item.
For example, to provide Portuguese and English versions of an alert, you could define a text item called alert-text, configure the strings Este é o texto for Portuguese and This is the text for English, and then use the text item in the Alert activity's Text input.
You can think of a text item as a set of locale-string pairs. For example:
alert-text = {(en, "This is the text"), (pt, "Este é o texto")}
Syntax
To use a text item, you put "@" before the text item's ID. The @ symbol indicates to VertiGIS Studio Workflow that what follows is a text item.
In an activity input, you can use an expression instead of the "@" notation. The general form of the expression is =strings["text-item-id"]. This general form works for all text item IDs. If the ID does not contain any dashes, you can also use the short form: =strings.textItemId.
![]()
Text item ID used in an Alert activity's Text input using the @ notation (left) and using an expression
The "@" notation works in all contexts.
How do I know which strings to translate?
To translate a workflow, you need to translate the strings that could be displayed to the user when the workflow runs. Some of these strings are built into the software for use in system messages. Other strings are associated with activities that interact with the user, like the Alert and Prompt activities. These activities are in the User Interface section of the Toolbox.
![]()
User Interface activities
To translate a workflow, translate the following strings:
-
Built-in Language Strings: Translate the built-in language strings.
-
User Interface Activities: Translate the workflow's User Interface activities:
-
Display Form: Translate the form properties that display text, including the properties of each form element.
-
Other User Interface Activities: Translate the activity inputs that display text.
-
Built-in Language Strings
Built-in language strings are used for system messages, like "Working...", "No data", and "Invalid". You can translate these strings the same way you translate strings associated with activities—by adding them as text items on the Translations panel and assigning them values in different languages.
The table below lists the built-in language strings. To translate these strings, you must use the predefined IDs as the text items' IDs. For example, to translate the common-all string, set the text item's ID to common-all.
If the workflow does not contain any Display Form activities, you do not need to translate the language strings.
|
ID |
Default Value |
|---|---|
|
common-all |
All |
|
common-cancel |
Cancel |
|
common-clear |
Clear |
|
common-color |
Color |
|
common-done |
Done |
|
common-edit |
Edit |
|
common-end |
End |
|
common-none |
None |
|
common-ok |
OK |
|
common-start |
Start |
|
common-to |
to |
|
common-today |
Today |
|
common-undo |
Undo |
|
date-range-picker-end-text |
End Date |
|
date-range-picker-start-text |
Start Date |
|
file-picker-remove-item-label |
Remove file |
|
form-element-status-failure |
Failure |
|
form-element-status-invalid |
Invalid input |
|
form-element-status-missing |
Required |
|
form-element-status-pending |
Working... |
|
form-element-status-trivial |
No data |
|
geometry-picker-remove-item-label |
Remove location |
|
item-picker-hidden-selected-item |
1 hidden item is also selected. |
|
item-picker-hidden-selected-items |
hidden items are also selected. |
|
item-picker-select |
Select |
|
item-picker-select-visible |
Select Visible |
|
sketch-size |
Size |
|
sketch-tool |
Tool |
|
sketch-tool-highlighter |
Highlighter |
|
sketch-tool-pen |
Pen |
Main Steps to Translate a Workflow
The main steps to translate a workflow are as follows:
-
On the Translations panel, add a text item for each user interface string in the workflow.
To open the Translations panel, click Info and then click Translations in Workflow Designer.
-
For each text item:
-
Select Default (invariant) and enter the string in the default language.
-
Select another locale that you want to support and enter the string's translation in the language of the selected locale.
Repeat this step for each additional locale you want to support.
-
-
For each activity and form element that displays text in the running workflow, configure the activity's string inputs or the form element's string properties to use the text items that you configured on the Translations panel.
When you translate a workflow, you might want to do the steps in a different order than the steps given here. You may find it easier to configure the translations as you develop the workflow.
Configure Translations
Configure and Use Text Items
To configure and use a text item:
Step 1: Configure a text item
-
In Workflow Designer, click Info in the sidebar, and then click Translations.
-
Click Add.
A text item with an automatically generated ID is added to the table.
It doesn't matter which locale is selected when you add a text item. Any single text item can have multiple translated strings for different locales defined for it.
-
Change the ID:
-
Click the edit icon
 to make the ID editable.
 -
The ID you choose depends on the type of text item:
-
Built-in Language String: To configure a text item to translate a built-in language string, change the ID to the ID given in the Built-in Language Strings table.
-
String Associated with an Activity: To configure a text item for an activity input or a form element property, change the ID to a meaningful name.
For strings that are only used in a single context in the workflow, you may want to use IDs that describe where the text item is used, for example, alert1-text, alert1-title, form1-header-title, form1-autoComplete1-title, form1-autoComplete1-hintText, and so on. This simplifies configuration and maintenance.
Text item IDs can include the characters a-z, A-Z, 0-9, dashes (-), and underscores (_). They cannot include spaces, special characters, or accented characters.
-
-
Click the check mark
 .
. If you later change the ID of a text item, Workflow Designer will automatically update all references to the text item in activity inputs and form element properties.
-
-
Assign values to the text item:
-
In the Choose a locale drop-down list, select Default (invariant).
-
In the Text column, type the item's text in the default language.
If you are translating a built-in string, use the default value given in the Built-in Language Strings table.
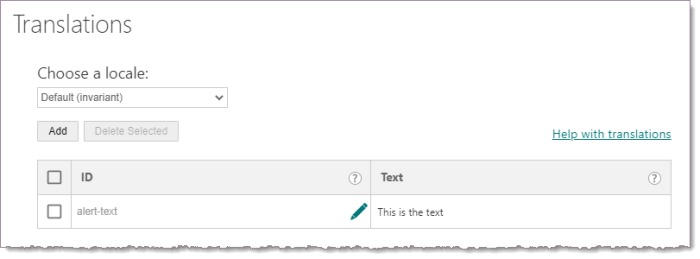
Text item "alert-text" with value "This is the text" in the default language
Text items can span multiple lines. Press Enter to go to a new line.
If you need to use a character that is not available on your keyboard, use one of the methods described in Insert Characters from Other Languages.
-
Select another locale that you want to support.
The text that you previously entered disappears when you select a different locale.
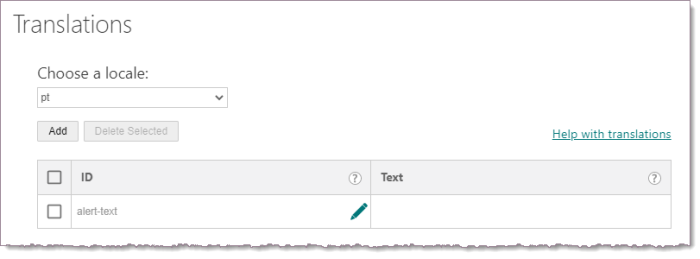
Text item "alert-text" ready for the Portuguese (pt) translation
-
In the Text column, type the item's text in the language of the selected locale

Text item "alert-text" with the Portuguese translation
-
Continue to select locales and enter translations until you have configured a translation for every locale you want to support.
-
Verify the text item's translations by selecting each locale that you support in turn and reviewing the text.
-
-
Press Ctrl+S to save the workflow.
Translations are saved in the workflow.
Step 2: Use text items in a workflow's configuration
This step applies to strings associated with activities and form elements only. You do not need to do this step for built-in strings.
-
Select the activity or form element that will use the text item.
The Properties panel opens.
-
Locate the desired input or property.
-
Type @ to open a drop-down list of text items and select the text item.
Alternatively, type in @ followed immediately by the ID of the text item.
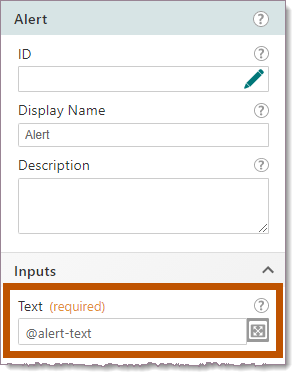
Alert activity's Text property configured with a text item called "alert-text"
Insert Characters from Other Languages
In general when you translate a workflow, you will be able to use your keyboard to enter the characters that you need for the text items' values. Typically, you translate workflows into languages that are used in your region, so your computer will already be set up to work in those languages.
Occasionally, however, you may need to use characters that are not available on your keyboard. For example, you may need to enter accented characters that are not available in the languages that you use daily, or you may need to enter characters from a different alphabet. In this case, you can get the characters you need in two ways:
-
Add the language you need using the Language option in Windows Control Panel.
-
Use the built-in Windows Character Map to insert special characters.
Change an Existing Text Item
You can change a text item's ID or one or more of its values at any time.
-
In Workflow Designer, click Info to open the Info panel, and then click Translations.
It doesn't matter which locale is selected when you change a text item's ID.
-
In the ID column, click the edit icon
beside the text item you want to change, change the ID, and then click the check mark . Workflow Designer updates the text item's ID throughout the entire workflow.
-
Press Ctrl+S to save your workflow.
To change a value for a text item:
-
In Workflow Designer, click Info to open the Info panel, and then click Translations.
-
In the Choose a locale drop-down list, select the locale for the value you want to change.
For example, if the workflow is available in Portuguese (default), Spanish, and French, and you want to change the text item's Spanish value, you would select the "es" (Spanish) locale.
-
Edit the value in the Text column.
-
Press Ctrl+S to save your workflow.
Remove Text Items
Deleting a text item deletes it from all locales, not only the currently selected locale. If the deleted text item is used in the workflow's configuration, you must update the properties that use it.
To remove one or more text items:
-
In Workflow Designer, click Info to open the Info panel, and then click Translations.
-
Select the checkbox beside each text item you want to delete, or, to select all the text items, select the checkbox in the column header.
-
Click Delete Selected.
-
Click OK to confirm.
Any activity inputs and form element properties that use a deleted text item will generate a validation error.
-
Update every activity input and form element property that uses a deleted text item.
-
Press Ctrl+S to save your workflow.
Remove a Locale
Every time you select a locale in the Translations panel, the locale is added to the list of configured locales in the Choose a Locale drop-down list. You may want to remove a locale from the list, either because you added it without intending to use it, or because you no longer want to support it.
To remove a locale from the list of configured locales:
-
In Workflow Designer, click Info to open the Info panel, and then click Translations.
-
Select the locale in the Choose a locale drop-down list.
-
Delete the value of each text item by inserting the cursor in the Text column and pressing Delete or Backspace. Do not leave any space characters.
Do not delete the text items themselves, as this would delete them from every locale. Only delete the values of the text items.
The Text column should not have any values in it.
-
Press Ctrl+S to save your workflow.
The locale is removed from the workflow's internal list of configured locales. However, the locale will continue to appear in Workflow Designer until you refresh the page or re-open the workflow.
Test a Workflow's Translations
After you translate a workflow, you will want to test the different languages that you support. Although you can review your translations in the Translations panel, it is also useful to see them in the context of the running workflow. You can change your browser's language settings to force the running workflow to use one of the supported languages, but this is not convenient. A quicker method is to launch the host application with the locale URL parameter:
locale=[configured locale]
For example, if a workflow is available in French (default), UK English (en-GB), and German (de), you can run the workflow in English by launching the application with &locale=en-gb (or &locale=en-GB) added to the end of the URL. To run the workflow in German, you would launch the application using &locale=de. To run the workflow in the default language, omit the locale parameter.
![]()
Example of a Geocortex Viewer for HTML5 URL with a locale parameter set to German (de)
See also...
Translate a Geocortex Viewer for HTML5 viewer
Example - Translate a Form and an Alert
This example shows how to translate the user interface text for a workflow that contains a Display Form activity and an Alert activity. The Display Form activity prompts the user to select a region in the Canadian province of Québec. The Alert activity echoes the selected region back to the user.
The workflow's default language is French. In addition, the workflow is translated into Canadian English (en-CA). If the user's language is set to en-CA, the workflow appears in Canadian English. If the user's language is set to some other variant of English, for example, en-AU or en-US, the workflow will not find the variant, so it will look for the non-variant, en. The non-variant en is not configured, so the workflow will use the default language, French. Similarly, if the user's language is set to some other language, for example, nl or pt, the workflow will not find the language, so it will use the default language.
Workflow Logic
The workflow has the following activities, in the order shown:
-
Display Form (
form1): In addition to the header and footer, the form has the following element:-
Radio Group: Get a region from the user.
The Radio Group has a
changeevent. Thechangesubworkflow has one activity:- Alert: Display the user's selection.
-
To translate a workflow with a simple form and an alert:
This example has the following steps:
-
Open Workflow Designer.
-
In a new, blank workflow, add and connect the following activity:
- Display Form (
form1)
- Display Form (
-
Double-click the Display Form activity to edit it.
-
Create the following form:
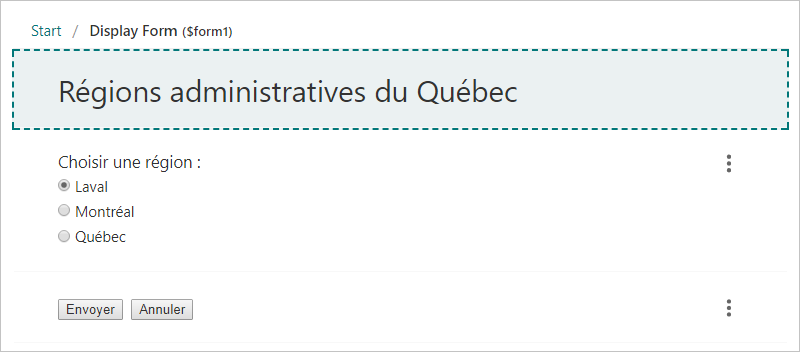
Preview of the form in its default language
To configure the form:
-
Select the Form Title element in the preview and set its Title property to:
Régions administratives du Québec -
Add a Radio Group form element and set its Title property to:
Choisir une région : -
Configure three radio buttons manually and set their Label properties to:
LavalMontréalQuébec
-
Add a
changeevent to the Radio Group. -
Add and connect an Alert activity and set its Text property to:
="Vous avez choisi " + $form1.state.radioGroup1.items[$form1.state.radioGroup1.current].label.markdown
You now have a functional workflow that is available in French only.
-
-
Run the workflow in the Sandbox to make sure it works.
-
Press Ctrl+S to save the workflow.
This workflow has two activities (Display Form, Alert) and three form elements (Header, Radio Group, and Button Bar (footer)) that require translation. Usually, workflows also have activities that do not require translation.
-
Click Info in the sidebar to open the Info panel.
-
Click Translations to open the Translations panel.
-
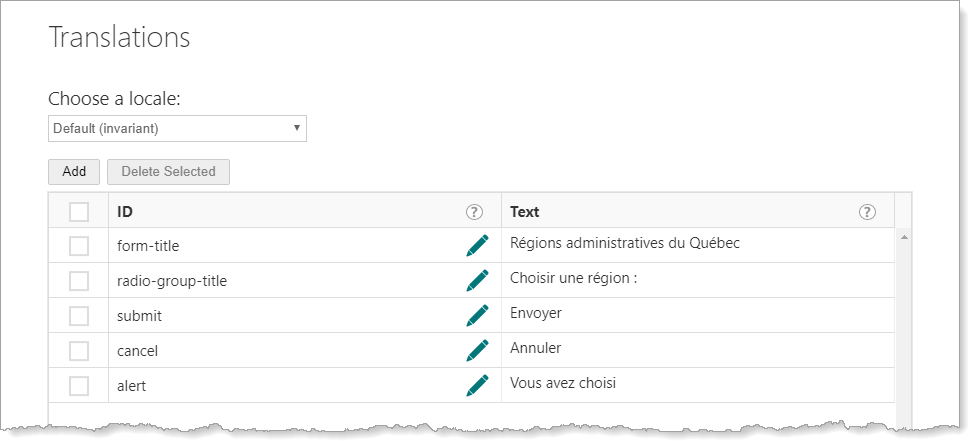
French (Default): Add the text items and configure the French values:
-
Make sure Default (invariant) is selected in the Choose a locale box.
-
Add and configure a text item for each user interface string in the workflow, listed in the following table.
Text items for the Default (invariant) locale
ID
Text
To be used in...
form-title
Régions administratives du Québec
Title property of the header form element
radio-group-title
Choisir une région :
Title property of the Radio Group
submit
Envoyer
Label property of the footer form element, first button
cancel
Annuler
Label property of the footer form element, second button
alert *
Vous avez choisi
Text property of the Alert activity in the Radio Group's
changesubworkflow* In the running workflow, the
alerttext item will be followed by the name of the region that the user selected. Leave a space at the end of its text ("Vous avez choisi ") to separate it from the region name.The Translations panel for the Default (invariant) locale should look like this:
-
-
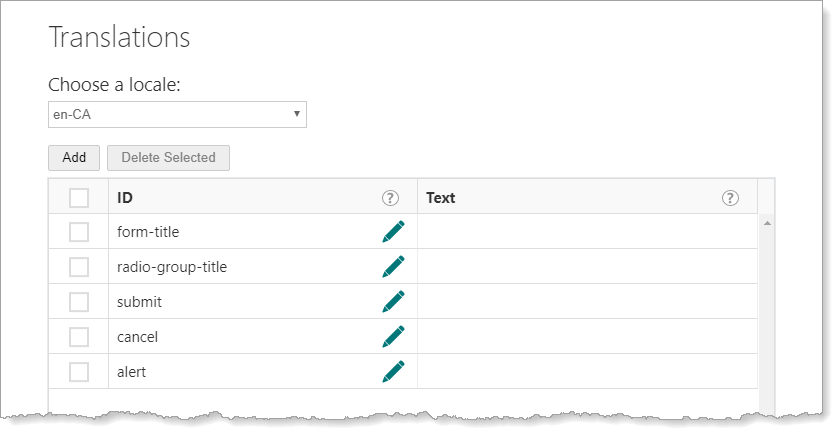
English: Configure the English values:
-
In the Choose a locale drop-down list, select en-CA.
The text items already appear in the table for Canadian English.
-
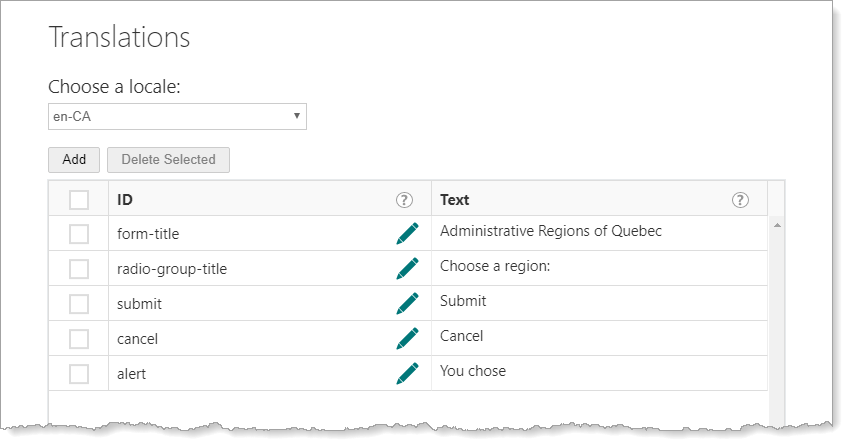
Configure the value for each text item.
Text items for the Canadian English locale
ID
Text
To be used in...
form-title
Administrative Regions of Quebec
Title property of the header form element
radio-group-title
Choose a region:
Title property of the Radio Group
submit
Submit
Label property of the footer form element, first button
cancel
Cancel
Label property of the footer form element, second button
alert *
You chose
Text property of the Alert activity in the Radio Group's
changesubworkflow* In the running workflow, the
alerttext item will be followed by the name of the region that the user selected. Leave a space at the end of its text ("You chose ") to separate it from the region name.The Translations panel for the Canadian English locale should look like this:
-
-
Press Ctrl+S to save the workflow.
Step 3: Use the text items in the workflow's configuration
-
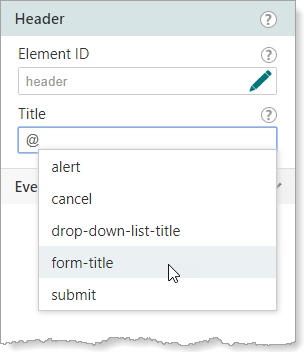
Display Form Header:
-
In the form preview, select the form's header element.
-
Type @ in the Title box and select @form-title from the drop-down list. Alternatively, type @form-title in the Title box.
-
-
Radio Group: Select the Radio Group. Set the Title property to @radio-group-title.
-
Display Form Footer: Select the footer form element. Set the first button's Label property to @submit. Set the second button's Label property to @cancel.
-
Alert: Open the Radio Group's
changesubworkflow and select the Alert activity. Set the Text property to @alert. -
Press Ctrl+S to save the workflow.
Step 4: Test your translations
You can preview a form in each language that you have configured. Make sure the workflow is saved and then select the locale that you want to preview in the Translations panel's Choose a Locale drop-down list.
![]()
Form preview shown in French and English
In addition, you can use the locale URL parameter to test your translations in the host application:
-
Launch the application that runs the workflow, without using a
localeparameter. -
Run the workflow.
The workflow appears in the default language, French.
-
In the browser's address bar, add
&locale=en-cato the end of the URL and refresh the page. -
Run the workflow.
The workflow appears in English.

Workflow running without a locale parameter (
 ) and with the locale set to Canadian English (
 )
)