Prepare the Workflow Widgets for Web AppBuilder
The ability to host and run workflows in Web AppBuilder is provided by custom Web AppBuilder widgets that were developed by VertiGIS for this purpose. If you are not going to use Web AppBuilder to host workflows, you do not need to prepare the widgets.
About the Workflow Widgets
The VertiGIS Studio Workflow widgets allow you to use ArcGIS Web AppBuilder to host and run workflows.
To configure a Web AppBuilder app to host a workflow, you add one of the Workflow widgets to the app and specify the workflow that you want the widget to run, as well as any inputs the workflow takes. To run the workflow, the user clicks the widget in the running app.
VertiGIS Studio Workflow provides the following widgets:
-
2D In-Panel Widget: Runs a workflow in a 2D app. Displays information about the running workflow in the app's side panel.
-
2D Modal Widget: Runs a workflow in a 2D app. Displays information about the running workflow in a modal window.
-
3D In-Panel Widget: Runs a workflow in a 3D app. Displays information about the running workflow in the app's side panel.
-
3D Modal Widget: Runs a workflow in a 3D app. Displays information about the running workflow in a modal window.
Although VertiGIS Studio Workflow has four widgets, the Web AppBuilder configuration only shows two widgets. When you configure a 2D app, Web AppBuilder shows the 2D widgets. When you configure a 3D app, Web AppBuilder shows the 3D widgets.
Prepare the Workflow Widgets
To use Web AppBuilder apps to host workflows, you must first prepare the widgets. You only need to do this one time, and then you can use the widgets in as many apps as you want.
VertiGIS Studio Workflow supports three editions of Web AppBuilder. The way that you prepare the widgets depends on the edition of Web AppBuilder you use:
-
Web AppBuilder in Portal for ArcGIS: If you have an on-premises portal and you want to use the edition of Web AppBuilder that comes with Portal for ArcGIS, you must register the widgets with your portal.
-
Web AppBuilder for ArcGIS Online: You must deploy the hosted widget from ArcGIS Marketplace to your Web AppBuilder for ArcGIS Online application.
-
Web AppBuilder (Developer Edition): If you do not have an on-premises portal, or you specifically want to use Web AppBuilder (Developer Edition), you must download the widgets and deploy them to your Web AppBuilder (Developer Edition) installation.
Follow the instructions for the edition of Web AppBuilder you use:
Register the Widgets with Web AppBuilder in Portal for ArcGIS
To register a widget with Web AppBuilder in Portal for ArcGIS, you create an application item in your portal that points to the widget's manifest.json file.
After you have registered the widgets, share the widget items with other Workflow authors in your organization. This allows them to configure their Web AppBuilder apps to run workflows. If the widgets are not shared, the other authors will not see the widgets in Web AppBuilder.
To register the Workflow widgets with Web AppBuilder in Portal for ArcGIS:
-
Sign in to Portal for ArcGIS as an administrator.
-
In Content, click Add Item and select An application.
-
Configure the item:
-
Set the Type to Application Extension (AppBuilder).
-
In the Manifest URL box, enter the URL to the
manifest.jsonfile for the widget you want to register.You can either use the copy of the
manifest.jsonfile in your local Workflow deployment or, if your portal has Internet access, the public copy of themanifest.jsonfile:-
2D In-Panel Widget:
-
Local Manifest:
https://[host.domain.com]/[virtual_path]/dist/wab/widgets/2D/WorkflowRunner_Panel/manifest.jsonwhere
[host.domain.com]is the fully qualified name of the Workflow server and[virtual_path]is configured on the Post Installer's IIS Settings panel. If Workflow is deployed using the default IIS settings, then the URL will look like this:https://[host.domain.com]/vertigisstudio/workflow/dist/wab/widgets/2D/WorkflowRunner_Panel/manifest.json -
Public Manifest: If you use Portal for ArcGIS 10.8.1, see the note below.
https://apps.vertigisstudio.com/workflow/latest/dist/wab/widgets/2D/WorkflowRunner_Panel/manifest.json
-
-
2D Modal Widget:
-
Local Manifest:
https://[host.domain.com]/[virtual_path]/dist/wab/widgets/2D/WorkflowRunner_Modal/manifest.jsonwhere
[host.domain.com]is the fully qualified name of the Workflow server and[virtual_path]is configured on the Post Installer's IIS Settings panel. If Workflow is deployed using the default IIS settings, then the URL will look like this:https://[host.domain.com]/vertigisstudio/workflow/dist/wab/widgets/2D/WorkflowRunner_Modal/manifest.json -
Public Manifest: If you use Portal for ArcGIS 10.8.1, see the note below.
https://apps.vertigisstudio.com/workflow/latest/dist/wab/widgets/2D/WorkflowRunner_Modal/manifest.json
-
-
3D In-Panel Widget:
-
Local Manifest:
https://[host.domain.com]/[virtual_path]/dist/wab/widgets/3D/WorkflowRunner_Panel/manifest.jsonwhere
[host.domain.com]is the fully qualified name of the Workflow server and[virtual_path]is configured on the Post Installer's IIS Settings panel. If Workflow is deployed using the default IIS settings, then the URL will look like this:https://[host.domain.com]/vertigisstudio/workflow/dist/wab/widgets/3D/WorkflowRunner_Panel/manifest.json -
Public Manifest: If you use Portal for ArcGIS 10.8.1, see the note below.
https://apps.vertigisstudio.com/workflow/latest/dist/wab/widgets/3D/WorkflowRunner_Panel/manifest.json
-
-
3D Modal Widget:
-
Local Manifest:
https://[host.domain.com]/[virtual_path]/dist/wab/widgets/3D/WorkflowRunner_Modal/manifest.jsonwhere
[host.domain.com]is the fully qualified name of the Workflow server and[virtual_path]is configured on the Post Installer's IIS Settings panel. If Workflow is deployed using the default IIS settings, then the URL will look like this:https://[host.domain.com]/vertigisstudio/workflow/dist/wab/widgets/3D/WorkflowRunner_Modal/manifest.json -
Public Manifest: If you use Portal for ArcGIS 10.8.1, see the note below.
https://apps.vertigisstudio.com/workflow/latest/dist/wab/widgets/3D/WorkflowRunner_Modal/manifest.json
-
In Portal 10.8.1, when setting up a widget using the public copy of the
manifest.jsonfile, you must configure additional administrative settings:-
Remove
apps.vertigisstudio.comfrom the Trusted Servers section. -
Add
apps.vertigisstudio.comas anallowedProxyHostby entering the code below into the Update Security Configuration section:{
"allowedProxyHosts":"apps.vertigisstudio.com"
}
-
-
Click anywhere outside the Manifest URL box.
Portal for ArcGIS will get the default title from the
manifest.jsonfile and enter it into the Title box. -
Enter a meaningful title in the Title box, for example:
VertiGIS Studio Workflow Widget In-Panel 2DBy default, the widgets all use the same title. Portal for ArcGIS does not allow multiple items to have the same title.
-
Enter one or more tags, for example, VertiGIS, Workflow, and Widget.
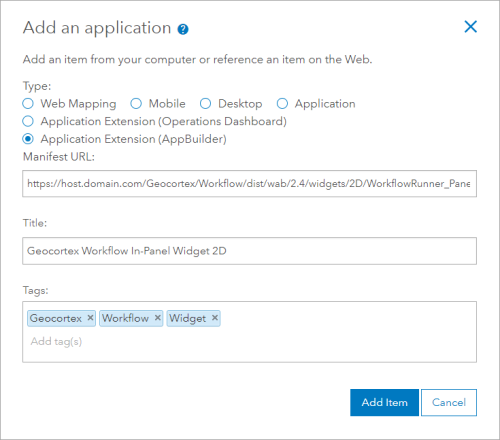
Example configuration for a Workflow widget's item in Portal for ArcGIS
-
Click Add Item.
-
-
Repeat these steps for each widget that you want to use in workflows. You will have one Web Mapping Application item for each widget.
Register the Widget with Web AppBuilder for ArcGIS Online
A VertiGIS Studio Workflow widget is available from the ArcGIS Marketplace. You can use this widget to run workflows in your ArcGIS Online edition of Web AppBuilder.
This section explains how to deploy the hosted widget into a Web AppBuilder application and share it with Web AppBuilder authors and end users.
The following are important items to note before you begin:
-
Hosted widgets are only available for Organizational ArcGIS Online accounts.
-
ArcGIS Online does not currently allow hosted widgets to be used in public apps. Only signed-in users from the same organization are able to run the widget.
-
You must share the widget with Web AppBuilder authors and end users before they can access it. The deployment process is straightforward if you create the appropriate ArcGIS Online group beforehand. See Create Groups for instructions.
-
Hosted widgets cannot run workflows that contain custom activities and form elements.
To register the Workflow widget with Web AppBuilder for ArcGIS Online:
-
Open ArcGIS Marketplace - Hosted Widgets and sign in with your Esri credentials.
-
Click the VertiGIS Studio Workflow widget.
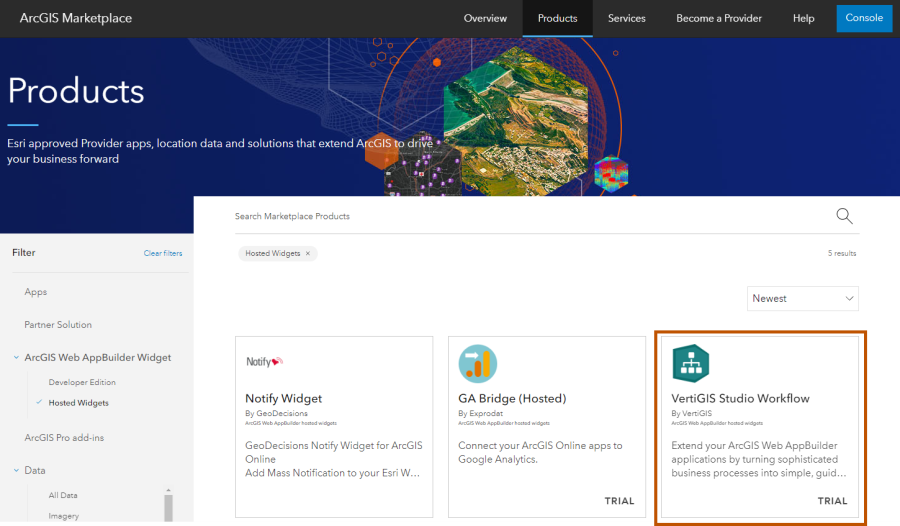
ArcGIS Marketplace - Hosted Widgets
-
Click 60-Days Trial.
-
Fill out the contact information and click Submit.
A confirmation appears that your free trial is active.
-
Sign in to the Console.
The widget appears in the Apps & Data tab.
-
Click Manage Sharing.
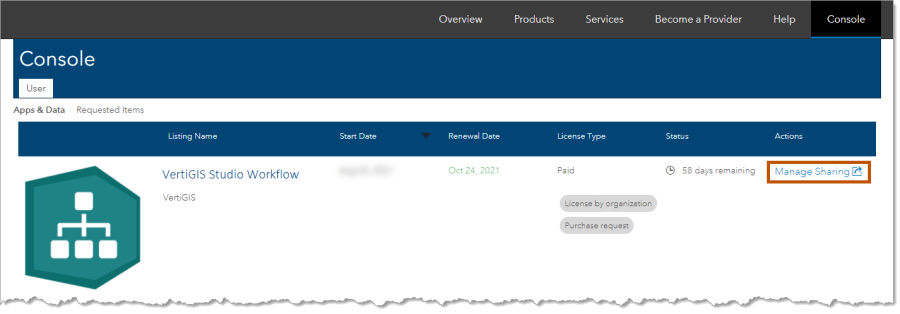
Marketplace - Console
-
Select the group of authors and end users you want to access the widget.
-
Click OK.
The steps differ slightly if you have already shared the widget and you want to edit the sharing group. In this instance, when you click Manage Sharing, you are directed to the Marketplace listing. Click Share. Ignore the message about insufficient permissions and click Edit group sharing. Make your changes and click Save.
The Workflow widget is now available in Web AppBuilder for the specified group of authors and end users.
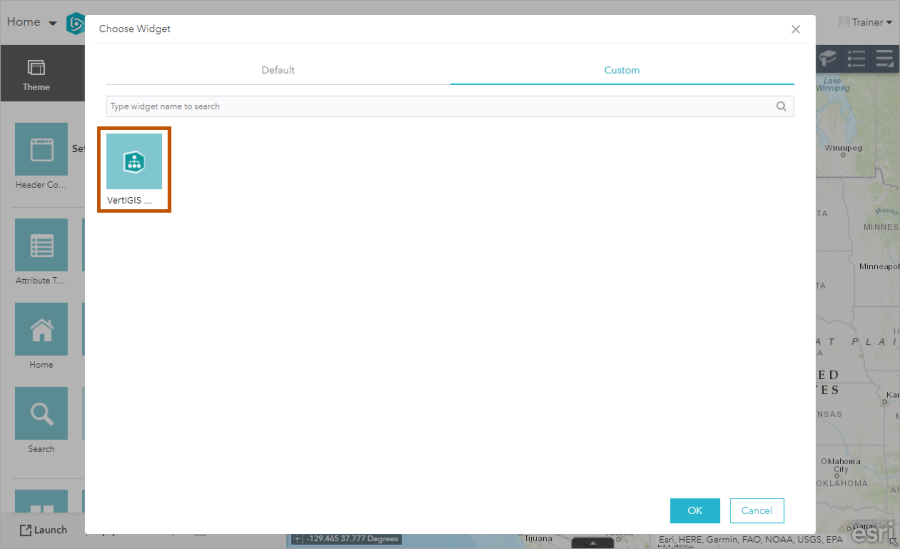
Web AppBuilder - Custom Widgets
Even if you already have a VertiGIS Studio license, select the 60-day trial option. Your trial is automatically converted to a subscription, so you can use the widget right away.
See also...
YouTube Tech Tips video: Deploying the Hosted Widgets
Download and Deploy the Widgets to Web AppBuilder (Developer Edition)
To prepare the widgets for Web AppBuilder (Developer Edition), you download the widgets via Workflow Designer and then copy them to your Web AppBuilder installation.
By default, the widgets point to cloud Workflow. When you download the widgets via the on-premises Designer, the widgets are modified to point to your on-premises installation.
The widgets that point to cloud Workflow also work with on-premises Workflow. This means that if you switch from cloud Workflow to on-premises Workflow, the cloud widgets will continue to work. In this case, you do not need to download and deploy the widgets unless you want to, for example, if you don't want the Internet traffic that comes from using the cloud widgets.
Using the cloud widgets guarantees that you are using the latest version of the widgets. When you use the on-premises widgets, you are responsible for periodically updating them.
To download and deploy the Workflow widgets to Web AppBuilder (Developer Edition):
This deployment procedure assumes that you have already installed Web AppBuilder (Developer Edition). You can download Web AppBuilder (Developer Edition) here for free. Follow the instructions to install it.
Step 1: Download the widgets
-
In Workflow Designer, click Deployment in the side panel and then click Download workflow widgets for ArcGIS Web AppBuilder.
A ZIP file containing the four widgets downloads.
Step 2: Deploy the widgets to Web AppBuilder (Developer Edition)
-
Locate the root of your Web AppBuilder (Developer Edition) installation.
By default, the root is called
WebAppBuilderForArcGIS. -
Extract the files to the root.
This places the widgets in the correct locations within your Web AppBuilder (Developer Edition) installation.