If you are installing VertiGIS Studio Mobile Designer on premises, and you want to use a custom website in IIS that is not the Default Web Site, there are manual steps to follow before you run the Post Installer.
You must do these steps before you run the post installer so that the website and the prefix are available for selection when you get to the IIS section of the post installer.
Although IIS is normally installed during the post-installation process, if you plan to use a custom folder, you will need to install IIS first and then follow the steps below.
The high-level steps to make it possible to use a custom IIS website include:
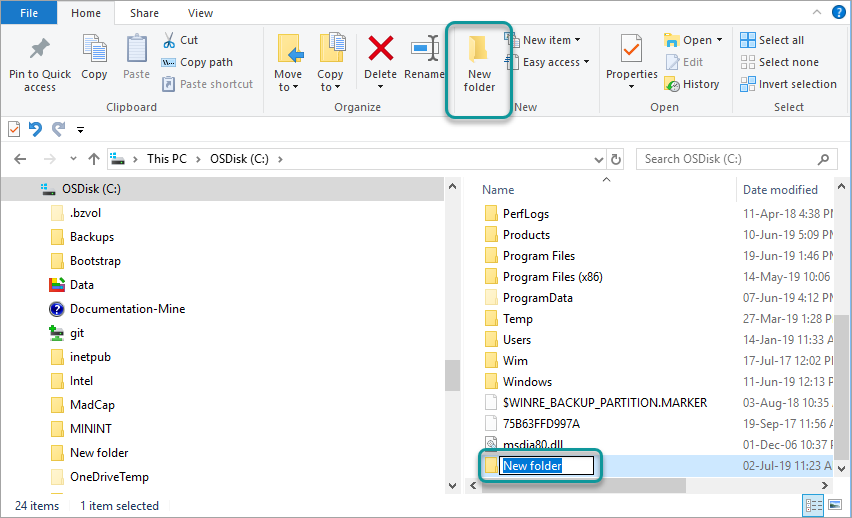
1.In Windows Explorer, add a custom folder.
2.Create a web.config file, add it to the custom folder, and insert your preferred URL prefix.
3.In Windows, grant IIS permission to access the custom folder.
4.In IIS, add a custom website and point its Physical Path to the custom folder.
5.During the Post Installation process, on the IIS Settings page, select the website you created in Step 5. and enter the Prefix you created in Step 3.
Add a Custom Folder
To add a custom folder:
1.In Windows Explorer, add a new custom folder in any location you want it to be.
Create and Edit a Web.Config File in the Custom Folder
You need to create a web.config file, add it to the custom folder and insert your preferred URL prefix into the web.config file.
To create a Web.Config file in the custom folder:
1.Open a text editor like (like Notepad++).
2.Create a new file called web.config and save it to the custom folder.
3.Copy the following code into the web.config file:
<?xml version="1.0" encoding="UTF-8"?>
<configuration>
<system.webServer>
<rewrite>
<rules>
<rule name="vertigis studio mobile viewer" patternSyntax="ECMAScript" stopProcessing="true">
<match url="^gcx/mobile(/mobileviewer/.*)$" />
<action type="Rewrite" url="http://localhost:10952{R:1}" />
</rule>
</rules>
</rewrite>
</system.webServer>
</configuration>
4.Verify that your web.config file looks the same as the one below:
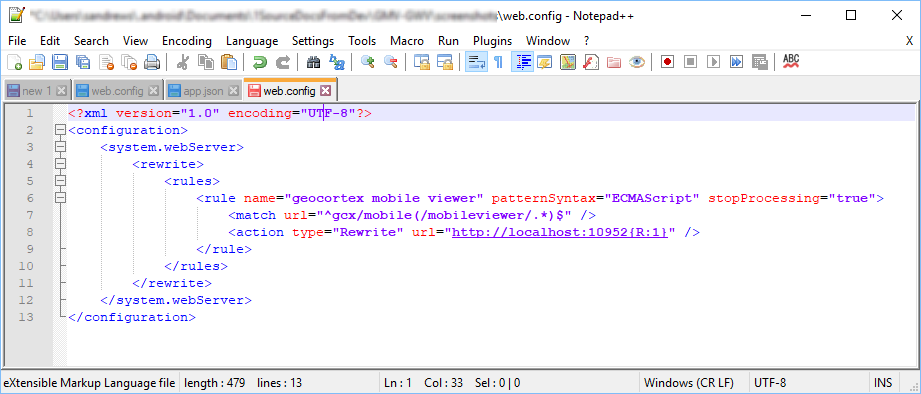
5.Save the web.config file.
To edit the prefix in the web.config file:
1.In the web.config file, locate the match url prefix: gcx/mobile.
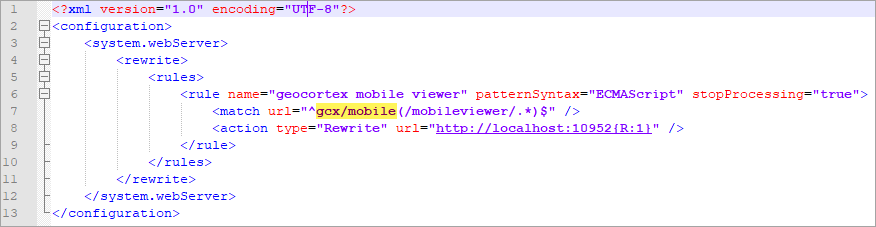
2.Replace the URL prefix with the one you want to use.
3.Save the web.config file.
Grant IIS Permission to the Custom Folder
To allow IIS to access the custom folder, you need to grant IIS permission to the folder.
To grant IIS permission to the custom folder:
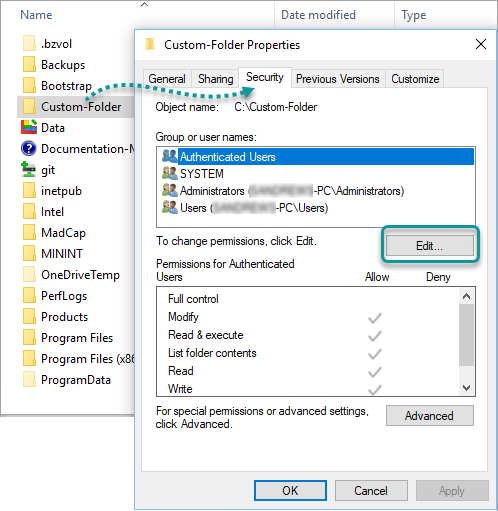
1.In Windows, right-click the custom folder you just created and select Properties.
2.Select the Security tab, and then click Edit.
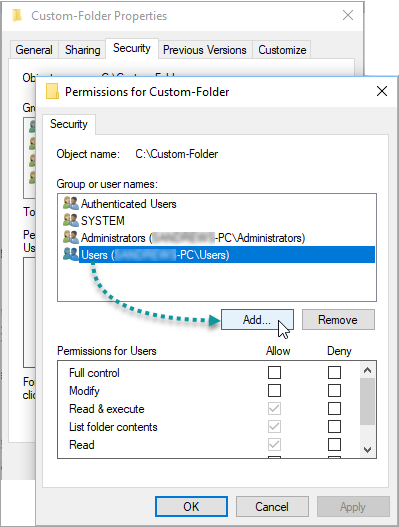
3.In the Permissions dialog, select Users and then click Add.
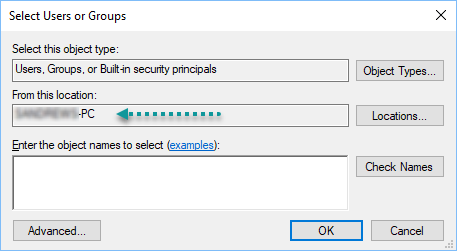
4.In the Select Users, Computers, Service Accounts or Groups dialog, click Locations.
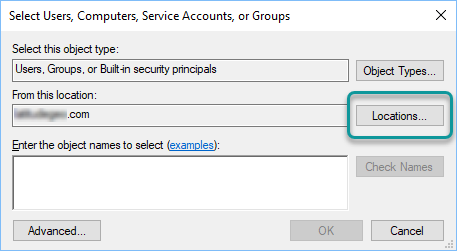
If you are asked to enter the credentials of the user, click Cancel.
5.In the Locations dialog, select the machine name, and then click OK.
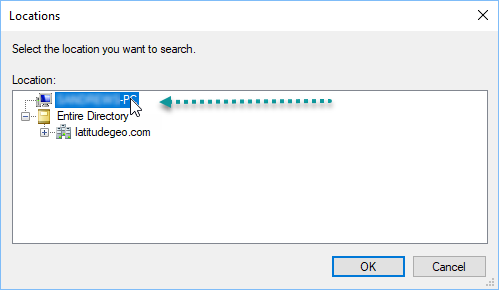
When you return to the Select Users, Computers, Service Accounts or Groups dialog, the name of the machine is in the From this location box.
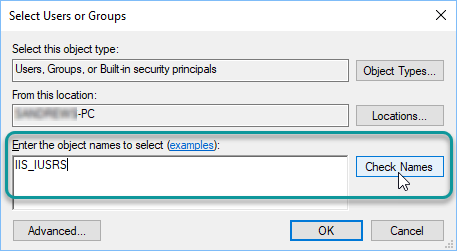
6.In the Enter the object names to select box, type in IIS_IUSRS, and then click Check Names.
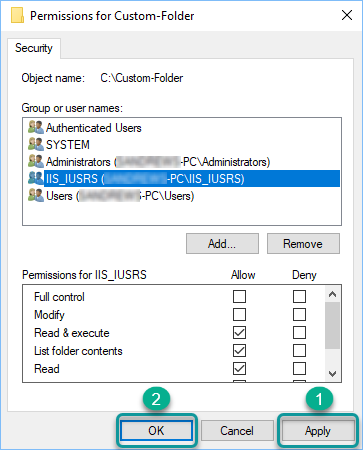
7.In the Permission for Custom-Folder dialog, click Apply and then OK.
8.In the Properties dialog, click OK again.
Add a Custom IIS Website
To add a custom IIS website:
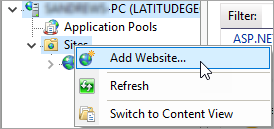
1.Open Internet Information Services (IIS) and expand the tree under the User's Computer name on the left.

2.Right-click the Sites folder and select Add Website.
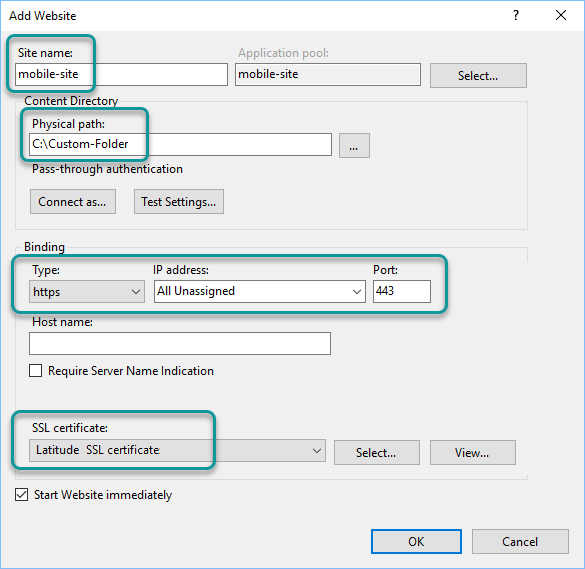
3.In the Add Website dialog, add the following settings and then click OK:
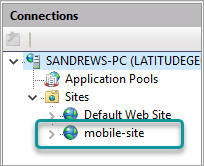
•Site name: Type in mobile-site.
•Physical path: Enter the path to the custom folder you created.
•Type: Select https. New fields appear in the dialog after you select this option.
•Port: Type in 443.
•SSL Certificate: Select the SSL certificate installed on the server.
To find the SSL certificate, click on the root folder in IIS, and then select Server Certificates.
The custom website appears in the Site folder in IIS.