If your app has been configured to allow it, and if you have permission, you can add, edit, and delete features in your app. In most cases, the information you can add about a particular feature is in a form that has been configured specifically to gather the required information about that feature. However, you can also add attachments to a feature, for example, photos, PDFs and multiple other formats.
To add a feature on the map:
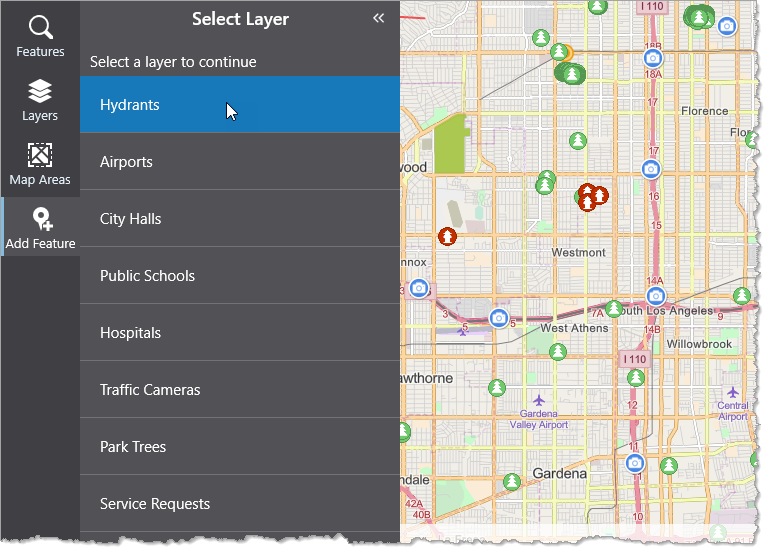
1.In the Task bar, click Add Features.
A list of layers in the map displays.
2.From the list of layers, select the layer you want.
A list of fields displays. Each field represents information that you can add about this feature.
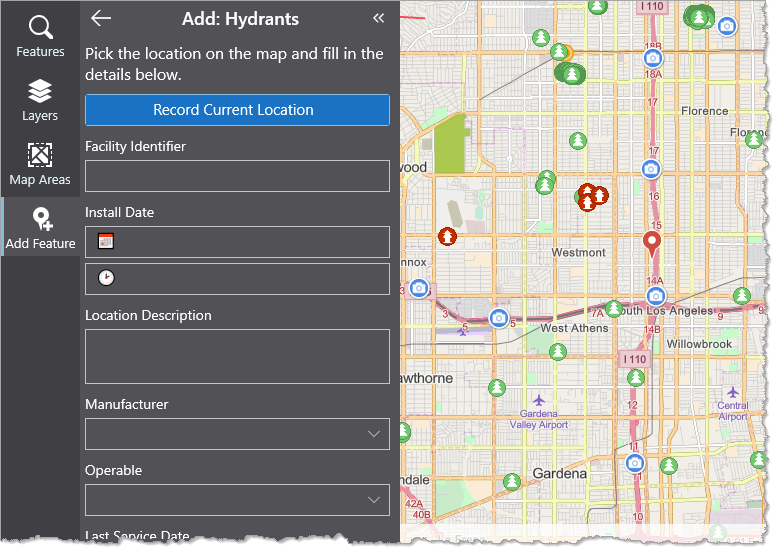
3.In each field, type or select information about the feature you want to add.
4.Set the location for your new feature. How you enter the location depends on the type of geometry your feature uses:
When using Crosshair mode, the next vertex is placed at the crosshair ![]() instead of where you click. The crosshair is always at the center of the map, so you must pan the map to choose a location. To enable Crosshair mode, click
instead of where you click. The crosshair is always at the center of the map, so you must pan the map to choose a location. To enable Crosshair mode, click ![]() in the toolbar and then click Use Crosshair.
in the toolbar and then click Use Crosshair.
To undo a mistake while editing the geometry of a feature, click ![]() in the toolbar and then click Undo. If you change your mind, click Redo. To start afresh, click Start New.
in the toolbar and then click Undo. If you change your mind, click Redo. To start afresh, click Start New.
By default, snapping to other visible features is enabled. To toggle snapping mode, click ![]() in the toolbar and then click Snap to Features. Alternatively, press the F key.
in the toolbar and then click Snap to Features. Alternatively, press the F key.
•Points: Click the map to select the location of your new feature.
Alternatively, to set the feature's location as your current location, click Record Current Location at the top of the panel, or click ![]() in the toolbar and then click Set Point at My Location. Mobile places the feature at the location your device reports.
in the toolbar and then click Set Point at My Location. Mobile places the feature at the location your device reports.

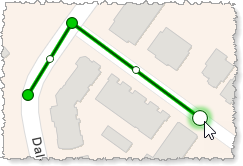
•Lines: Click repeatedly on the map to create a connect-the-dots line.
Alternatively, to create a vertex at key locations as you move around an area, click Record Current Location at the top of the panel, or click ![]() in the toolbar and then click Set Point at My Location. Mobile places the vertex at the location your device reports.
in the toolbar and then click Set Point at My Location. Mobile places the vertex at the location your device reports.
To display the length of each line segment as well as the whole line, click ![]() in the toolbar and then select Show Measurements.
in the toolbar and then select Show Measurements.
To display the bearing angle of each line segment, click ![]() in the toolbar and then select Show Bearing.
in the toolbar and then select Show Bearing.
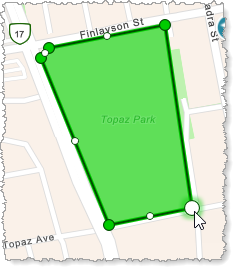
•Polygons: Click repeatedly on the map to create a connect-the-dots area around your feature.
Alternatively, to create a vertex at key locations as you move around an area, click Record Current Location at the top of the panel, or click ![]() in the toolbar and then click Set Point at My Location. Mobile places the vertex at the location your device reports.
in the toolbar and then click Set Point at My Location. Mobile places the vertex at the location your device reports.
To display the length of each line segment as well as the perimeter and area of the polygon, click ![]() in the toolbar and then select Show Measurements.
in the toolbar and then select Show Measurements.
To display the bearing angle of each line segment, click ![]() in the toolbar and then select Show Bearing.
in the toolbar and then select Show Bearing.
5.Click Save to commit your changes.
To edit a feature:
1.Do one of the following:
•Click a feature listed in search results.
•Click a single feature on the map.
The Features panel opens and displays details about the feature.
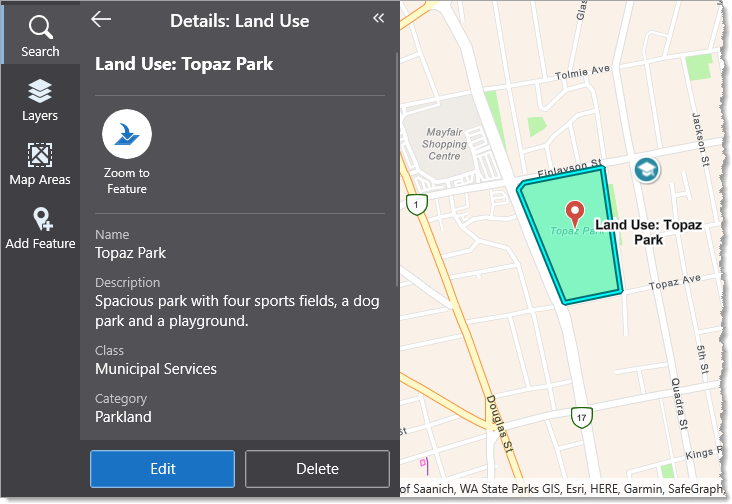
2.Click Edit at the bottom of the pane
The Edit button is only available if you have permissions to edit features.
The Edit pane opens with a list of fields that you can edit.
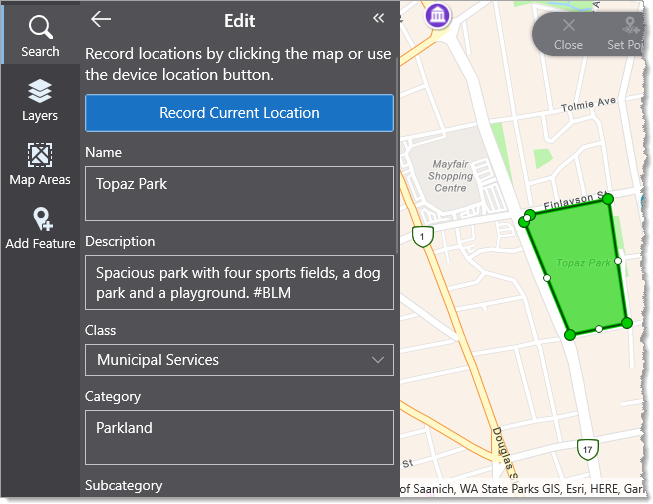
3.Click in a field and change the existing information.
4.You can also edit the location of the feature. How you edit the location depends on the type of geometry your feature uses:
When using Crosshair mode, the next vertex is placed at the crosshair ![]() instead of where you click. The crosshair is always at the center of the map, so you must pan the map to choose a location. To enable Crosshair mode, click
instead of where you click. The crosshair is always at the center of the map, so you must pan the map to choose a location. To enable Crosshair mode, click ![]() in the toolbar and then click Use Crosshair.
in the toolbar and then click Use Crosshair.
To undo a mistake while editing the geometry of a feature, click ![]() in the toolbar and then click Undo. If you change your mind, click Redo. To start afresh, click Start New.
in the toolbar and then click Undo. If you change your mind, click Redo. To start afresh, click Start New.
By default, snapping to other visible features is enabled. To toggle snapping mode, click ![]() in the toolbar and then click Snap to Features. Alternatively, press the F key.
in the toolbar and then click Snap to Features. Alternatively, press the F key.
•Points:
•To move the feature to a new location, drag the feature.
•To move the feature to your current location, click Record Current Location at the top of the panel, or click ![]() in the toolbar and then click Set Point at My Location. Mobile places the feature at the location your device reports.
in the toolbar and then click Set Point at My Location. Mobile places the feature at the location your device reports.
•Lines:
•To move the feature to a new location, click anywhere along the line that isn't a vertex to select the line, and then drag the line to the new location.
•To move a vertex of the line, ensure ![]() is enabled in the toolbar, and drag the vertex
is enabled in the toolbar, and drag the vertex ![]() to the new location.
to the new location.
•To add a vertex to the line, ensure Move mode is disabled ![]() in the toolbar, select the vertex to which you want to add the next vertex, and select a position for the new vertex.
in the toolbar, select the vertex to which you want to add the next vertex, and select a position for the new vertex.
Alternatively, drag a sub-vertex ![]() to a new position.
to a new position.
•To move a vertex to your current location, click the vertex you want to move and then either: click Record Current Location at the top of the panel, or click ![]() in the toolbar and then click Set Point at My Location. Mobile places the vertex at the location your device reports.
in the toolbar and then click Set Point at My Location. Mobile places the vertex at the location your device reports.
•To delete a vertex, click the vertex you want to delete and then either: click ![]() in the toolbar and then select Delete.
in the toolbar and then select Delete.
To display the length of each line segment as well as the whole line, click ![]() in the toolbar and then select Show Measurements.
in the toolbar and then select Show Measurements.
To display the bearing angle of each line segment, click ![]() in the toolbar and then select Show Bearing.
in the toolbar and then select Show Bearing.
•Polygons:
•To move the feature to a new location, click anywhere along the side of the polygon that isn't a vertex to select the polygon, and then drag the polygon to the new location.
You cannot select the polygon by clicking the area within it, you must click one of its sides before dragging the polygon to a new location. Due to a technical limitation, you cannot select the last side that completes the polygon.
•To move a vertex of the polygon, ensure ![]() is enabled in the toolbar, and drag the vertex
is enabled in the toolbar, and drag the vertex ![]() to the new location.
to the new location.
•To add a vertex to the polygon, ensure Move mode is disabled ![]() in the toolbar, select the vertex to which you want to add the next vertex, and select a position for the new vertex.
in the toolbar, select the vertex to which you want to add the next vertex, and select a position for the new vertex.
Alternatively, drag a sub-vertex ![]() to a new position.
to a new position.
•To move a vertex to your current location, click the vertex you want to move and then either: click Record Current Location at the top of the panel, or click ![]() in the toolbar and then click Set Point at My Location. Mobile places the vertex at the location your device reports.
in the toolbar and then click Set Point at My Location. Mobile places the vertex at the location your device reports.
•To delete a vertex, click the vertex you want to delete and then either: click ![]() in the toolbar and then select Delete.
in the toolbar and then select Delete.
To display the length of each line segment as well as the perimeter and area of the polygon, click ![]() in the toolbar and then select Show Measurements.
in the toolbar and then select Show Measurements.
To display the bearing angle of each line segment, click ![]() in the toolbar and then select Show Bearing.
in the toolbar and then select Show Bearing.
5.Click Save.
To delete a feature:
1.Click the Delete button, which is visible if you have permission to delete a feature.