You can change how VertiGIS Studio Printing is registered with ArcGIS.
1.Open the Post Installer and click Portal in the sidebar.
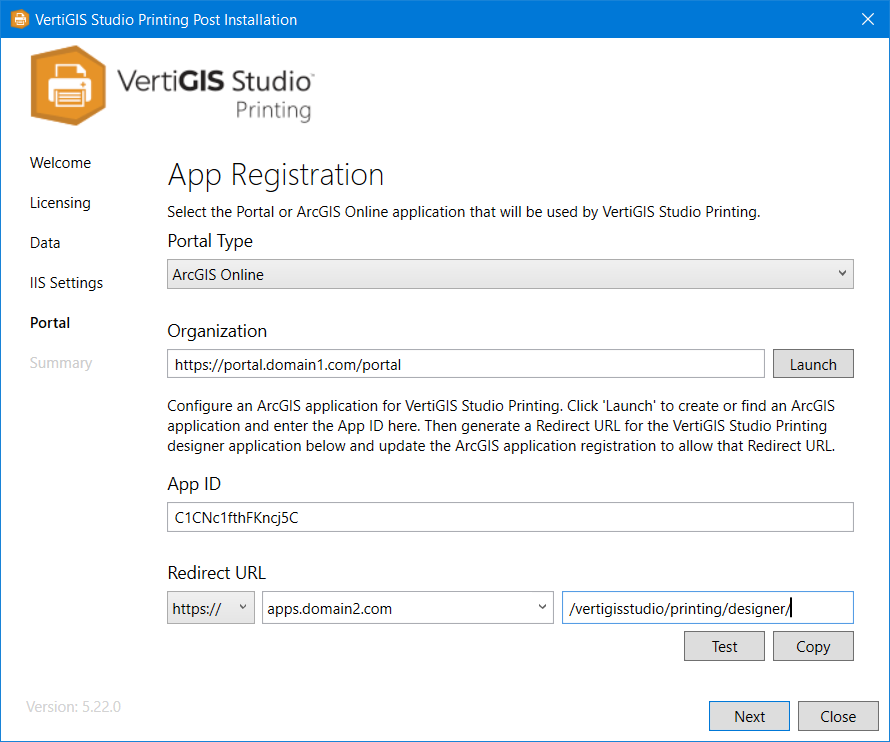
2.If you are changing to a different portal type, select the type of portal you use from the Portal Type drop-down list—ArcGIS Online or Portal for ArcGIS.
3.If you changed the Portal Type, follow the instructions for the Portal Type you selected:
•ArcGIS Online: In the Organization box, enter your ArcGIS organization name, for example myorganization, or the URL of your ArcGIS Online portal, for example, https://myorganization.maps.arcgis.com.
•Portal for ArcGIS: In the Portal URL box, enter the URL for your portal, for example, https://portal.domain1.com/arcgis/.
We strongly recommend that you use HTTPS to access ArcGIS.
4.In the Redirect URL area:
•Select the appropriate connection scheme for your Printing server: https:// or http://.
If the web applications that will host print templates run on HTTPS then you must run VertiGIS Studio Printing on HTTPS as well. Otherwise, the applications will not be able to connect.
We strongly recommend that you use HTTPS to access VertiGIS Studio Printing.
•Select the host name of your Printing server from the drop-down list.
Alternatively, type or paste the host name.
•Click Copy to copy the redirect URL to your clipboard for use in a later step.
The virtual path is entered automatically based on the IIS Settings.
5.Follow the instructions that apply to you:
•If your organization already uses other VertiGIS Studio products that are registered with the same portal as VertiGIS Studio Printing, we recommend that you use the existing ArcGIS item to register Printing with the portal. Follow the instructions in Register Studio Printing Using an Existing ArcGIS Item.
•If this is the first VertiGIS Studio product registered with this portal, you will have to create an ArcGIS Application item and use it to register VertiGIS Studio Printing. Follow the instructions in Register VertiGIS Studio Printing Using a New ArcGIS Item.
