Managing an on-premises Printing installation may require changing the post-installation configuration:
To change the Post Installer configuration:
1.In the Windows Start menu, start to type VertiGIS Studio Printing.
The Start menu will show the Post Installer application.
2.Click VertiGIS Studio Printing Post Installer.
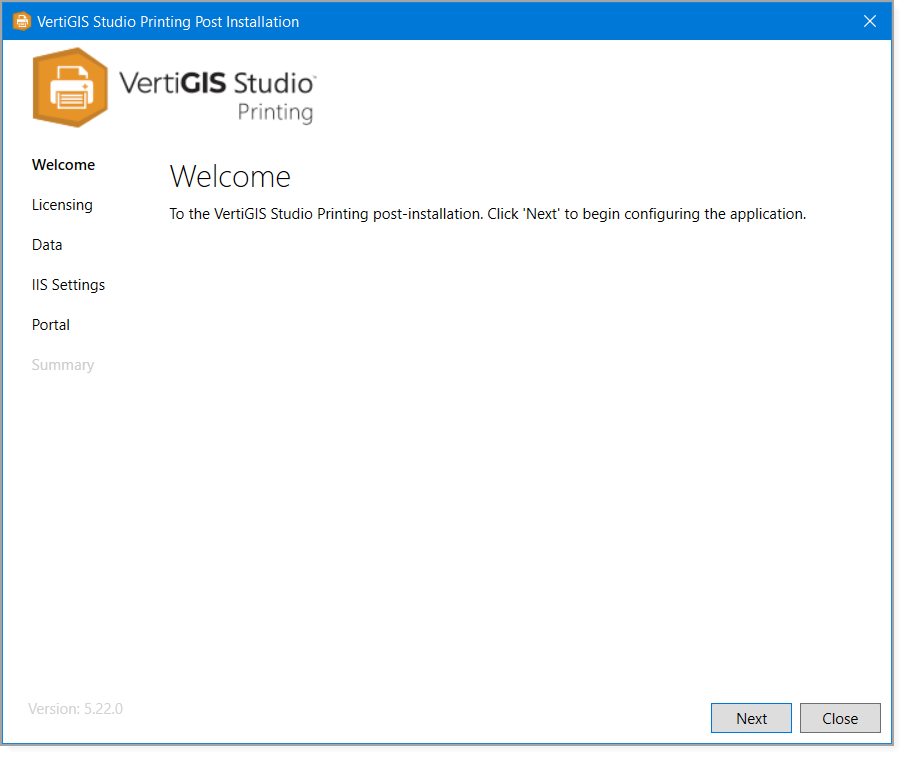
3.Click Next to move to the Licensing page.
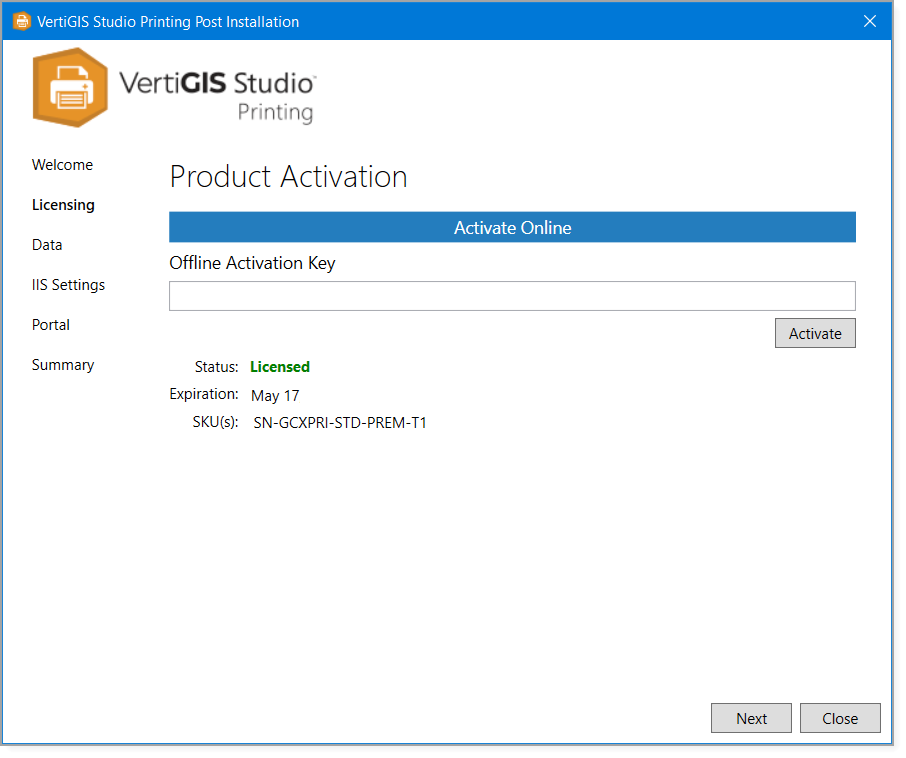
4.Choose one of the following options:
•Activate Online: To activate VertiGIS Studio Printing online, you must have a VertiGIS Studio account.
a.Click Activate Online.
b.Sign in to your VertiGIS Studio account.
c.When the activation is complete, return to the Post Installer.
•Activate Offline: To activate VertiGIS Studio Printing offline, contact VertiGIS Studio Support at to request an activation key.
When you receive the key, open the Post Installer and click Licensing. Paste the key into the Offline Activation Key box and click Activate.
5.Click OK to close the License Status dialog box.
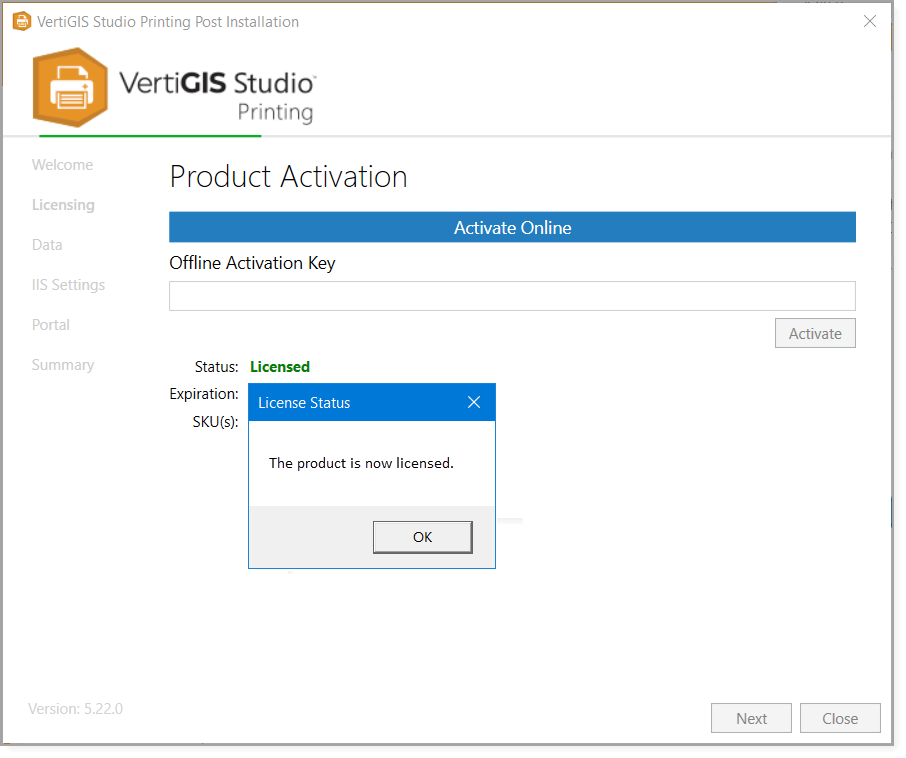
6.Click Next to advance to the Data page.
We recommend that you configure the data directory one time only, immediately after you install VertiGIS Studio Printing.
If you create print layouts and then change the data directory, you will lose access to your existing layouts.
7.Click Next to advance to the IIS Settings page.
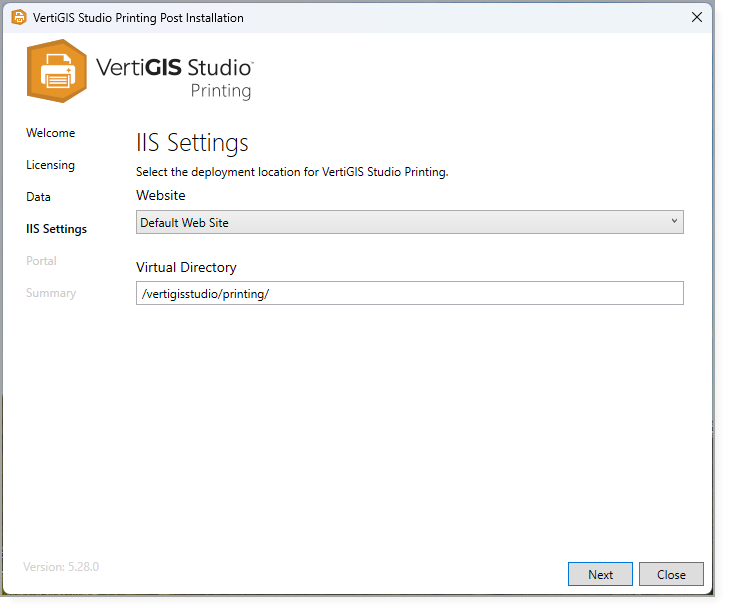
8.To use a different website, select the website from the Website drop-down list.
9.To use a different virtual directory, type the path in the Virtual Directory box.
10.Click Next to advance to the Portal in the sidebar.
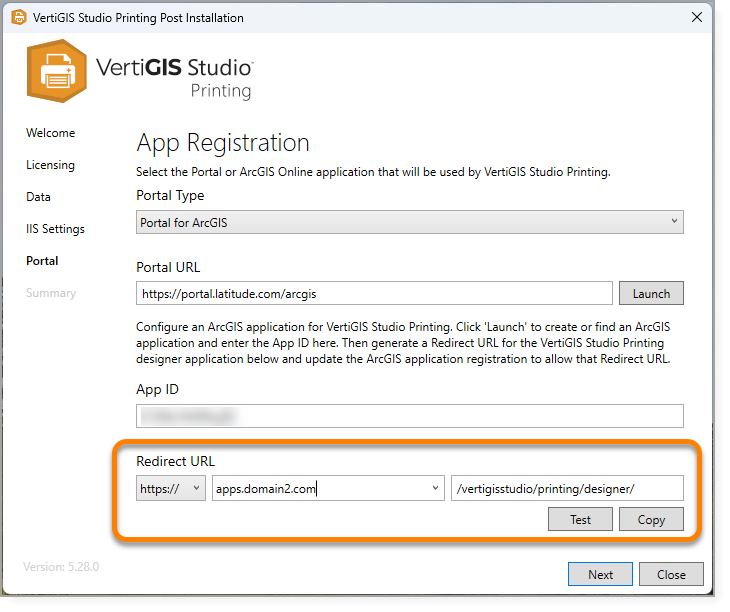
11.Update the Redirect URL to reflect the new IIS deployment.
You may have to update the redirect URI of the Application item in Portal for ArcGIS as well.
12.Click Close to close the Post Installer when you are finished.
Change the ArcGIS Registration
You can change how VertiGIS Studio Printing is registered with ArcGIS.
1.Open the Post Installer and click Portal in the sidebar.
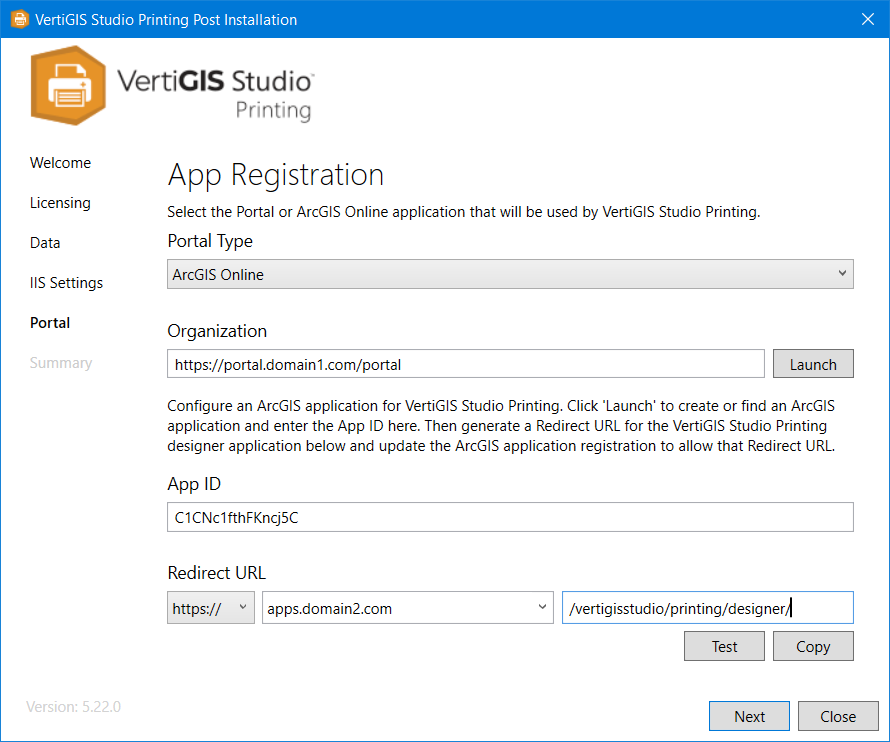
2.If you are changing to a different portal type, select the type of portal you use from the Portal Type drop-down list—ArcGIS Online or Portal for ArcGIS.
3.If you changed the Portal Type, follow the instructions for the Portal Type you selected:
▪ArcGIS Online: In the Organization box, enter your ArcGIS organization name, for example myorganization, or the URL of your ArcGIS Online portal, for example, https://myorganization.maps.arcgis.com.
▪Portal for ArcGIS: In the Portal URL box, enter the URL for your portal, for example, https://portal.domain1.com/arcgis/.
We strongly recommend that you use HTTPS to access ArcGIS.
4.In the Redirect URL area:
▪Select the appropriate connection scheme for your Printing server: https:// or http://.
If the web applications that will host print templates run on HTTPS then you must run VertiGIS Studio Printing on HTTPS as well. Otherwise, the applications will not be able to connect.
We strongly recommend that you use HTTPS to access VertiGIS Studio Printing.
▪Select the host name of your Printing server from the drop-down list.
Alternatively, type or paste the host name.
▪Click Copy to copy the redirect URL to your clipboard for use in a later step.
The virtual path is entered automatically based on the IIS Settings.
5.Follow the instructions that apply to you:
▪If your organization already uses other VertiGIS Studio products that are registered with the same portal as VertiGIS Studio Printing, we recommend that you use the existing ArcGIS item to register Printing with the portal. Follow the instructions in Manage an On-Premises Installation.
▪If this is the first VertiGIS Studio product registered with this portal, you will have to create an ArcGIS Application item and use it to register VertiGIS Studio Printing. Follow the instructions in Register VertiGIS Studio Printing Using a New ArcGIS Item.
Register VertiGIS Studio Printing Using an Existing ArcGIS Item
▪Click Launch to open the portal in your browser.
▪View the item's details.
▪On the Settings tab, scroll down to the App Registration area and click Update.
▪Paste the copied redirect URL into the Redirect URI box, and then click Add.
The URL is added to the list of permitted redirect URLs.Redirect URL for VertiGIS Studio Printing added to the ArcGIS item
▪Click Update.
▪Copy the App ID from the App Registration area to the clipboard.
▪On the Overview tab, edit Tags and add one or more tags for VertiGIS Studio Printing.
▪Return to the Post Installer to enter the app ID.
Register VertiGIS Studio Printing Using a New ArcGIS Item
There are two steps:
▪Use the item to register VertiGIS Studio Printing with the portal.
▪Sign in to your portal and open the Content page.
▪In My Content, click Add Item and select An application.
▪Configure the application using the following settings, and then click Add Item.
▪Type: Web Mapping
▪Purpose: Ready to Use
▪API: JavaScript
▪URL: Paste the redirect URL that you copied in the previous step.
For example: https://apps.domain2.com/vertigisstudio/Printing/designer
▪Title: For example: VertiGIS Studio Printing
▪Tags: For example: VertiGIS Studio and Printing
You may want to add additional tags used by your organization.
A new application is added to the portal.
Step 2: Use the item to register VertiGIS Studio Printing with the portal
▪On the Settings tab, scroll down to the App Registration area.
▪Click Register beside App Registration.
▪Paste the copied redirect URL into the Redirect URI box, and then click Add.
The URL is added to the list of permitted redirect URLs.
▪Click Register to complete the application registration.
▪Copy the app ID to the clipboard.
6.Enter the App ID: In the Post Installer, paste the app ID into the App ID box.
7.Click Test to test the application registration.
The Post Installer will either show a success message or prompt you to fix any errors.
If Portal for ArcGIS is secured using Windows Integrated Security and anonymous access to the portal is disabled in IIS, the Post Installer will present a warning that says: "The portal application registration is valid—however the specified portal requires authentication". You must install the VertiGIS Studio Web Adaptor Extensions to allow VertiGIS Studio Printing to communicate with Portal for ArcGIS.
8.Close the Post Installer when you are finished.
Manage the Service Account
The first time you run the Post Installer, it creates a local user account called VSP_runner that VertiGIS Studio Printing uses in its back-end operations. This account is required for running prints.
You can modify the account in the Post Installer, in case you need to:
▪Update the password if it expires.
▪Change to a different local user or to a domain user.
A domain user is required to access Windows-secured ArcGIS Server running on a different machine.
The account can be a local user or a domain user, but not a machine account. The account must have the "Allow log on locally" user right.
To modify the user account:
1.If you want to use a different account, create the account.
2.Open the Post Installer.
3.Click the VertiGIS Studio Printing icon  in the upper left corner and select Service Account.
4.If you created a new account, enter the name of the account in the Account box.
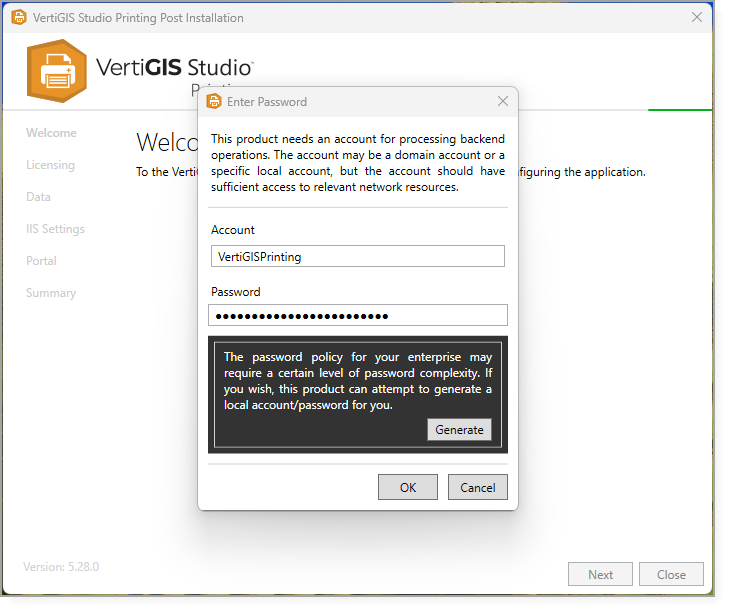
5.Enter the password and click OK, or click Generate to create a password automatically.
6.Close the Post Installer when you are finished.
