The quickest way to create a print layout is to use one of the preconfigured templates that come with VertiGIS Studio Printing, such as the 8.5 x 11 Landscape layout or the A4 Landscape layout. The preconfigured layouts offer a standard layout that includes the map, overview map, legend, scale bar, map information, and north arrow, with areas for the logo, title, notes, and disclaimer.
This tutorial shows you how to create a print layout based on a preconfigured layout, configure an application to host the print layout, and run the print from the host application.
Before you Begin
VertiGIS Studio Printing can run in two environments—in the cloud or on premises. To do this tutorial, you must have an ArcGIS identity that gives you access to one of these environments.
▪Cloud: To do this tutorial in the cloud environment, you need an ArcGIS Online account. You can use a public account or an organizational account. You can get a public account here for free.
▪On Premises: To do this tutorial using on-premises Printing, you must first install and configure the Printing Engine. Then, VertiGIS Studio Printing must be installed and registered either with Portal for ArcGIS or with ArcGIS Online. See Install VertiGIS Studio Printing on Premises for instructions. The registration information is on the Post Installer's Portal panel.
•Portal for ArcGIS: If VertiGIS Studio Printing is registered with your organization's on-premises installation of Portal for ArcGIS, do this tutorial using the account that you use to access your organization's portal.
•ArcGIS Online: If VertiGIS Studio Printing is registered with ArcGIS Online, do this tutorial using your ArcGIS Online account.
Quick Steps to Create, Host, and Run a Print Layout
The steps to create a print layout based on a preconfigured template are as follows:
1.Create a new print layout using a preconfigured template.
6.Run the print layout in a supported host application.
Tutorial - Create, Host, and Run a Print Layout
In this tutorial, the vertical bar is used to list Print Designer elements that you access in the given order, for example:
Properties | <control> | <section> | <setting>
means
Click Properties  , select <control> in the drop-down list, expand the <section> area, and configure the <setting> property.
Note that <control> can refer to a particular control or band in the layout or to the template as a whole.
Step 1: Create a New Print Layout
1.Launch VertiGIS Studio Print Designer and click Let's get started. Sign in if you are prompted.
If you use VertiGIS Studio Printing in the cloud, you can access Print Designer here.
2.Click the 8.5 x 11 Landscape tile. Alternatively, click New | 8.5 x 11 Landscape.
Print Designer shows the layout of the 8.5 x 11 Landscape template on the design surface ( ).
).
The Properties panel ( ) shows the properties for the currently selected item, either a control or the layout as a whole. Initially, the layout as a whole, Print (XtraReport), is selected.
To select a control, click the control in the layout or select the control in the Properties drop-down list. To select the layout as a whole, click the background of the design surface or select the layout in the Properties drop-down list.
In the Properties list, the name is followed by the type of control, for example, in "Map (XRMapPictureBox)", the control is named "Map" and the type is "XRMapPictureBox".
You can change the name of any layout element using the Properties | <control> | Design | Name setting. The name can contain letters, numbers, and underscores. It cannot contain spaces or special characters.
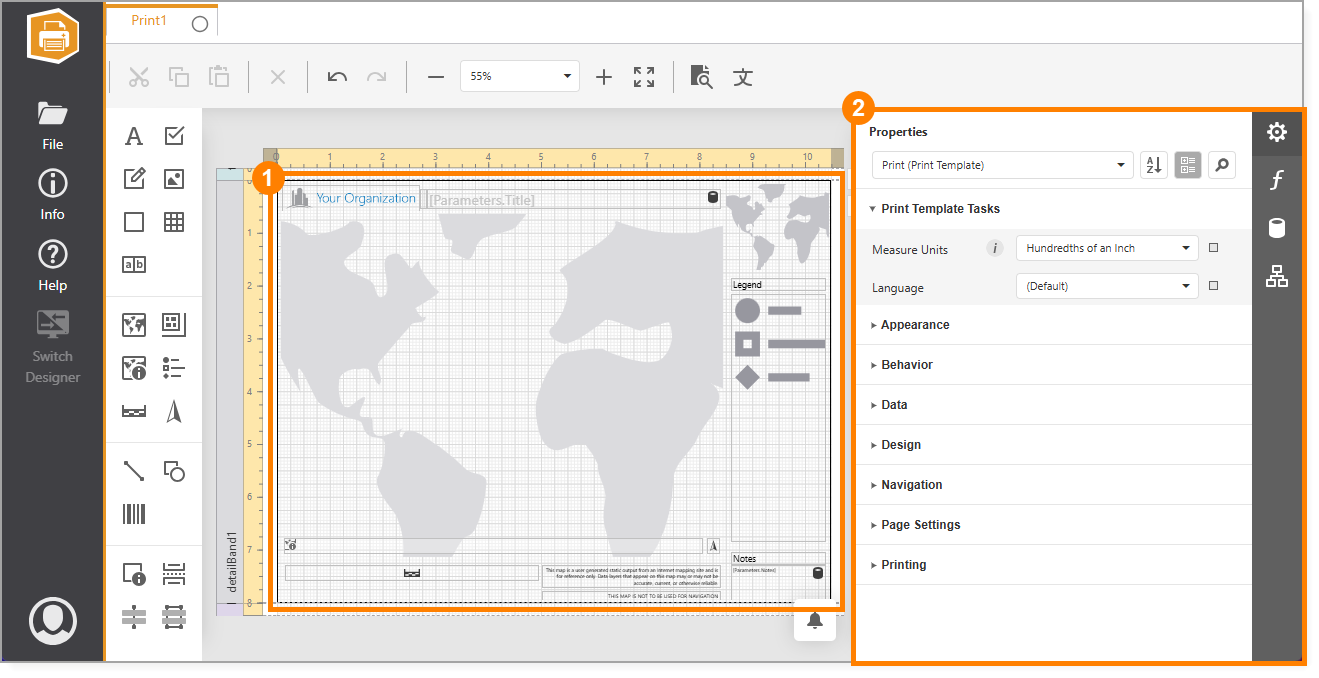
Preconfigured layout in Print Designer (), with the layout properties shown in the Properties panel ()
3.To verify the paper size and orientation of the layout as a whole, open Properties | Print (XtraReport) | PageSettings. The Landscape checkbox controls whether the layout is portrait or landscape orientation. The Paper Kind setting controls the height and width of the paper that the print output is intended to be printed on.
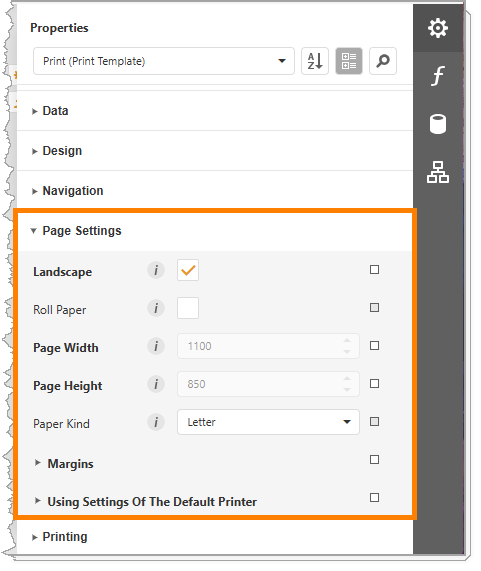
Page settings for the print layout
See also...
Step 2: Brand the print layout
In this step, you will brand the print layout by replacing the default logo with your organization's logo.
In addition to the logo, you may want to configure the font, color, and other appearance settings to conform to your corporate style. For more information, see Configure the Look and Feel and the Appearance Properties Common to Most Controls.
The preconfigured layouts use Panel controls to organize the template into functional areas. Panels allows you to move and copy related controls as a unit.
The logo is in the TopPanel control with the title.
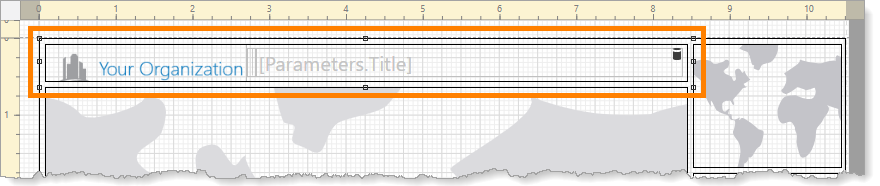
TopPanel control, containing the logo and title
This tutorial uses a high-resolution image for the logo. The image is larger than the control, so the Sizing setting is used to fit the image to the control.
The size of a control is given in Properties | <control> | Layout | Size. The units are set at the template level, in Properties | Print (XtraReport) | Actions | Measure Units.
1.In the layout, click the logo's control to select it.
This also selects the control in the Properties panel. The control is called OrganizationLogo.
![]()
Default logo selected in the layout
2.Specify the logo file's location:
▪Workstation: If the image is on your workstation, you can select the file in the file system. This embeds a copy of the image in the print layout. The preconfigured layouts use this method.
In Properties | OrganizationLogo | Actions, click the  icon in the setting where the default image is configured. Browse to your logo file, select it, and click Open.
![]()
Setting to select an image on your workstation
▪Web Server: If the image is served by a web server, you can specify the image's HTTP or HTTPS URL. In on-premises Printing, you can specify the image's file path on the server instead of the URL.
Cloud Printing does not support file paths.
In Properties | OrganizationLogo | Actions, type or paste the logo's URL in the top Image URL box.
Setting to specify an image by its URL
The custom logo replaces the default logo in the OrganizationLogo control. If the logo is larger than the control, only part of the logo is visible.
![]()
Custom, high-resolution logo in the OrganizationLogo control
3.In Properties | OrganizationLogo | Actions | Sizing, select Squeeze from the drop-down list.
![]()
High-resolution logo squeezed to fit the OrganizationLogo control
4.Drag the middle, right handle of the OrganizationLogo control towards the left to adjust the width of the control.
Alternatively, you can use the settings in Properties | OrganizationLogo | Layout | Size to adjust the size of the control.
![]()
Handle to drag to resize the width of the control
![]()
Control resized to fit the logo's width
5.Move the LogoSeparator control to the left.
To move a control, you can either drag the control or select the control and use your keyboard's arrow keys to move it.
Alternatively, modify the Properties | LogoSeparator | Layout | Location settings.
![]()
LogoSeparator moved to the left
6.Increase the size of the MapTitle control to fill the available space.
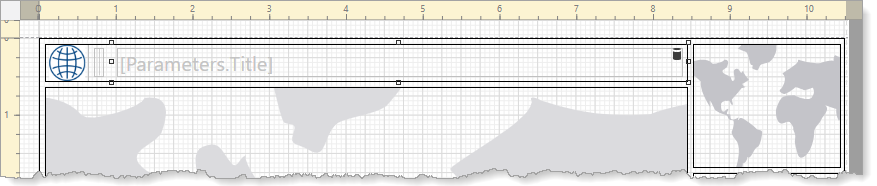
MapTitle control resized to fit the available space
See also...
Configure the Picture Box Control
Step 3: Preview the print
Print Designer has a Preview function for running prints. The Preview function allows you to verify a print layout while you are designing it.
The preview shows a placeholder map and overview map. To produce a print using your own map, you must run the print from a host application.
To preview a print, your browser must allow pop-ups from apps.vertigisstudio.com (cloud Printing) or from your domain (on-premises Printing).
1.Click Preview  .
.
The preconfigured layouts have two controls that use parameters in their configuration. A parameter is a placeholder for print content that gets its value when the print is generated. You can use a parameter in any Label control.
The controls in the preconfigured layouts, MapTitle and NotesDesc, use parameters called Title and Notes respectively. The Preview prompts you to enter values for Title and Notes.
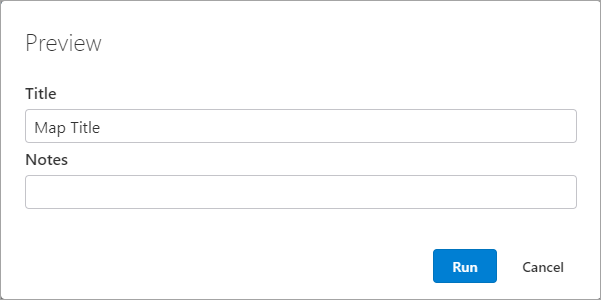
Prompt to enter values for the Title and Notes parameters
2.Type in values for Title and Notes, if you want.
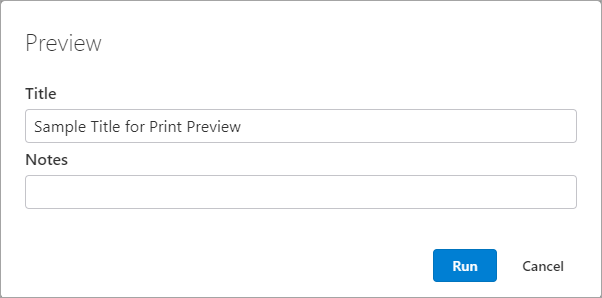
Default value for the Title parameter replaced with a custom title
3.Click Run.
The PDF opens in a new browser tab.
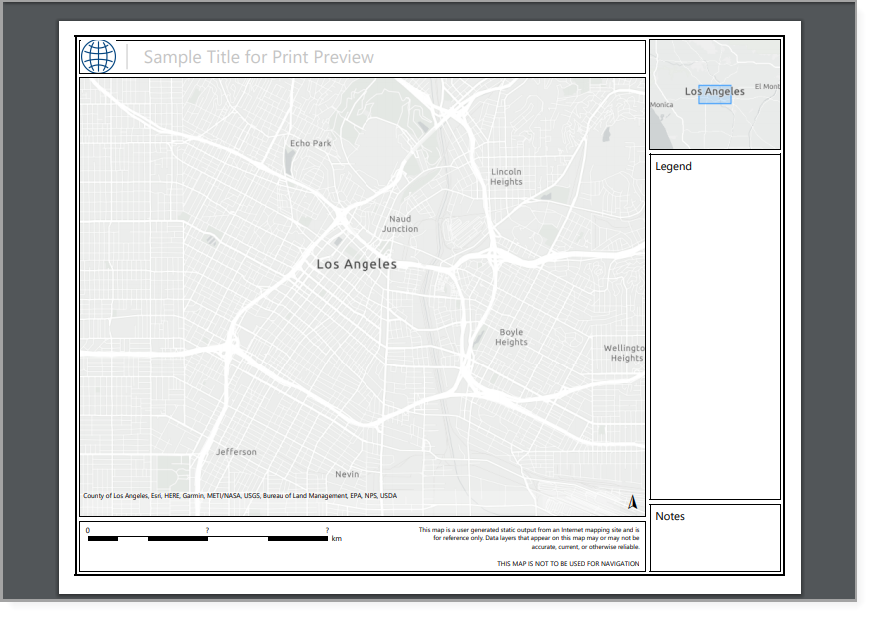
Print preview, showing the placeholder map
See also...
Step 4: Save the print layout
1.Press Ctrl+S or click File | Save As.
2.Enter a name for the print layout.
3.Click Save.
When you save a print layout for the first time, an item is created for the template in your ArcGIS content. The item's URL is given in Print Designer's Info panel. To open the item in ArcGIS, click the View hyperlink. The Info panel also provides an area to enter a description of the layout.
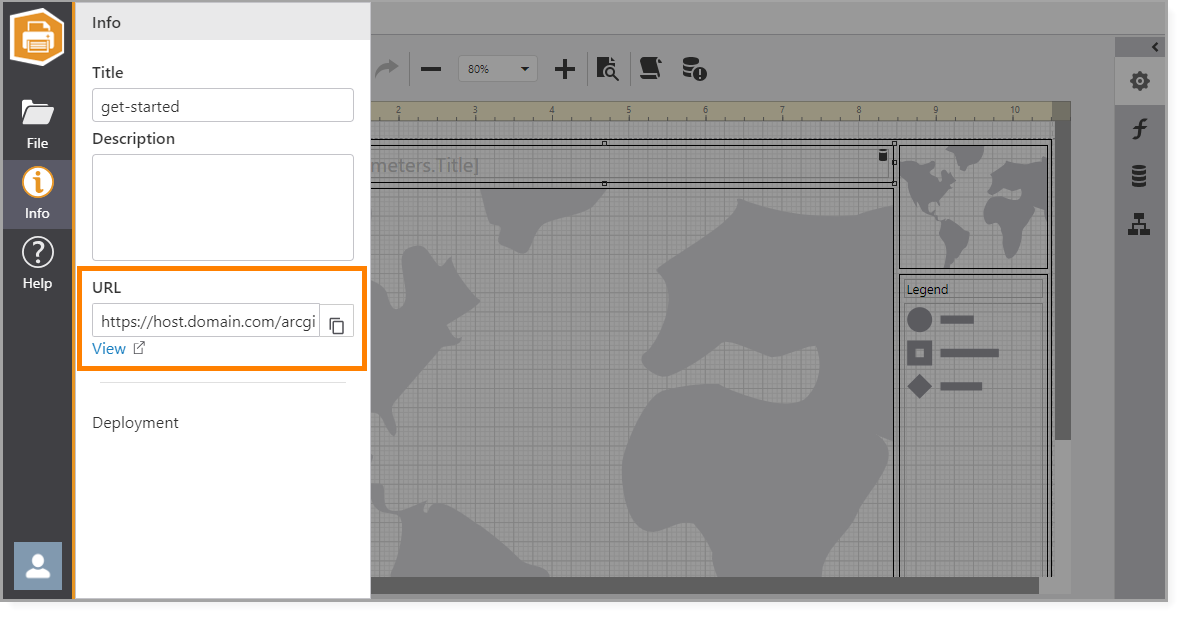
Info panel, showing the URL for the print layout's ArcGIS item
Step 5: Share the print layout
When you first save a print layout, only you have access to the layout. You can share print layouts with groups that you belong to, with your entire organization, or with everyone (including the public). In this tutorial, for simplicity, you will share the layout with everyone.
Normally, you have to share the host app in addition to the print layout. You do not need to share the host app in the context of this tutorial because only you will run the app.
To share a print layout, you share the print item in ArcGIS. In some Experience Builder scenarios, you also have to share the VertiGIS Studio Printing widget that runs the print.
Normally, we do not recommend sharing print layouts with everyone unless the application is public and you want to allow anyone to run the print.
1.Sign in to your ArcGIS account.
You can open your ArcGIS account from Print Designer by clicking Info | View.
2.Share the print item:
a.On the print item's details page, click Share.
b.Select the Everyone (public) checkbox.
c.Click OK.
Step 6: Run the Print Layout
Run the print layout in a supported host application:
▪Run a Print in a VertiGIS Studio Web App