Create Reports
To create a new report, click File | New in Report Designer and then select a template. The Blank Report template is a general purpose template that is suitable for creating any report. The other templates create a partially configured report that is designed for a particular purpose. You augment the configuration to suit your needs.
The templates are:
-
Layer Report: Use the Layer Report template to create a report that presents ArcGIS feature data for the features that are currently selected by the user.
-
Blank Report: Use the Blank Report template to create an empty report that you can configure from scratch.
-
Mailing Labels: Use the Mailing Labels template to print address labels on sheets of commercially available labels, such as Avery, Formtec, or Herlitz labels.
You can also base a new report on an existing report by saving a copy of the existing report under a new name. This is useful if the configuration or formatting will be largely the same in the two reports.
Layer Report Wizard
The Layer Report Wizard creates a report that includes feature data from an ArcGIS layer. The report includes the data for the features that the user selected before running the report. The features are passed into the report via their IDs.
The Layer Report template configures the report as follows:
-
Data Source: The ArcGIS data source that you specify in the template is added to the report. You can either select an existing data source or create a new one. Creating a new data source adds the data source to the Data Sources panel so you can use it in other reports.
The Layer Report template's option to create a new data source only works for services that are unsecured or federated. If the service is secured by some other method, add the data source before you use the template.
-
Records Returned by the Query: The query returns the records for the features whose IDs are passed in to the report as inputs. To configure this, the template adds the following:
-
Report Parameter: A multi-value report parameter of type Number (32 bit integer). The parameter is called
FeatureIds. -
Query Filter: A filter condition that filters for records whose ID matches one of the IDs that are passed in to the report. The filter condition uses a query parameter called
fids. TheFeatureIdsreport parameter is bound to the query parameter.
For more information, see Use the Current Features as Report Inputs.
-
-
Fields Returned by the Query: The query returns all the fields. You can modify the query to return a subset of the layer's fields.
-
Report Layout: The report's layout has the following content:
-
Report Header band containing the name of the data source
-
Page Header band containing the name of the layer and column headings for the first few fields in the layer
-
Detail band containing the first few fields in the layer
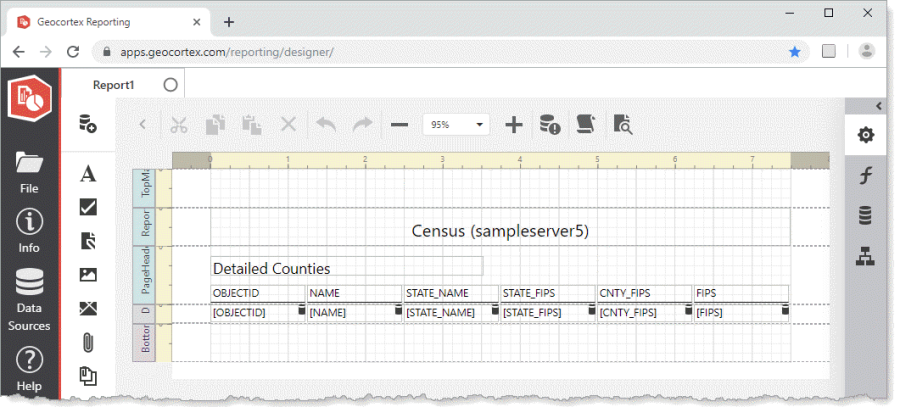
Report created by the Layer Report Wizard for the Detailed Counties layer of the Census (sampleserver5) data source
-
After the report is created, you will build on the initial configuration by adding or removing data fields and other controls and formatting the content.
To open the wizard, click File | New | Layer Report. To try creating a report using the Layer Report Wizard, follow the tutorial in Tutorial - Create a Simple Report Using the Layer Report Template.
To create a report based on the Layer Report Wizard:
- In Report Designer, click File | New and double-click Layer Report.
- In the Layer Report Wizard, there are a few available options for the types of data source to use for the report. Use the following as a guide:
- If you have already added a data source to Report Designer that you wish to use, select Option A: Create a report using an existing data source
- If you need to create a new data source for the report, select Option B: Create a report using a new ArcGIS layer or table.
- If you wish to create a custom connection to a data source, select Option C: Create a report using a no data source, and create the custom connection after the report is created.
- Click Next.
Option A: Create a report using an existing data source
If you selected Use an existing data source, use these steps as a reference.
- From the list of data sources added to Report Designer, select the data source you wish to use for your report, and then click Next.
- Select the layer or table you wish to query in the data source and then click Finish.
Option B: Create a report using a new ArcGIS layer or table
If you selected Use a new ArcGIS layer or table, use these steps as a reference.
- Enter a name for the data source.
-
Enter the URL to the ArcGIS service, and then click Next.
The URL must be to the service and not to the layer or table you wish to use for the report.
- Select the layer or table you wish to query in the data source and then click Finish.
Option C: Create a report using a no data source
If you selected No data source, there are no other steps in the wizard to configure the report.
Blank Report Template
To create a report from scratch, use the Blank Report template. The Blank Report template has three bands and no controls. It is initially configured for 8.5" x 11" paper in portrait orientation.
![]()
Blank Report template open in Report Designer
To try creating a report using the Blank Report template, follow the tutorial in Tutorial - Create a Layer Report Using the Blank Report Template.
To create a report based on the Blank Report template:
-
In Report Designer, click File | New and double-click Blank Report.
-
Configure template-wide settings like paper size, page orientation, and margins.
-
If you want, add bands (See the Band Reference for more information on bands) such as the Report Header and Report Footer.
-
Add a data source to the report.
-
Configure the query that will get the data for the report.
-
Design the report by adding data fields and other controls (See the Control Reference for more information on controls).
-
Click Preview
 to generate the report.
 To preview a
apps.vertigisstudio.com(cloud Reporting) or from your domain (on-premises Reporting).Refine the layout and re-preview the report until you are satisfied with the result.
-
Press Ctrl+S to save the report.
You can now share the report, configure an application to host it, and run the report.
Mailing Labels Template
The Mailing Labels template creates a report that prints on commercially available labels, such as Avery, Formtec, or Herlitz labels. The most common use of this template is to print address labels. You can also use the template to print other types of label, like spine labels, labels for file folders, name badges, and so on. When you use the Mailing Label template, you only need to design a single label and the report takes care of repeating the design on the other labels on the sheet.
To create a report using the Mailing Labels template:
- Click File | New | Mailing Labels to open the template.
-
Select the type of label you want to use, and then click Finish.
To view the spacing of labels and make adjustments, you can click Next instead of Finish, but usually this is not necessary. Selecting the label type provides the template with all the information it needs about how the labels are laid out on a sheet.
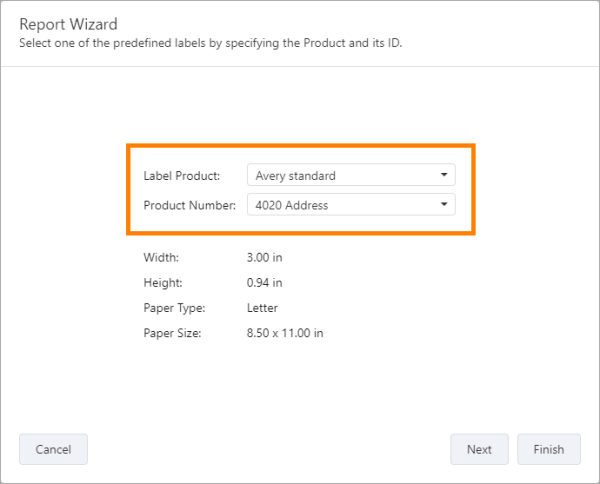
Label type selected in the Mailing Labels template
The template creates the report. Within the detail band is a panel that says Place controls here to keep them together. This area represents a single label. This is the area that you will use to design a label.

Mailing Labels layout, showing the panel where you will lay out a single label
-
Add the data source. Make sure you select the address fields you need, such as name, street address, city, and so on.
Avoid using a field that contains a complete address, as the address will appear on one line, with wrapping if necessary. Selecting separate fields allows you to place individual parts of the address on separate lines.
-
Add the data fields to the panel in the detail band.

Layout for a single mailing label
You can place other types of control besides data fields on a label, like images.
-
Format the data fields.
You may want to remove the border around each data field by setting Appearance | Border Width to 0.
-
Click Preview
to preview the report.To preview a
apps.vertigisstudio.com(cloud Reporting) or from your domain (on-premises Reporting).
Preview of a report created by the Mailing Labels template
See Also...
Tech Tip: Creating mailing labels with reports in VertiGIS Studio Reporting