For our example in the procedure below, we create a data link on our Water Lines layer extension. This data link retrieves specific field attributes from our external data source and displays them alongside the existing data in the Results Details.
To create a data link:
1.Go to the Map component and select the appropriate Layer Extension. In this example, our layer extension is "Water Lines".
2.Navigate to the Data Links section and click Add Data Link to open the Select Workflow window.
3.Click Create a New Workflow.
4.Choose the preconfigured workflow in the Select a Workflow Template drop-down list and enter a Workflow Title. In this example, our workflow is "Data Linking Sample".
In addition to the "Feature - Data Linking Sample" template, there are two working example workflows available to you. A client workflow that links to a REST API class and a server workflow example that links to an SQL database.
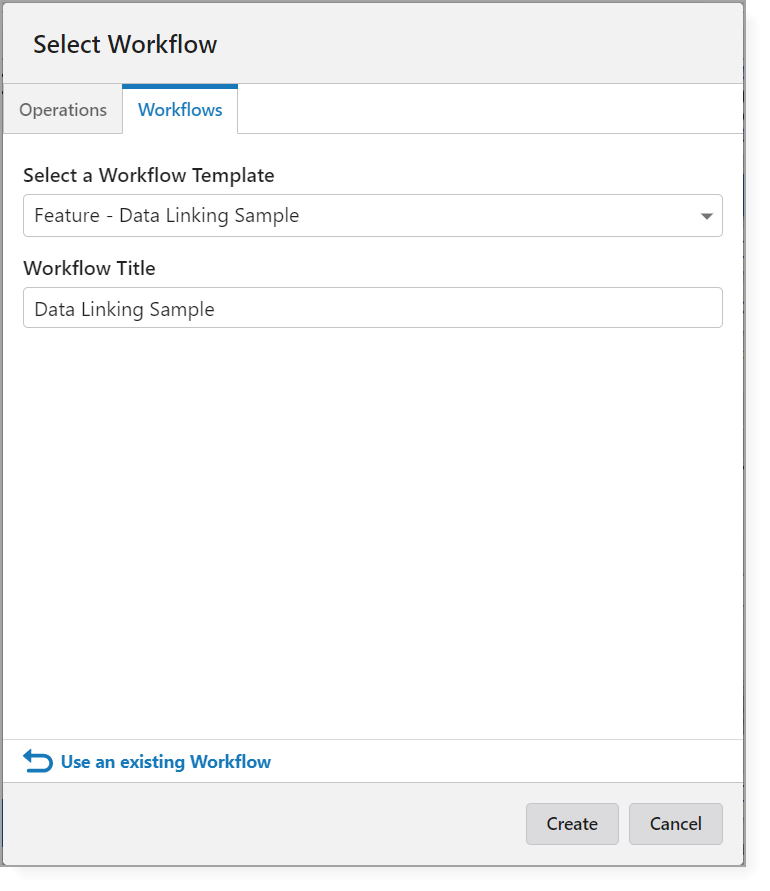
5.Click Create. This creates the empty placeholder in the Results Details, which the data link will populate with field attributes from your external data source.
After you create the workflow, you must open it in VertiGIS Studio Workflow and specify which field attributes you want to retrieve.
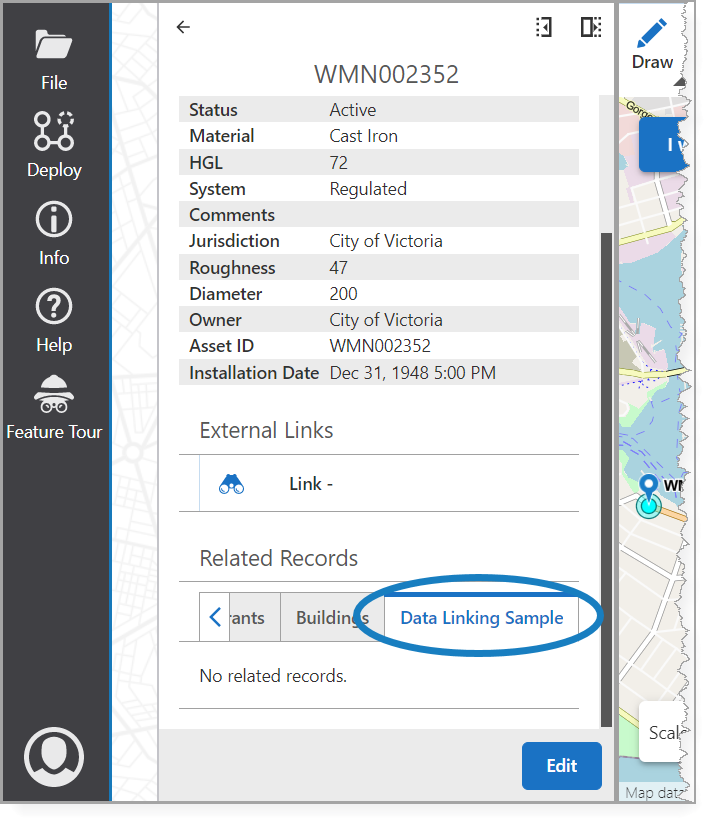
If you open the app and click on the water line, you see a new (empty) tab in Related Records. The default name is what you entered for the Workflow Title (in our example, "Data Linking Sample").
6.Go back to the Map component and click the new data link to open its configuration.
There are many configurable options for data linking; however, the minimum settings you need to configure to make the data link work are as follows:
• Data Link Name
• Popup Template
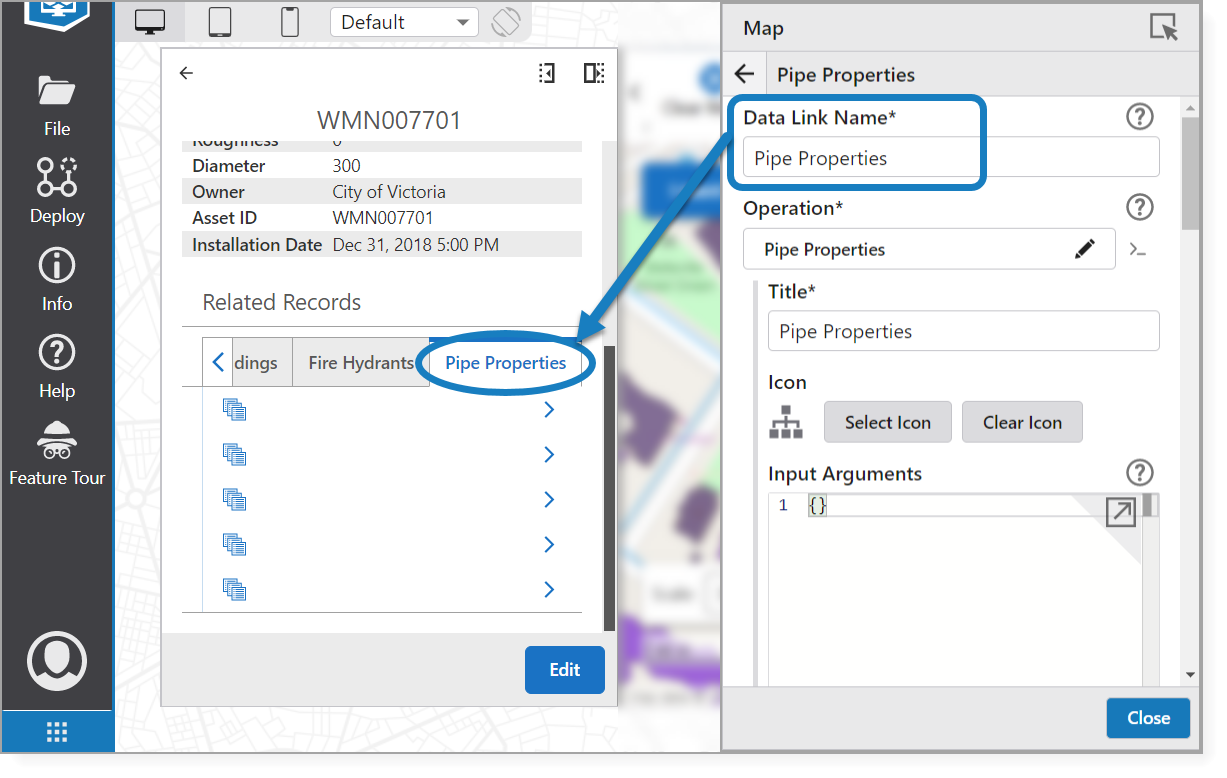
7.Change the Data Link Name. In this example, we change "Data Linking Sample" to "Pipe Properties"). This updates the tab in the Related Records section.
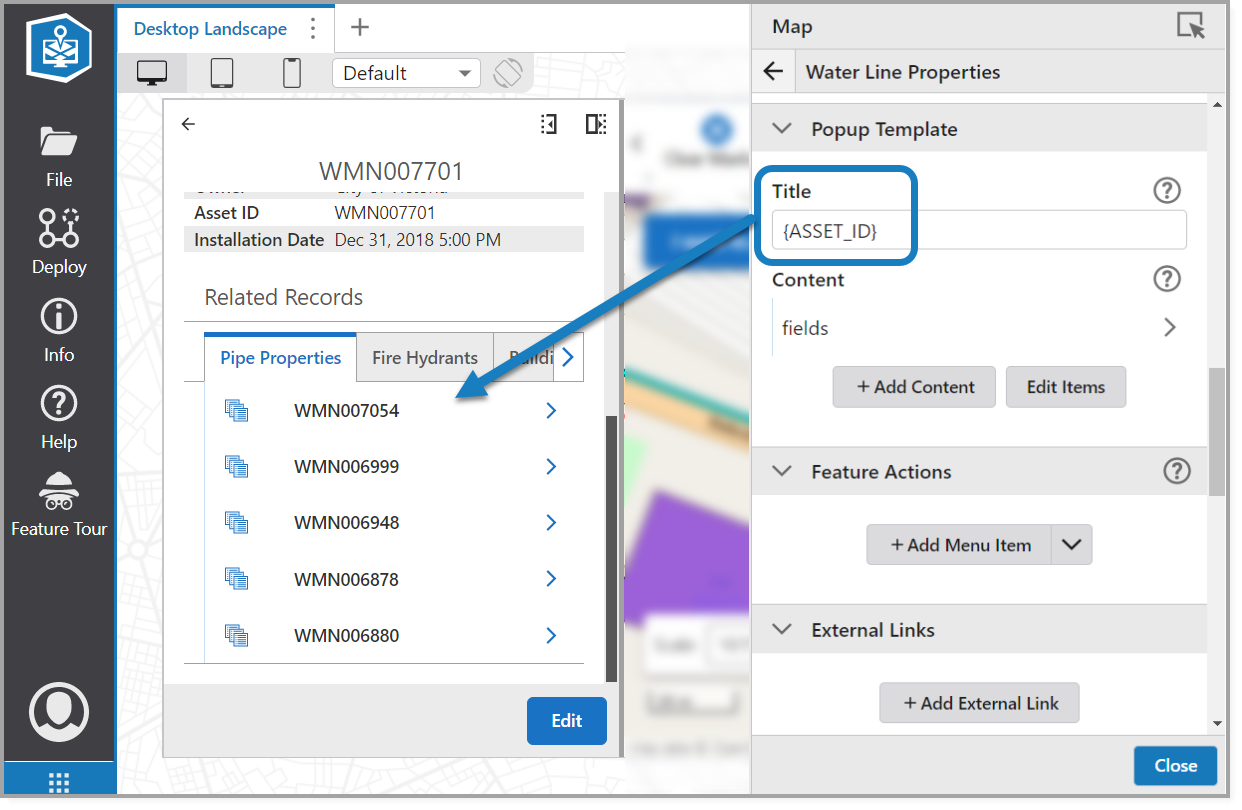
8.Navigate to the Popup Template section, to specify which field attribute from the external data source you want to populate the empty placeholder in the Results Details.
9.Enter the field attribute in the Title field, formatted as {ATTRIBUTE}. In this example, we display the asset ID {ASSET_ID}.
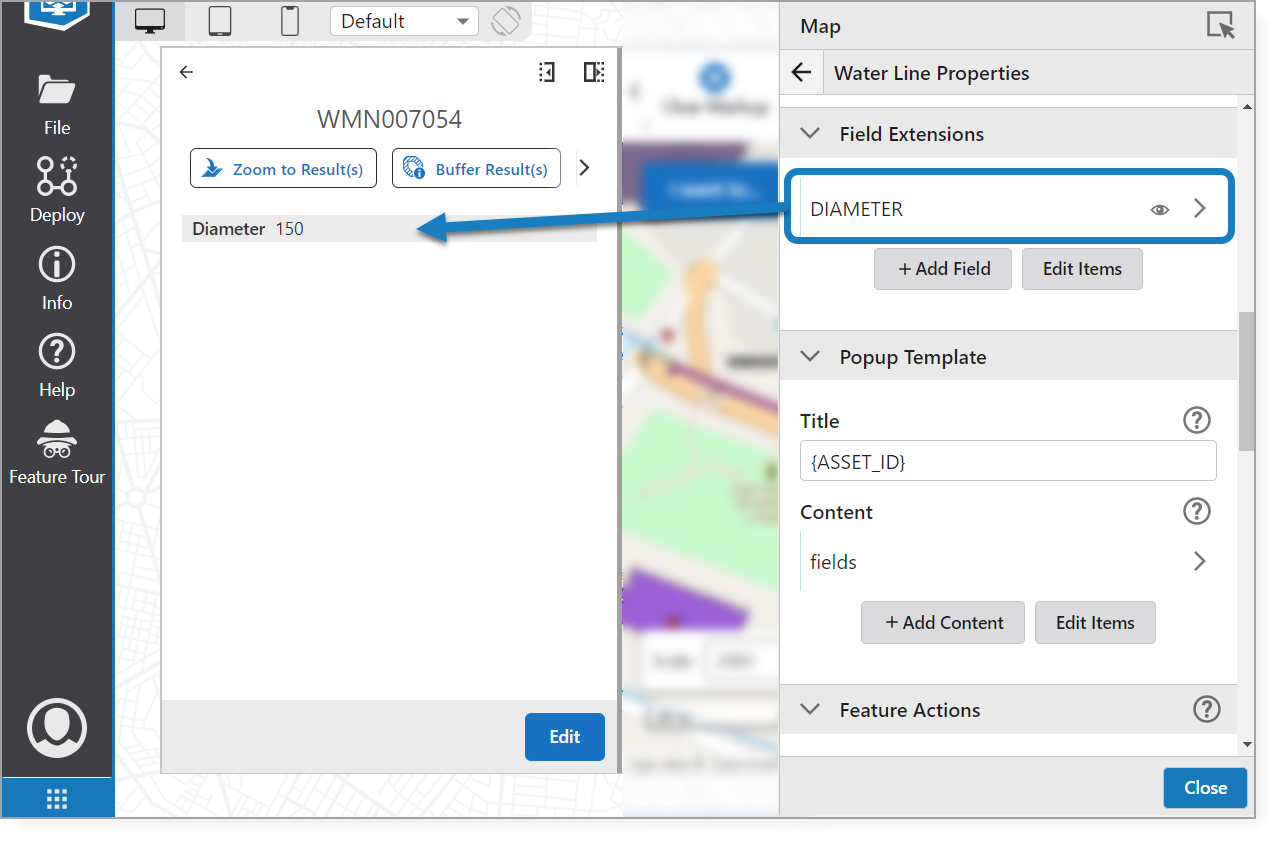
Now when you click on the water line, you see the workflow has retrieved the ASSET_ID field attribute from the external data source and displayed it in the new Pipe Properties tab.
10.Click Add Content to open the Content window. You can customize the following to appear in the Results Details when you click on a data record:
•Text: A text string also supports field attributes from the external data source.
•Fields: Configure the Field Extensions (detailed in the next step), to specify which field attributes to display from the external data source.
•Image: Specify the source URL for the image you want to display. You can also hyperlink the image, to open a URL when the user clicks it.
11.Navigate to the Field Extensions section and click Add Field.
The Field window opens so you can add more field attributes to display in the tab. In this example, we add the "DIAMETER" attribute from the external data source.
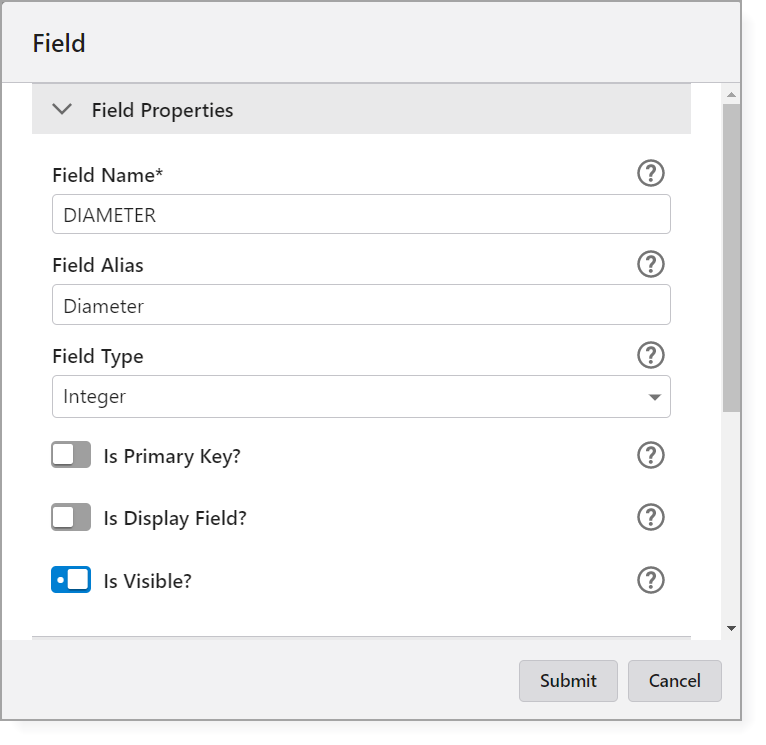
12.Click Submit.
The field extension appears when you select a data record.
13. Repeat as necessary to complete your data link.
The remaining sections you can optionally configure for your data link (i.e., Result Actions, External Links, Display Settings, Formatting, and Failure Behavior) function identically to the sections you can configure in a Layer Extension or a Table Extension (see Map Settings).