Add a Workflow to a Mobile App
Access to VertiGIS Studio Workflow is part of the VertiGIS Studio Mobile package. Workflows can be very powerful and enable you to extend the functionality of your Mobile apps to include complex processes, including forms. For example, if you have specific information needed for an inspection, you can give field workers multiple options to select so they do not have to type in data. You could also include a guided interaction form with cascading combo boxes that limit options based on previous choices.
In the following water pump example, users can identify a pump by serial number or by the type of pump they can observe.
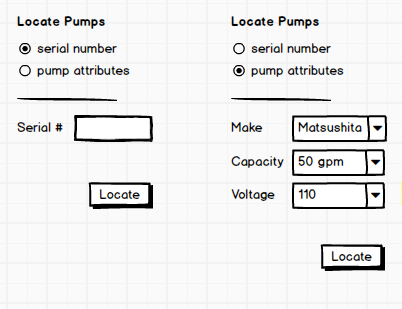
For detailed instructions on building workflows, see the VertiGIS Studio Workflow Help on the documentation center. In particular, the Activity Reference contains information about each Workflow activity, and if it can be used offline or not.
It's important to know that not every Workflow activity works offline, although most of them do. Similarly, not all workflows work in Mobile apps. Fortunately, Workflow has a built-in way of presenting you those activities that work with your app or offline. The Deployment settings in Workflow, allow you to select whether your workflow is going to be deployed in a Mobile app and if it needs to work while offline. When you select those options, the list of activities changes to present only those activities that meet those criteria.
You can add a workflow to run in multiple places in VertiGIS Studio Mobile Designer and VertiGIS Studio Go.
User-Run Workflows:
- I Want To Menu: You can add a menu item that runs a workflow when a user clicks the menu item.
- Map | Result Action: You can add a workflow to a result action for a particular layer. The workflow runs when a user clicks the result action button on that layer.
- Map | Context Menu: You can add a menu item that runs a workflow when a user right-clicks or long-presses on the map and then clicks the menu item in the resulting context menu.
- Result Details | Result Action: You can add a workflow to a result action that works on all the layers in a map. The result action appears in the feature Details panel when a feature is selected and users run the workflow when they click a result action on the Details panel.
- Taskbar: You can add a menu item to the taskbar that runs a workflow when a user clicks the menu item.
Automatic Workflows:
- Map | Events | Map Initialized: You can add a workflow to run each time a map is triggered to initialize - when the app loads, when a map area is activated or deactivated, or when a user logs out and then in again.
- Launch Link: You can add a workflow to a link that runs a workflow when a Mobile app is opened from an external application.
Set Workflow Deployment Options
To set deployment options for a workflow:
- Open Workflow Designer and click the Info icon in the toolbar.
- In the menu, select Deployment.
-
In the options, select the VertiGIS Studio Mobile Viewer
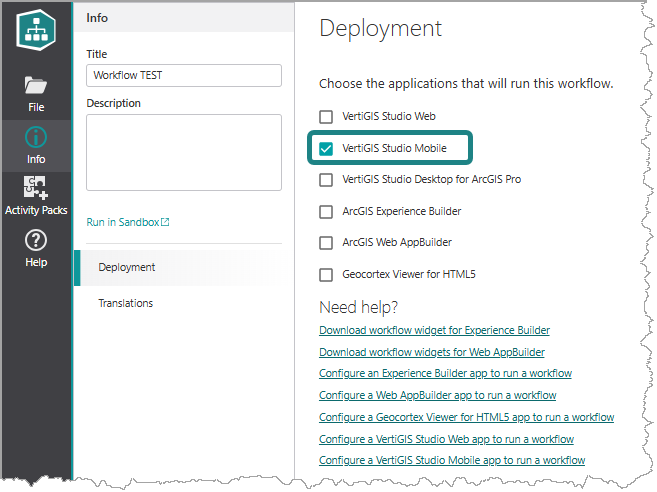
Now, the list of activities will only list those activities that will work with Mobile apps and offline.
Add a Workflow in Mobile Designer
To add your workflow to your app in Mobile Designer:
This procedure adds a command to the I Want To menu that you can use to run an existing workflow that you have already created in VertiGIS Studio Workflow Designer. However, you can also use workflows that others have shared with you.
-
In Mobile Designer, in the Components panel, click I Want To Menu > +Add Menu Item.
A window appears that lets you select a command or workflow.
-
Click the Workflows tab.
-
Select a workflow.
By default, the title of the workflow is also the title of the menu item.
If you can't find the workflow, try using the Search box or, in the Filter by menu, select one of the other options.
-
Click Select.
The menu item for the workflow with is added to the I Want To menu.
-
Click the menu item named after the workflow.
The Menu Item panel appears.
-
In the Menu Item panel, in the Title box, type in a title for your workflow, for example, My Mobile Workflow.
This title appears in your app in the I Want To menu as an option. -
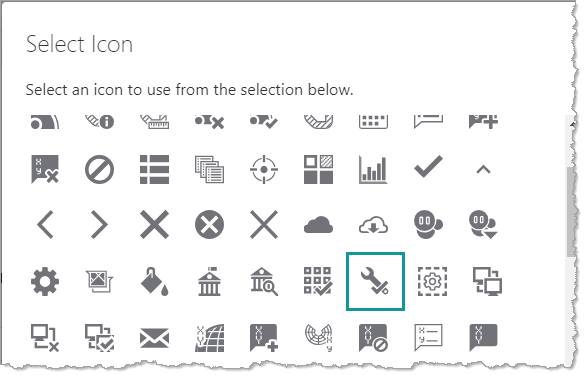
Click Select Icon and choose an icon to be displayed beside your menu option in the I want to menu.
-
In Mobile Designer, click File | Save to save the workflow option to your new app.
-
Return to VertiGIS Studio Go and in the I want to menu, click Refresh App.
The map refreshes.
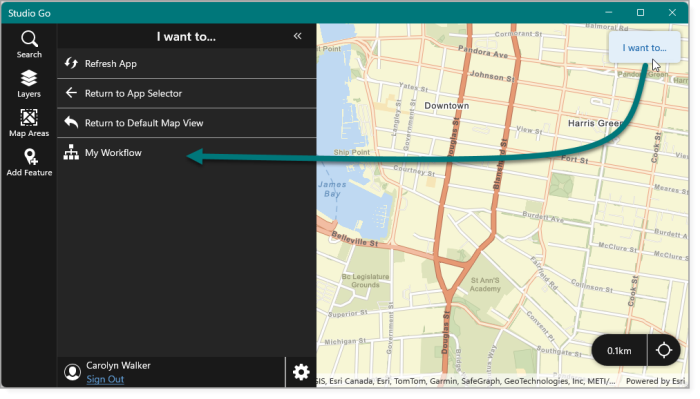
The new workflow appears in the I want to panel as a new option.
-
When you click the new option in the I want to menu, the workflow runs and also adds a temporary icon to the task bar.
Use a Built-in Workflow Template
Mobile Designer has built-in workflows for several of the most common uses for a workflow. The built-in workflows are available for use within multiple components in Mobile Designer, including the I want to menu, layers, and features. The built-in workflows that are available, differ depending on the context.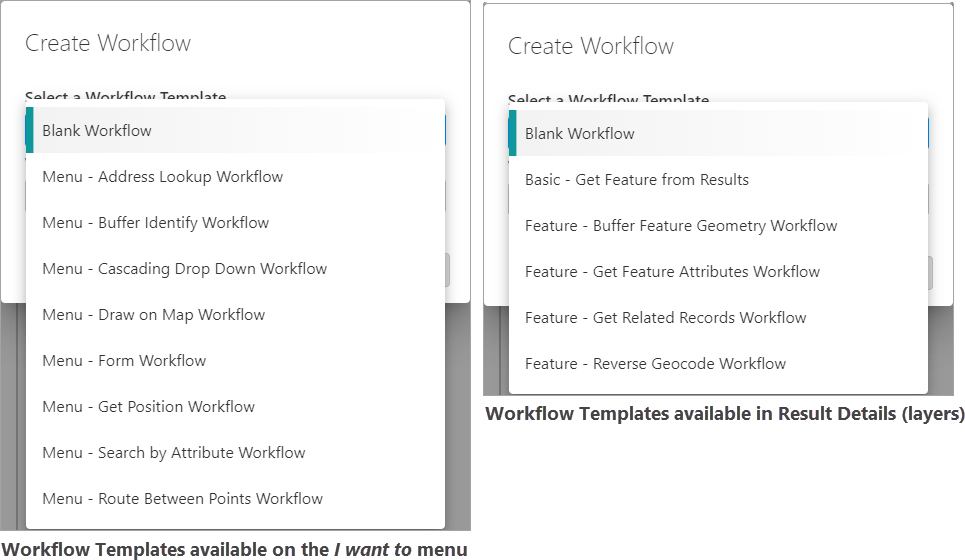
The built-in workflow templates can be used as they are and do not require editing except for the Blank Workflow template, which needs to be edited in VertiGIS Studio Workflow Designer. Most of the time, you will likely want to use the built-in workflow templates as a starting point for building your own custom workflow. The workflow templates take inputs from their context and turn them into code. So if you generate a built-in workflow on a feature, for example, that workflow has unique connections and properties based on the feature you generate it from.
To add a workflow using a template:
The procedure below adds a built-in workflow to the Details panel as a result action using the Result Details component in Mobile Designer. The procedure is the same if you are adding a built-in workflow to the I want to menu - only the types of workflow templates are different.
-
In Mobile Designer in the Components panel, click Result Details, and then Add Menu Item.
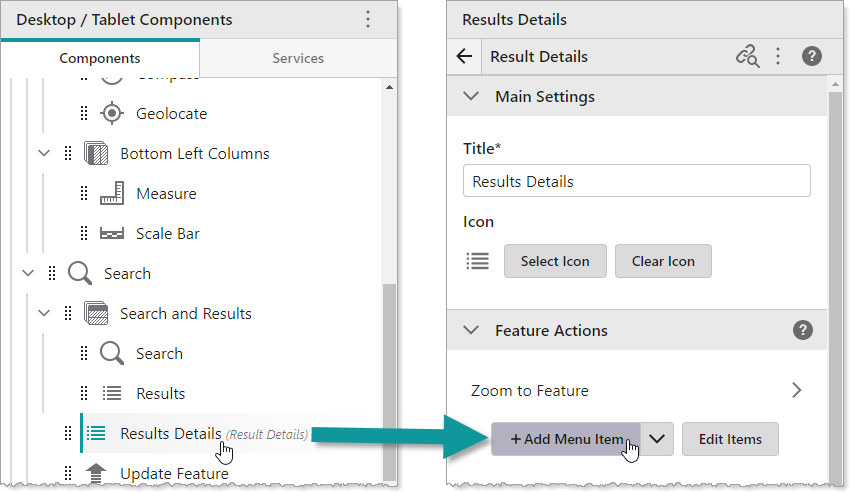
A window appears that lets you select a command or workflow.
-
Click the Workflows tab.
-
At the bottom, click
 Create a new Workflow.
 -
In the Select a Workflow Template menu, select a workflow template that provides the desired GIS functionality, or Blank Workflow if you want to create a workflow from scratch. The templates available depend on the context of the menu.
-
In the Workflow Title box, type a title for the workflow, for example, Find Address.
By default, this is also the title of your menu item.
-
Click Create.
To edit the menu item, click the name of the menu item, for example Find Address. To edit the workflow itself, additionally click Open in VertiGIS Studio Workflow. For information about editing workflows, see VertiGIS Studio Workflow Help.
-
Click File | Save.
When you open the map and click on a feature, you now have the option to click a button to find the address of that feature.
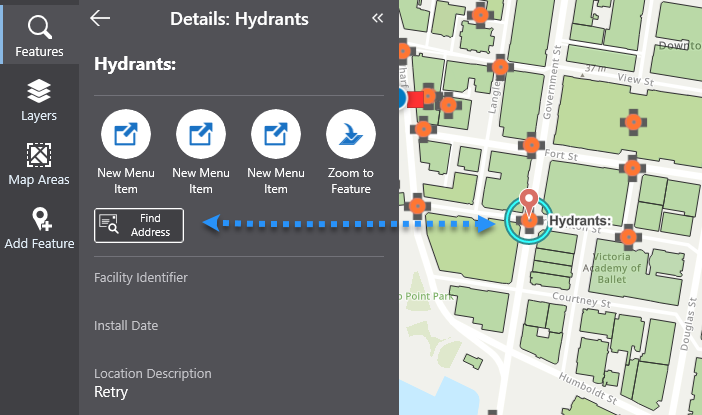
When you click the Find Address button, the workflow runs and displays the address in the panel. A Find Address button appears on the toolbar and the feature is highlighted on the map.
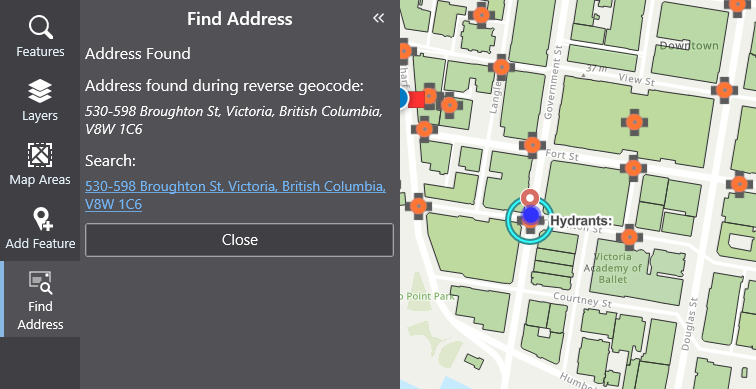
Specify Workflow Input Values
You can manually specify values for one or more workflow inputs.
To specify workflow input values:
This procedure adds a menu item to the Result Details menu that runs an existing workflow with custom input.
For a list of component menus to which you can add menu items, see Component Menu Types and Contexts.
-
While editing an app in Mobile Designer, in the Components panel, click Result Details.
-
Click +Add Menu Item.
A window appears that lets you select a command or workflow.
-
Click the Workflows tab.
-
Select a workflow.
By default, the title of the workflow is also the title of the menu item.
If you can't find the workflow, try using the Search box or, in the Filter by menu, select one of the other options.
-
Click Select.
-
In the Result Details panel, click the new menu item to edit it.
-
Optionally, to rename the menu item, type a Title for the menu item, for example, Run My Workflow With Input.
-
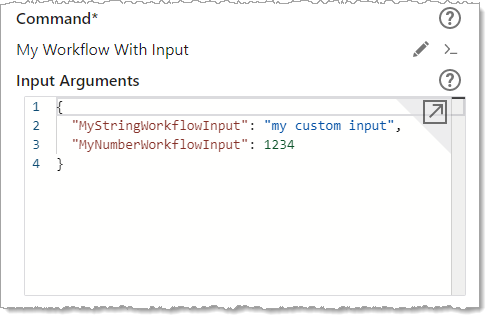
Find the code box below the command.
-
Set Input Arguments to a key-value object, where the keys are the names of workflow inputs and the values are the values for those workflow inputs. For example, set
MyStringWorkflowInputto a string andMyNumberWorkflowInputto a number. By default, this property is set to{}, which is an empty object.The type of the workflow input should match the type of the value specified.
You can customize the command by clicking
 , however, note this action cannot be reversed. When the command is customized, the Input Arguments object is represented by the
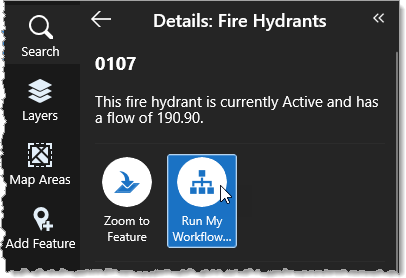
 inputsproperty. When a context is passed into a workflow, the context is passed in via theinputsobject under the value specified bycommandArgumentInput. For example, if the value ofcommandArgumentInputis"map-context", then the workflow input arguments will contain a property calledmap-contextwhose value is the context. For more information, see Use the Menu Context as a Workflow Input.The workflow menu item appears in the Result Details menu as follows.
-
Click File | Save to save the app.
If you want the workflow to be available to other users, see Configure Sharing Permissions.
Use the Menu Context as a Workflow Input
Some menus have a context in which they are used. You can pass the context of the menu as the value to a workflow input. For example, a menu item in the Result Details passes the results as the input to a workflow.
The following table indicates the types of context of each kind of menu.
Component Menu Types and Contexts
|
Component Menu |
Type |
Context |
|
I Want To |
|
None |
|
Map > Events > Map Initialized |
|
None |
|
Launch Link Workflows |
|
None |
|
Result Details |
|
An array of Feature objects representing the result in the Result Details panel. |
|
Map > (Specific layer) |
|
An array of Feature objects representing the results from the specified layer in the search results. |
| Map > Context Menu | Geometry
|
The geometry at the point of the secondary click. |
To use the menu context as a workflow input:
This procedure adds a menu item to the Result Details menu that runs an existing workflow with the results in the Result Details as its input.
-
While editing an app in Mobile Designer, in the Components panel, click Result Details.
-
Click +Add Menu Item.
A window appears that lets you select a command or workflow.
-
Click the Workflows tab.
-
Select a workflow.
By default, the title of the workflow is also the title of the menu item.
If you can't find the workflow, try using the Search box or, in the Filter by menu, select one of the other options.
-
Click Select.
-
In the Result Details panel, click the new menu item to edit it.
-
Optionally, to rename the menu item, type a Title for the menu item, for example, Run My Workflow With Input.
-
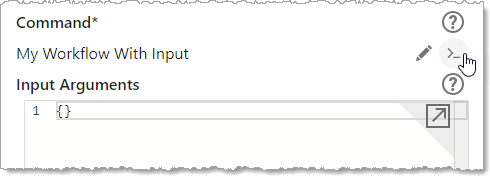
Under the command, to the right of the workflow title, click
 to customize the command.
-
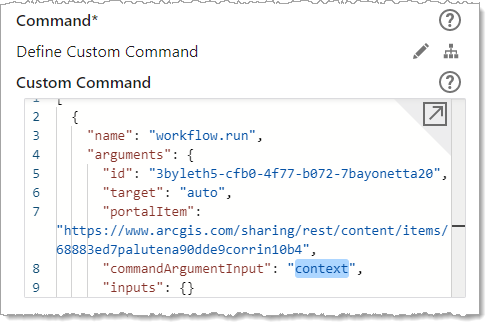
Find the code box below the command.
-
Set the
commandArgumentInputproperty to the name of the workflow input you want to pass the menu's context to. For example,MyFeaturesWorkflowInput. By default, this property is set tocontext, which only works if that is the name of your workflow input.The type of the workflow input should match the type of the context of the component menu. For example, the workflow input type is an array of Feature objects which is the same type as the context of the Result Details component menu. For a list of types and contexts, see Component Menu Types and Contexts.
When a context is passed into a workflow, the context is passed in via the
inputsobject under the value specified bycommandArgumentInput. For example, if the value ofcommandArgumentInputis"map-context", then the workflow input arguments will contain a property calledmap-contextwhose value is the context.The workflow menu item appears in the Result Details menu as follows.

-
Click File | Save to save the app.
If you want the workflow to be available to other users, see Configure Sharing Permissions.