Configure an App
After you create and name a new app, you can configure its components. You can also import components from the template, a shared app, or your own existing apps.
You can preview changes as you configure them by having VertiGIS Studio Go open as you work. For more information, see Use VertiGIS Studio Go to Preview Configuration Changes.
To open an app:
-
In Mobile Designer, click File | Open.
-
Select the app and then click Open.
The Components panel displays a list of high-level components that you can configure in this app.
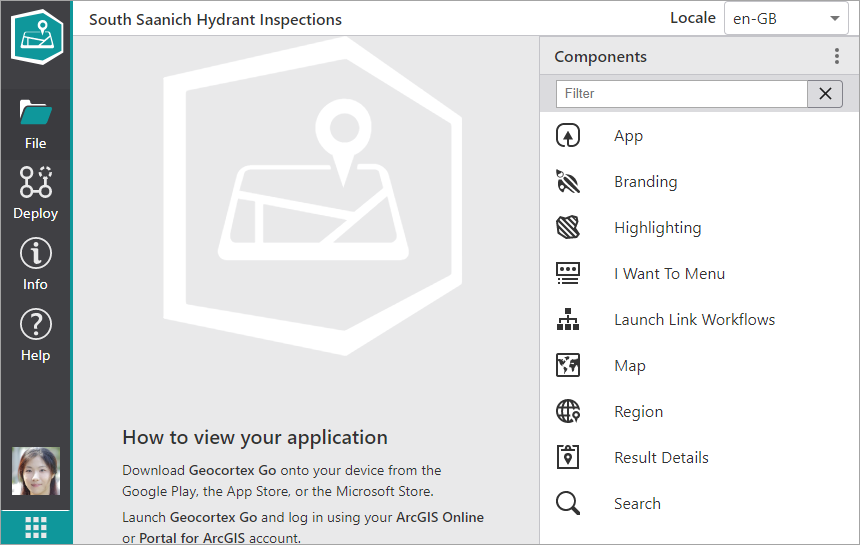
For a full list of the components you can configure, see Component Settings.
Configure App Platform Settings
You need to give a specific name or icon, ID or version number to the apps that are on each platform. Giving unique names to each app can help identify them for users so that they know the version or platform or app they want to download. The settings for each platform are the same, although the requirements can differ. For more information about individual settings, and requirements when using the Google Play, the App Store, or Microsoft Store to deploy your app, see App Settings
Updating the version must be done manually for each new version.
If you are distributing an app via the app store, and do not increment the number, the store will reject the app because the version number is not higher than the version it currently has.
To set specific information for apps by platform:
-
In VertiGIS Studio Mobile Designer, from the Services tab in the Components panel, select App.
- In the Privacy Policy Url box, paste in the URL where the privacy policy that applies to your app is located. The URL is then added to the footer of your app.
-
Click any of the following:
- Android Settings
- iOS Settings
- Windows Settings
-
In the App Name box, type in the name of your app as you want it to appear on this specific platform.
-
To replace the icon with the one you want to use for this app, click Select File, browse to the location of your replacement icon, and then click Open.
For version 5.0 of the VertiGIS Studio Mobile Designer, it is not possible to change the icon for iOS apps. All iOS custom apps will have the Mobile icon when you create an app. All app icons should be 1240 x 1240 .png files with a transparent background.
 -
In the ID field type in the unique identifier for each platform using one of the following formats:
- Android: Use the convention com.example.myapp for example, com.vertigis.studiogo. Only use lowercase letters, numbers and periods.
-
iOS: Use the convention com.example.myapp for example, com.vertigis.studiogo. Only use lowercase letters, numbers and periods.
If you are building an iOS app for distribution via the App Store, you need a provisioning file and a certificate before you can use Mobile Designer to build your app. The provisioning file from Apple will have an App ID within it. You must add that ID under App Settings before you build the app.
It is possible to have subsets, that is, have a provisioning file and certificate for any app from a particular company: com.vertigis.*.
You must ensure that the App ID you enter, matches the App ID in the provisioning file. -
Windows: You can use the same convention as Android and iOS, although Windows permits the use of capitals, numbers, periods and hyphens. The ID can only be between 3 and 21 (inclusive) characters long, for example, VertiGIS.StudioGo.
For more details about formatting your App ID, see App Settings .
Once you have chosen an ID, it is not easy to change it. For more information about each platform ID format, see the following:
Android: Set the application ID
iOS: CFBundleIdentifier
Windows: Identity (Windows 10) - In the Version box, type in the version number that you want to assign this app on each platform. For details about the numbering conventions, see App Settings
- Click File | Save.
Configure Branding for Your App
You can configure Branding options for your app that affect the background colors and the accent colors within the app.
To set branding options:
-
In VertiGIS Studio Mobile Designer, in the Components panel, click Branding.
-
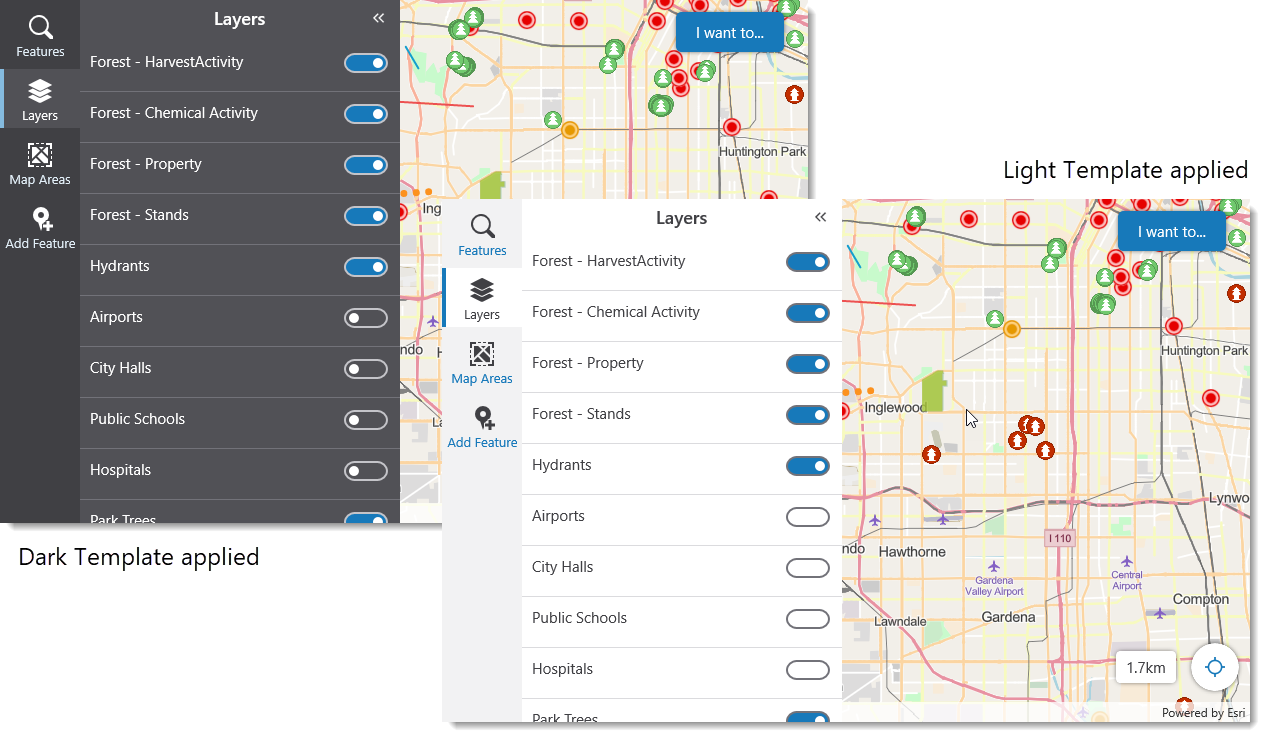
In the Color Template drop-down list, select either the Light or Dark Template.
-
To change the Accent Color, click the colored bar, and select the color you want to use.
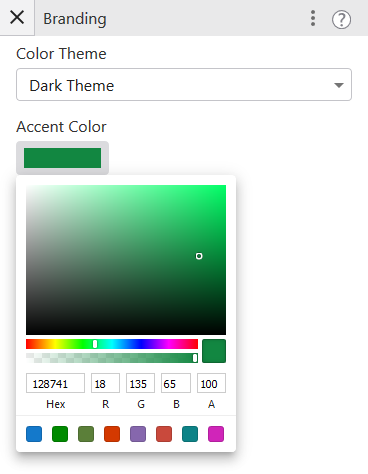
The app with accent color changed to green.

- Click File | Save.
Configure Highlighting Options
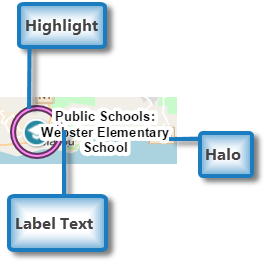
When you search for features and they are found within the visible part of your map, each one is highlighted in a specific color and if there is room, an identifying label appears beside each feature found. When you click a feature on the map to focus on it, the feature is highlighted in a different color and a label appears to identify the feature you selected.
You can change the colors used to highlight searched features or a clicked feature. You can also change the font size and color used for the text label and the size and color of the surrounding halo that makes the label easy to read against the map.
To change the highlight or focus color:
-
In the Components panel, click Highlighting.
-
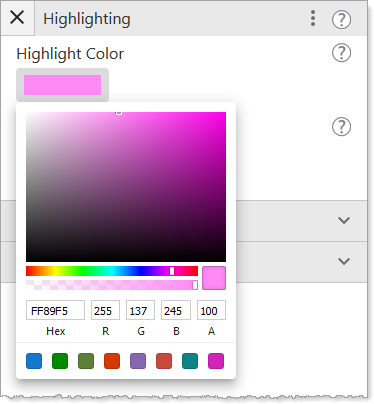
To change the color that surrounds features found when you do a search, click the color bar in the Highlight Color box, and then select a new color.
-
To change the color that surrounds features you click on the map, click the color bar in the Focus Color box, and then select a new color.
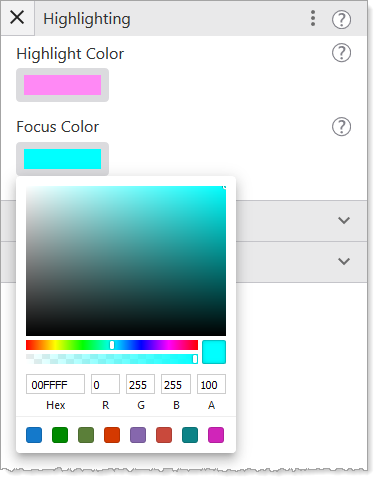 To use a custom color for either the Highlight or Focus color, replace the default RGBA numbers with those for your custom color.
 - Click File | Save.
To change the size or color of the text or halo of feature labels:
-
In the Components panel, click Highlighting.
- Expand one of the following:
- Highlight Label Text Symbol: Changes the color and size of the text or the color and size of the halo surrounding the text of labels attached to features found during a search.
- Focus Label Text Symbol: Changes the color and size of the text or the color and size of the halo surrounding the text of labels attached to features you click on the map.
-
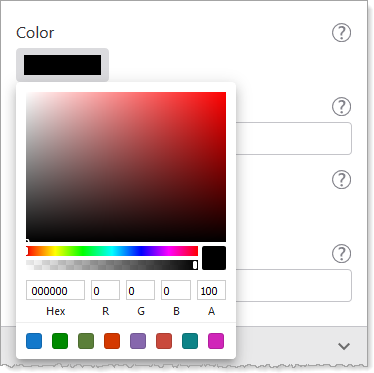
To change the color of the text, click the black square in the Color box and select a different color, or replace the RGBA numbers with those of a new color.
-
To change the size of the text, click Font Size and type in a smaller or larger number.
-
To change the color of the halo that surrounds each label, click the color bar in the Halo Color box and select a new color, or type in the color's RGBA numbers.
-
To change the width of the halo around text labels, click Halo Size and increase or decrease the number of pixels.
-
Click File | Save.
Reference an Esri Web Map
To reference an Esri web map:
-
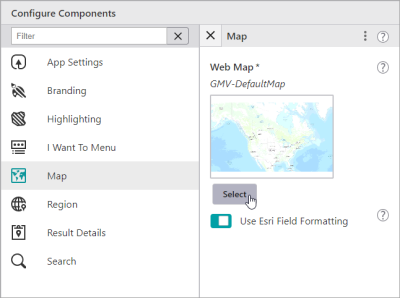
In the Components panel, click Map
 .
. -
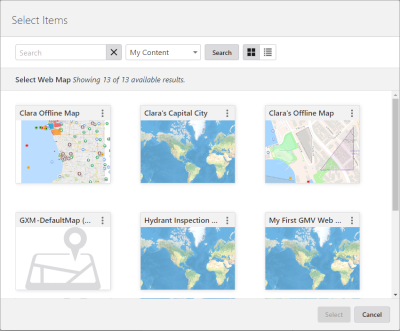
To use an Esri web map in your app, click Select below the map thumbnail.
The Select Items dialog opens displaying thumbnails of Esri Portal Items that you can use in your app.
-
In the Select Items dialog, you can do any of the following:
-
Type the name of your web map into the Search box and click Search.
If you want to reference a map on a Portal that is different from your current one, paste the full URL into the Search box, and then click Search. - Select whether you want to list maps that are:
- My Content: Shows maps you have created and that are in My Content in ArcGIS Online or Portal for ArcGIS.
- Shared With Me: Shows content shared with you by others.
- Public: Shows publicly available maps.
-
Click the List View icon
 to change the display of web maps to a list format. The default view shows web maps in a Grid View
  with thumbnails of the available web maps.
When you click a map thumbnail and then Select, the dialog closes and the name of the map appears below the Web Map title.
The Layer Extensions heading appears and below it, a list of the layers in this web map that you can click to configure. -
-
If you want to use specific number formatting that is configured only in Mobile Designer, then turn off the Use Esri Field Formatting option. If you leave this Esri Field Formatting on, then the formatting will be inherited from the Esri web map.

-
To apply quick edits to a layer, click any of the following:
-
Disable/Enable Identify
 : Click the icon to toggle the identify function on or off for this particular layer. The setting controls whether or not a user can click a feature on the map to identify it.
 -
Disable/Enable Search
 : Click the icon to toggle search on or off for this layer. The setting controls whether or not this layer is included in searches.
 -
Open Field Extension Panel
 : Click a layer to open a panel that lists all the fields on this layer under the heading Field Extensions.
 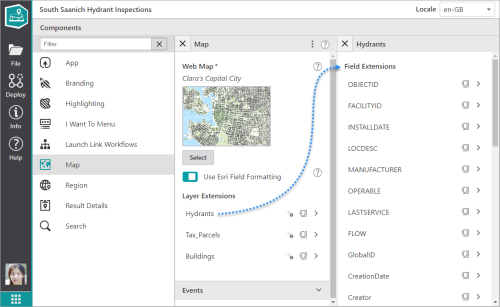 Just as you did for the layer, you can drill down and click a field to open a panel of settings for each field. The settings for each field differ depending on the type of field. For a full list of possible field settings , see Map Settings .
-
-
At the Field Extension level, you can also apply settings that will apply to all the fields on that layer.
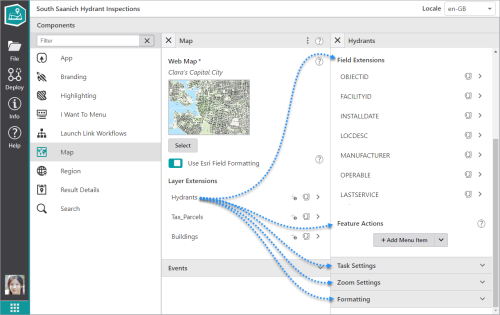
The field settings are functionally grouped and include the following:
- Result Actions: Add a new menu item to configure a result action that applies to all the features of the layer. The result action is then available when you click on, or search for, the features of this layer.
You can give the result action a title, a description, an icon, as well as add a command or workflow to run when you click the result action. - Task Settings: Enable or disable the tasks you want to be available for this layer. You can turn on or off the ability to Edit features, Export information, Identify features or Search for features.
- Zoom Settings:
- Zoom Scale: Set the scale to which the map should zoom for results in this layer. When zooming to results from multiple layers, the highest Zoom Scale is used. If both Zoom Scale and Zoom Factor are set, the higher of the two scale values is used.
- Zoom Factor: Set the Zoom Factor that is applied to the geometry of non-point results to calculate the scale at which to zoom. When zooming to non-point results from multiple layers, the highest Zoom Factor is used. The default is 1.5. If both Zoom Scale and Zoom Factor are set, the higher of the two scale values is used.
- Formatting: Set specific formatting to apply to the numbers on this layer and how they are displayed. To activate the settings, you have to disable Inherit Formatting.
- Result Actions: Add a new menu item to configure a result action that applies to all the features of the layer. The result action is then available when you click on, or search for, the features of this layer.
-
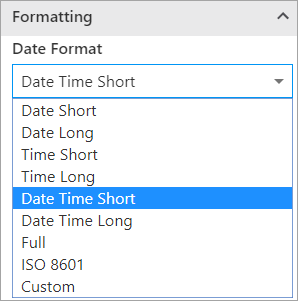
To change the Formatting settings, click the banner to expand the section. Because you are changing the formatting at the layer level, these changes will only apply to this one layer.
If you want to configure Formatting settings that will apply to every layer on the map, change them under the Result Details settings.
You can then change the following settings to apply different number formats depending on the data on your layer:
-
Date Format: Select the date format to use if your layer contains date information.
-
Number Format: Select the number format to use for numbers in the layer. For details about the options for number formats, see Region Settings
-
Currency: Select the Currency if their is currency information on this layer.
-
Decimal Places: Type in the number of digits to appear after the decimal point in fractions. If you do not set a number, the default applied to currency units depends on the currency.
For a number format, the default applied is 4. -
Time Zone: Select the time zone this map will operate within.
-
-
To optionally run a command the first time the map finishes loading, click
 to expand the Events section.
 -
Beneath Map Initialized, click +Add Command.
The Map Initialized command runs after any Launch Link Workflow is run.
A window appears that lets you select a command or workflow.
-
Click one of the following tabs as appropriate:
-
Commands: Select the command you want to run, and click Select.
-
Workflows: Select the workflow you want to run, and click Select. Alternatively, to create a new Workflow, click Create a new Workflow. After adding the workflow, you can set its Title and Icon.
-
To turn your command into a custom command, click ![]() . A code box appears in which you can manually edit the JSON code for the command. Turning your command into a custom command is a one-way operation.
. A code box appears in which you can manually edit the JSON code for the command. Turning your command into a custom command is a one-way operation.
To run multiple commands, click ![]() and, in the code box, type a sequence of commands in JSON format. While editing the custom command in the code box, press CTRL+Space to access code suggestions.
and, in the code box, type a sequence of commands in JSON format. While editing the custom command in the code box, press CTRL+Space to access code suggestions.
For example, the following custom command uses the map.zoom-to-viewpoint command and adds the ability to zoom to a specific point on the map.
[
  {
    "name": "map.zoom-to-viewpoint",
    "arguments": {
      "viewpoint": {
        "targetGeometry": {
          "xmin": "-13727411.901",
          "ymin": "6183163.201",
          "xmax": "-13726074.253",
          "ymax": "6181204.502",
          "spatialReference": {
            "wkid": 102100,
            "latestWkid": 3857
          }
        }
      }
    }
  }
]
Configure the I Want To Menu
You can edit any of the existing options on the existing I Want To menu, as well as add other options to the menu, including adding workflows or other commands to run. You can also add a divider between the menu items to divide them into groups.
To define the I Want To Menu:
-
In the Components panel, click I Want To Menu
 .
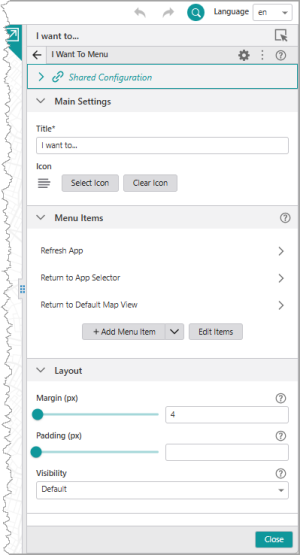
.The Menu panel opens and lists the existing menu items that you can edit.
You can also rearrange the order of the menu items, delete them, add a new menu item, or add a divider between them.
-
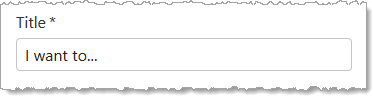
To change the title of the I Want To menu itself, click inside the Title box and type in the new title.
-
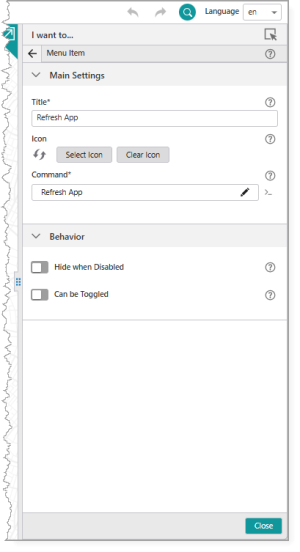
To edit an existing menu item, click the menu item to open its Menu Item panel.
-
Edit any of the following settings:
-
Title: Type in the text of the menu item as you want it to appear on the I Want To menu.
-
Icon: Click Select Icon to change the icon associated with this menu item. The new icon appears beside the button and beside the menu item in the I Want To menu.
To help you find icons that represent an action, use the Filter and type in a meaning, for example, "zoom". The icons refresh to show you appropriate icons for the word. -
If you do not want to have an icon beside the menu item at all, click Clear Icon.
-
Command: The command to run when a user taps the menu item. A command is an action the app should perform.
To select the command you want, click the box that contains the current command followed by
 . The list of available commands depends on the context of the component.
Some commands have additional settings you can configure.
To turn your command into a custom command, click
 . A code box appears in which you can manually edit the JSON code for the command. Turning your command into a custom command is a one-way operation.
To run multiple commands, click
and, in the code box, type a sequence of commands in JSON format. While editing the custom command in the code box, press CTRL+Space to access code suggestions.For example, the following custom command uses the map.zoom-to-viewpoint command and adds the ability to zoom to a specific point on the map.
Copy[
{
"name": "map.zoom-to-viewpoint",
"arguments": {
"viewpoint": {
"targetGeometry": {
"xmin": "-13727411.901",
"ymin": "6183163.201",
"xmax": "-13726074.253",
"ymax": "6181204.502",
"spatialReference": {
"wkid": 102100,
"latestWkid": 3857
}
}
}
}
}
] -
Hide when Disabled: Click the slider to hide this menu item when it is disabled rather than have it grayed out.
-
-
Click File | Save.
When you refresh the VertiGIS Studio Go app, the new menu item has been added to the I Want To menu and you can click it to run the command or workflow, for example, remove highlights if they are obscuring what you want to see on the map.
To add an I Want To menu item:
-
In the Menu panel, click +Add Menu Item.
A window appears that lets you select a command or workflow.
-
Click one of the following tabs as appropriate:
-
Commands: Select the command you want to run, and click Select.
-
Workflows: Select the workflow you want to run, and click Select. Alternatively, to create a new Workflow, click Create a new Workflow. After adding the workflow, you can set its Title and Icon.
-
-
Click the new menu item to edit it.
The same settings appear as those for editing an existing menu item.
-
Configure the settings you want to apply to this menu Item.
-
Click File | Save.
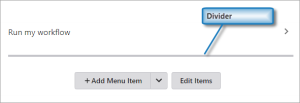
To add a divider between menu items:
-
In the Menu panel, beside +Add Menu Item,click
 , and then click Add Divider.
The divider appears as a gray line at the bottom of menu item list.
-
Click Edit Items.
Icons appear before and after the gray line to indicate that you can move or delete it.
-
Click and drag the divider into position between the menu items.
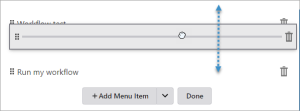
- Click Done.
To reorder an I Want To menu item:
-
In the Components panel, select I Want To Menu.
-
In the Menu panel, click Edit Items.
-
Drag the menu item up or down to the position you want it to occupy on the I Want To menu.
-
Click Done.
To delete an I Want To a menu item:
-
In the Components panel, select I Want To Menu.
-
In the Menu panel, click Edit Items.
-
Click the Delete icon
 .
. -
Click Done.
Configure Region Settings and Number Formats
You can configure settings in the Region component of Mobile Designer that control how numbers are treated in your whole app, or a particular layer, or right down to a field on a particular layer.
This means that Number settings can be set at the whole-app level and then inherited by all the layers and in turn, the fields on those layers. Or you can override the inherited settings to configure specific number formats for a particular layer, for example, if it contained property values you wanted to represent in dollars. Layer settings take precedence over app-level settings. If there is a particular field on a layer that contains dates, you can configure that particular field to format dates in a particular way. When you configure field-level numbers, they override all the number settings above them in the Layer or App.
In addition to the settings you can apply in Mobile Designer, there are also number settings that are applied to the Web Map in ArcGIS Online or Portal for ArcGIS. In the hierarchy, Web Map number settings take precedence over Region settings. But if you have number formatting configured in Mobile Designer at the Field level, they will take precedence of the web map settings.
Number formats that can be configured for Mobile at the following levels:
- Region settings: Defined in Mobile Designer. Sets the default number formatting for the whole application. These settings are inherited by the layer and field levels if those are not configured.
- Map Layer settings: Defined in Mobile Designer in the layer. Sets the default number format for all the fields in this layer. These settings override the Region settings when configured.
- Web map settings: Defined in ArcGIS as part of the web map field definition. These settings override the Region and Map Layer settings when configured.
You can turn the web map field settings off in Mobile Designer. Under Map settings, turn off the Use Esri Field Formatting option. When you turn the Use Esri Field Formatting option off, then only the settings you define in Mobile Designer are used. - Field settings: Defined in Mobile Designer in the field of a layer. Sets the default number format for one field. These settings override region, map Layer, and web map settings when configured.
Specific Types of Number Formats
Number format settings have different effects on different types of numbers. Some are general and affect all numbers and others have a specific effect on only the numbers that are applicable to the setting. For example:
- Number Format: Setting this attribute affects all integers and real numbers.
- Date Format: Setting this attribute affects only dates.
- Currency Format: The currency setting only comes into affect if the Number Format is set to Currency or Accounting.
- Decimal Places: Setting this attribute affects all numbers if they have decimals.
- Mobile Designer Number Formats: When you set the Number Formats in Mobile Designer, the settings apply to all date and number fields (both integer and real numbers) as well as to dates.
To set Region number formats:
-
In VertiGIS Studio Mobile Designer Help, click Region.
-
Change any of the following options:
-
Measurement Units: Select the units of measurement you want your app to use:
-
Detected Measurement: Detects whether the region settings in the browser use Metric or Imperial and then uses that setting.
-
Metric : Sets the app to use metric units of measurement.
-
Imperial: Sets the app to use the imperial units of measurement.
-
-
Fallback Locale: Select the default locale to use when no translation exists for the currently-selected locale. For example, if you have translated the app into French but one word does not have a French word available, the Fallback Locale language will be used for that word. The default is English.
-
Date Format: Select the format of the date to use for this app. The default is Date Time Short.
-
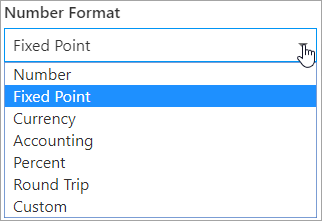
Number Format: Select the number format to use for numbers displayed by this app.
The default is Fixed Point. For more details about number formats, see Region Settings .
-
Currency: Select the currency you want your app to operate in. The default is USD.
-
Decimal Places: Type in the number of digits to appear after the decimal point in fractions. If you do not set a number, the default applied to currency units depends on the currency.
For a number format, the default applied is 4. -
Time Zone: Select the time zone your app will operate within.
-
-
Click File | Save.
To set Layer number formats:
- In VertiGIS Studio Mobile Designer Help, click Map.
- When the layers for the map display, click the layer you want to add number settings to.
-
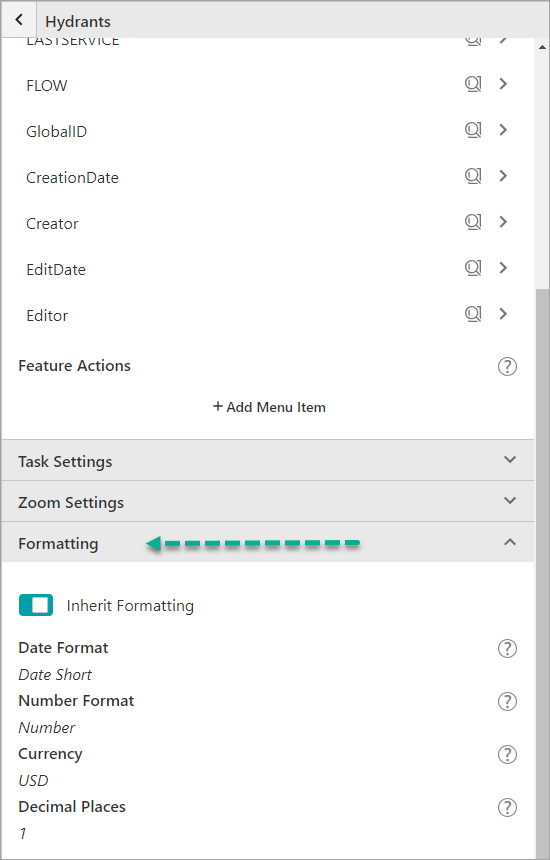
In the panel of settings for that layer, scroll to the bottom of the panel and expand the Formatting section.
-
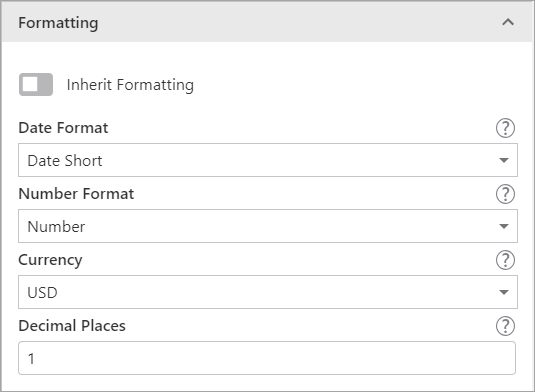
Click the Inherit Formatting option to turn inheritance off for number formatting on this layer.
The number settings activate and you are able to edit the number formatting options.
-
Change any of the following settings:
- Date Format: Select the format of the date to use for this layer.
- Number Format: Select the number format to use for numbers displayed on this layer.
- Currency: Select the currency you want this layer to use.
- Decimal Places: Type in the number of digits to appear after the decimal point in fractions.
- Click File | Save.
To set Field level number formatting:
-
In VertiGIS Studio Mobile Designer Help, click Map.
-
When the layers for the map display, click the layer that contains the field you want to apply settings to.
-
In the Field Extensions panel, click the field where you want to change the number formatting.
Only some fields have the ability to change number formatting.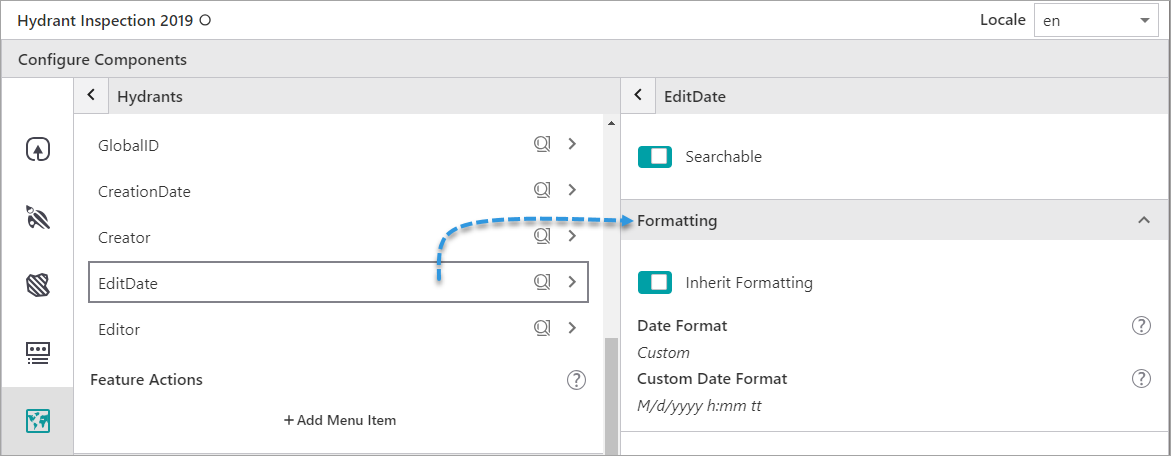
-
Click the Inherit Formatting option to turn inheritance off for number formatting for this field.
The number settings activate and you are able to edit the number formatting options. The type of settings available will differ depending on the field. For more information, see Map Settings
- Click File | Save.
Configure a Result Action
You can configure result actions to run from the feature Details panel.
The feature Details panel opens when you:
-
Search on a feature. From the list of search results, you select a feature to see more information about it.
-
Click a single feature to identify it. Information about that feature displays with result action icons at the top of the panel. If you have a long list of result actions, the first four actions show in the panel as white buttons. result actions lower in the list, show as black buttons with a white border.
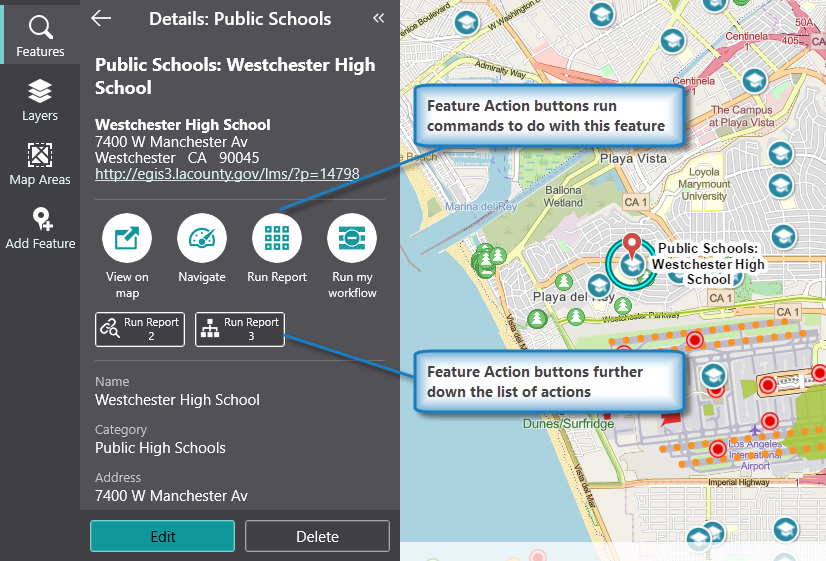
Details panel displaying information about a single feature selected on the map
Add or Edit Result Actions
You can configure result actions at multiple levels. You can configure a result action to act globally on all the features and all the layers of a map, or to act locally on the features of a single layer. In both cases, the steps to add or edit a result action are the same, but you add the result action in a specific place within Mobile Designer.
To add:
-
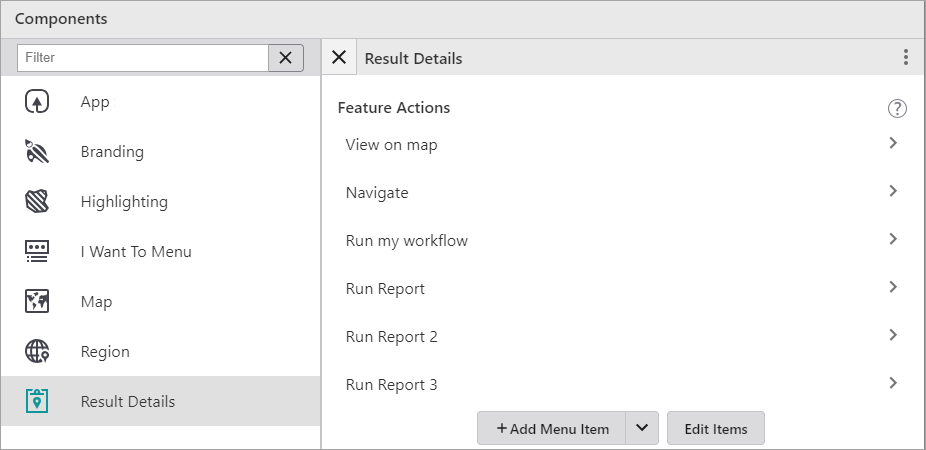
Global Result Actions: From the Components panel, select Result Details
 . In the Result Details panel, click +Add Menu Item.
 -
Local Result Actions: From the Components panel, select Map
, and then click a Layer Extension.
In the layer panel, below the Field Extensions list, is the Result Actions section. Click +Add Menu Item.The instructions below describe how to add or edit global result actions. The instructions are the same for local result actions although they take place in the Map Components area of Mobile Designer.
To add a Result Action menu item:
-
In Mobile Designer, in the Components panel, click Result Details.
-
In the Result Actions section, click +Add Menu Item.
A window appears that lets you select a command or workflow.
-
Click one of the following tabs as appropriate:
-
Commands: Select the command you want to run, and click Select.
-
Workflows: Select the workflow you want to run, and click Select. Alternatively, to create a new Workflow, click Create a new Workflow. After adding the workflow, you can set its Title and Icon.
-
-
Click the new menu item to edit it.
-
In the Menu Item panel, type in the Title of this result action as it you want it to appear in the feature Details panel.
-
Select an Icon to represent this result action in the Details panel.
Use the filter to find an icon that represents an idea. For example, type in "zoom" to see icons that represent zooming in or out.The first four result actions in the list you add, appear as round buttons with the icon in the middle and the title under it the button.

Subsequent result actions appear as a square button with the icon on the left and title on the right.

-
Select the Command you want to run for this result action.
To select the command you want, click the box that contains the current command followed by
. The list of available commands depends on the context of the component.Some commands have additional settings you can configure.
To turn your command into a custom command, click
. A code box appears in which you can manually edit the JSON code for the command. Turning your command into a custom command is a one-way operation.To run multiple commands, click
and, in the code box, type a sequence of commands in JSON format. While editing the custom command in the code box, press CTRL+Space to access code suggestions.For example, the following custom command zooms to the current feature and temporarily highlights it.
Copy[
"map.zoom-to-features",
"highlights.pulse"
]The above example demonstrates how to pass the current context - the current feature - as an argument into the
map.zoom-to-featuresoperation. The returned value ofmap.zoom-to-features, which is the same set of features, is then automatically passed into the next command,highlights.pulse.
Once you have added the Result Action, the icon and title appear as a button in the feature Details panel where you can click it to run the result action.
In Mobile Designer, the result action appears in the Result Details panel in the list of Result Actions, where you can rearrange their order, edit, or delete them.
To change the order of Result Actions in the Details panel:
If you have more than a single result action, you can change the order they appear on the feature Details panel,
-
In the Components panel, click Result Details
. -
In the Result Details panel, in the Result Actions section, click Edit Items.
-
To re-order the result actions, click Edit Items, and then drag the feature items up or down in the list.
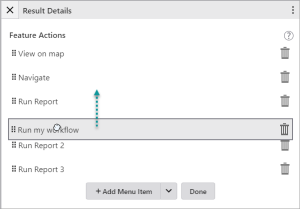
- When you have the order you want, click Done.
-
Click File | Save.
To edit a Result Action:
-
In the Components panel, click Result Details
. -
In the Result Details panel, in the Result Actions section, click the result action you want to edit.
The Menu Item panel opens.
-
Do any of the following:
- Title: Type in a new title for the result action.
- Icon: Select a new icon or click Clear Icon to delete the icon completely.
- Command: Enter a new command, or change the code of the existing command.
-
Click File | Save.
To remove a Result Action:
-
In the Components panel, click Result Details
. -
In the Result Details panel, in the Result Actions section, click Edit Items.
-
Click the Delete icon
beside the Result Action you want to delete. -
Click File | Save.
Use VertiGIS Studio Go to Preview Configuration Changes
To view the changes as you make them, install the VertiGIS Studio Go app. Open both Mobile Designer and VertiGIS Studio Go. Make a change in Mobile Designer, then in VertiGIS Studio Go, click I Want To | Refresh App, and check the changes you made. For more information, see Launch and Preview an App in VertiGIS Studio Go