To reference an Esri web map:
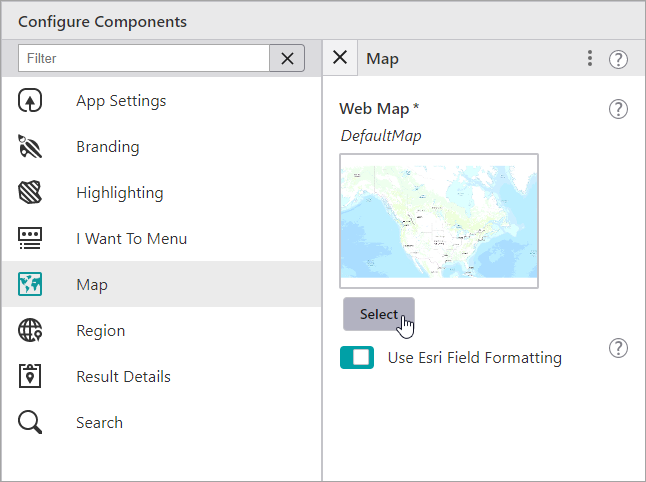
1.In the Components panel, click Map.
2.To use an Esri web map in your app, click Select below the map thumbnail.
The Select Items dialog opens displaying thumbnails of Esri Portal Items that you can use in your app.
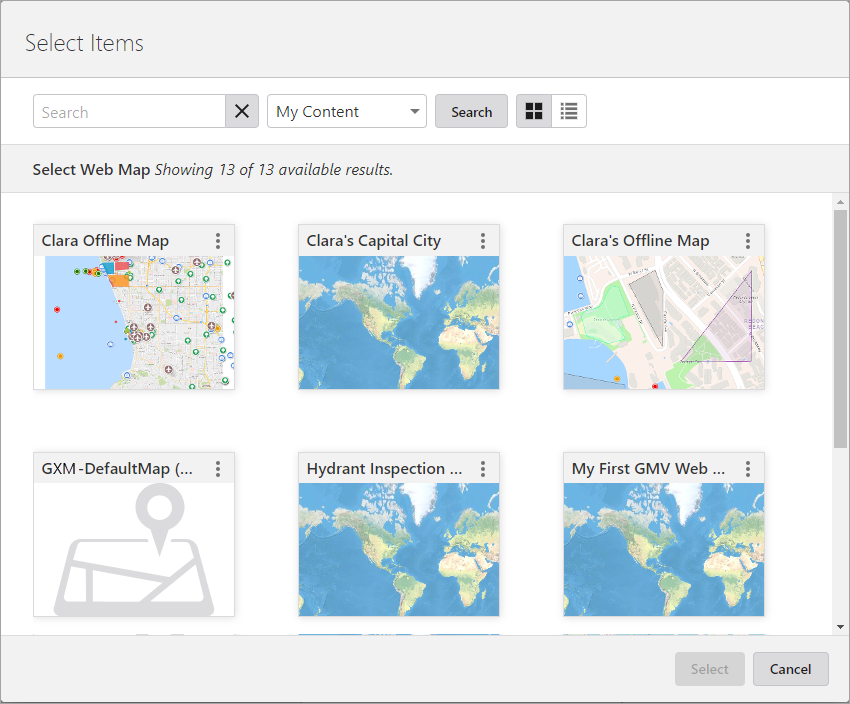
3.In the Select Items dialog, you can do any of the following:
•Type the name of your web map into the Search box and click Search.
•If you want to reference a map on a Portal that is different from your current one, paste the full URL into the Search box, and then click Search.
•Select whether you want to list maps that are:
•My Content: Shows maps you have created and that are in My Content in ArcGIS Online or Portal for ArcGIS.
•Shared With Me: Shows content shared with you by others.
•Public: Shows publicly available maps.
•Click the List View icon ![]() to change the display of web maps to a list format. The default view shows web maps in a Grid View
to change the display of web maps to a list format. The default view shows web maps in a Grid View ![]() with thumbnails of the available web maps.
with thumbnails of the available web maps.
When you click a map thumbnail and then Select, the dialog closes and the name of the map appears below the Web Map title.
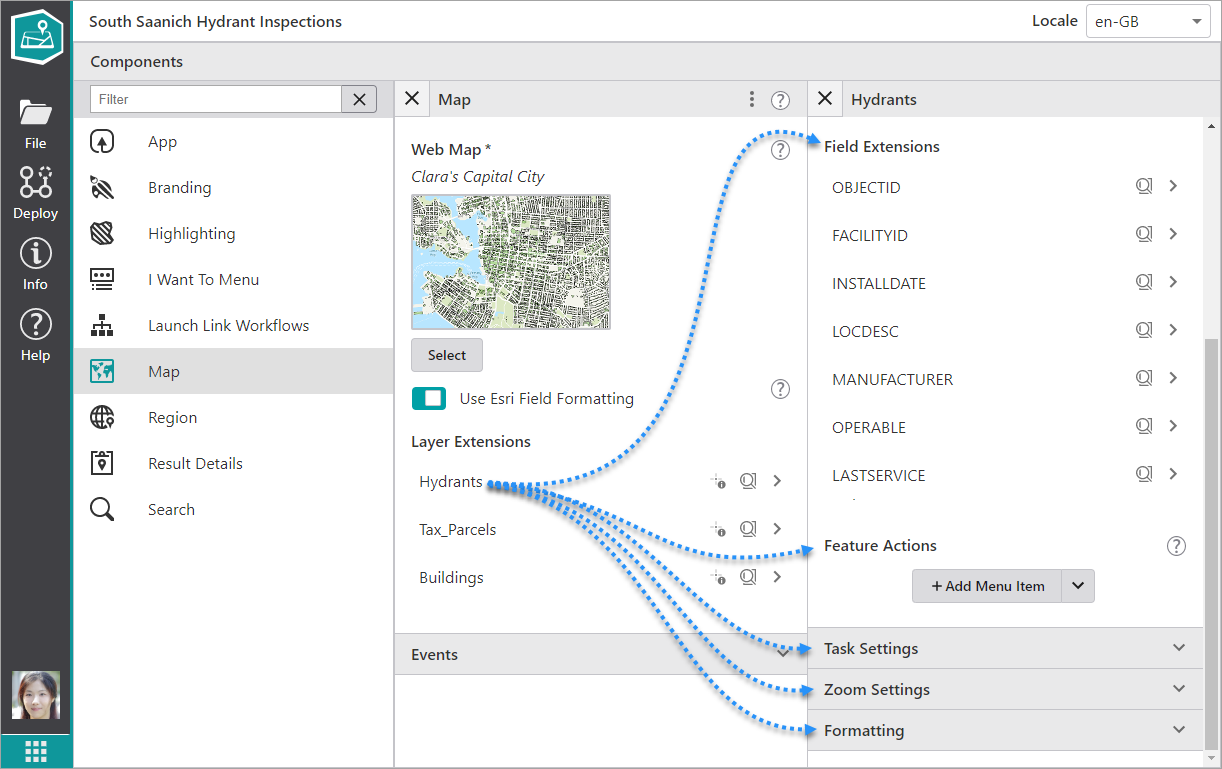
The Layer Extensions heading appears and below it, a list of the layers in this web map that you can click to configure.
4.If you want to use specific number formatting that is configured only in Mobile Designer, then turn off the Use Esri Field Formatting option. If you leave this Esri Field Formatting on, then the formatting will be inherited from the Esri web map.

5.To apply quick edits to a layer, click any of the following:
•Disable/Enable Identify ![]() : Click the icon to toggle the identify function on or off for this particular layer. The setting controls whether or not a user can click a feature on the map to identify it.
: Click the icon to toggle the identify function on or off for this particular layer. The setting controls whether or not a user can click a feature on the map to identify it.
•Disable/Enable Search ![]() : Click the icon to toggle search on or off for this layer. The setting controls whether or not this layer is included in searches.
: Click the icon to toggle search on or off for this layer. The setting controls whether or not this layer is included in searches.
•Open Field Extension Panel ![]() : Click a layer to open a panel that lists all the fields on this layer under the heading Field Extensions.
: Click a layer to open a panel that lists all the fields on this layer under the heading Field Extensions.
Just as you did for the layer, you can drill down and click a field to open a panel of settings for each field. The settings for each field differ depending on the type of field. For a full list of possible field settings, see Map Settings.
6.At the Field Extension level, you can also apply settings that will apply to all the fields on that layer.
The field settings are functionally grouped and include the following:
•Result Actions: Add a new menu item to configure a result action that applies to all the features of the layer. The result action is then available when you click on, or search for, the features of this layer.
You can give the result action a title, a description, an icon, as well as add a command or workflow to run when you click the result action.
•Task Settings: Enable or disable the tasks you want to be available for this layer. You can turn on or off the ability to Edit features, Export information, Identify features or Search for features.
•Zoom Settings:
•Zoom Scale: Set the scale to which the map should zoom for results in this layer. When zooming to results from multiple layers, the highest Zoom Scale is used. If both Zoom Scale and Zoom Factor are set, the higher of the two scale values is used.
•Zoom Factor: Set the Zoom Factor that is applied to the geometry of non-point results to calculate the scale at which to zoom. When zooming to non-point results from multiple layers, the highest Zoom Factor is used. The default is 1.5. If both Zoom Scale and Zoom Factor are set, the higher of the two scale values is used.
•Formatting: Set specific formatting to apply to the numbers on this layer and how they are displayed. To activate the settings, you have to disable Inherit Formatting.
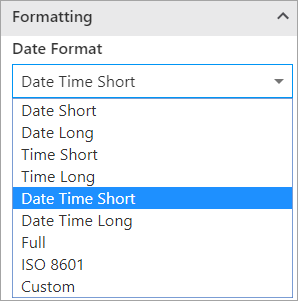
7.To change the Formatting settings, click the banner to expand the section. Because you are changing the formatting at the layer level, these changes will only apply to this one layer.
If you want to configure Formatting settings that will apply to every layer on the map, change them under the Result Details settings.
You can then change the following settings to apply different number formats depending on the data on your layer:
•Date Format: Select the date format to use if your layer contains date information.
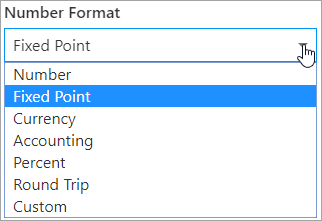
•Number Format: Select the number format to use for numbers in the layer. For details about the options for number formats, see Region Settings
•Currency: Select the Currency if their is currency information on this layer.
•Decimal Places: Type in the number of digits to appear after the decimal point in fractions. If you do not set a number, the default applied to currency units depends on the currency.
For a number format, the default applied is 4.
•Time Zone: Select the time zone this map will operate within.
8.To optionally run a command the first time the map finishes loading, click ![]() to expand the Events section.
to expand the Events section.
9.Beneath Map Initialized, click +Add Command.
The Map Initialized command runs after any Launch Link Workflow is run.
A window appears that lets you select a command or workflow.
10.Click one of the following tabs as appropriate:
•Commands: Select the command you want to run, and click Select.
•Workflows: Select the workflow you want to run, and click Select. Alternatively, to create a new Workflow, click Create a new Workflow. After adding the workflow, you can set its Title and Icon.
To turn your command into a custom command, click ![]() . A code box appears in which you can manually edit the JSON code for the command. Turning your command into a custom command is a one-way operation.
. A code box appears in which you can manually edit the JSON code for the command. Turning your command into a custom command is a one-way operation.
To run multiple commands, click ![]() and, in the code box, type a sequence of commands in JSON format. While editing the custom command in the code box, press CTRL+Space to access code suggestions.
and, in the code box, type a sequence of commands in JSON format. While editing the custom command in the code box, press CTRL+Space to access code suggestions.
For example, the following custom command uses the map.zoom-to-viewpoint command and adds the ability to zoom to a specific point on the map.
[
{
"name": "map.zoom-to-viewpoint",
"arguments": {
"viewpoint": {
"targetGeometry": {
"xmin": "-13727411.901",
"ymin": "6183163.201",
"xmax": "-13726074.253",
"ymax": "6181204.502",
"spatialReference": {
"wkid": 102100,
"latestWkid": 3857
}
}
}
}
}
]