Use Scripts in Reports
In on-premises installations of
Scripting allows
Scripting is
To use scripts in
Scripting is available in on-premises installations of
In
Example 1: If you associate the script with the Report Header band and After Print event, the script will run immediately after the Report Header is generated.
Example 2: If you associate the script with a particular control and the Before Print event, the script will run immediately before the control is generated.
The script runs as many times as the associated
Example 3: If you associate the script with the Page Footer band, the script will run once per page, because the Page Footer is generated once per page.
Example 4: If you associate the script with a control in a Detail band, the script will run once for each record, because the Detail band is generated once for each record.
Main Steps to Configure a Script
To add a script to a
-
Open the
-
Click Scripts
 to open the Script Editor.
 -
Specify when the script will run.
To do this, you need to associate the script with a
Configuring the
-
Select the element to associate the script with.
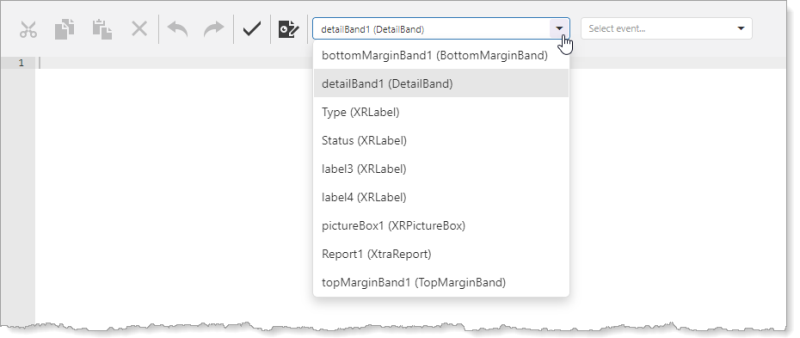
Drop-down list in the Script Editor to associate the script with a
-
Select the event.

Drop-down list in the Script Editor to select the event
The Script Editor creates a script stub. The script is named for the

Script stub created by the Script Editor
-
-
Type or paste the remainder of the script into the stub.
If you type the script, the Script Editor provides intelligent code completion as you type.
-
Click Validate
 to validate the script.
 -
When the script is valid, click Designer
 to return to the design surface.
 -
To test your script, preview the
See Also...
Most feature attachment requirements can be met using the Single Feature Attachment Control and Multiple Feature Attachment Control . However, should you require more flexibility, you can use scripting to include attachments in a report. See Tech Tip: Using scripting to put attachments in reports using VertiGIS Studio Reporting for more information.
Example - Use a Script to Show Feature Attachments
This example uses a C# script to show feature attachment images in a report.
This is intended as an example only. If you want to use feature attachments in a report, use one of the feature attachment controls. See Configure Feature Attachment Controls for information.
-
Sign in to on-premises Report Designer.
-
If you have not yet configured the data source for a feature service that has feature attachment images, configure it now.
-
Create a report that uses the data source.
-
Add data fields and other controls to the report.
-
Drag a Picture Box control
 to the design surface, resize it, and configure its settings, except the image's location. The script will construct the image's URL.
Set the image's Sizing property to Zoom Image to enlarge or shrink the image to fit the control.
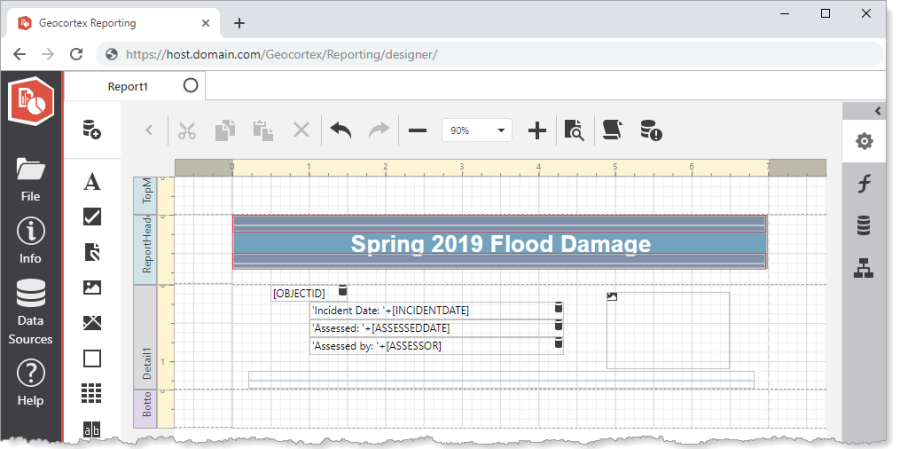
Example report layout
-
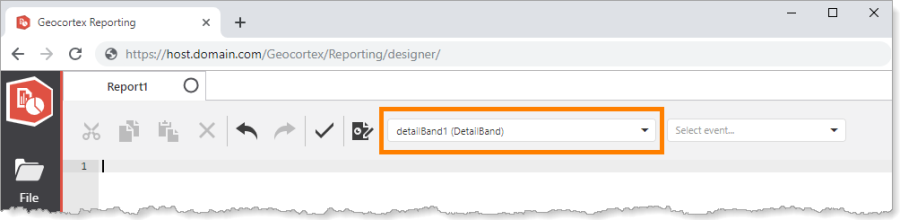
Click Scripts
to open the script editor. -
Select the report element to associate with the script, in this case, detailBand1. Alternatively, you could select the pictureBox1 control.
Your selection determines the list of events that you can choose from.
Location of drop-down list to select the report element
-
Select Before Print from the Select event drop-down list.
A script stub appears:
private void detailBand1_BeforePrint(object sender, System.Drawing.Printing.PrintEventArgs e) {

}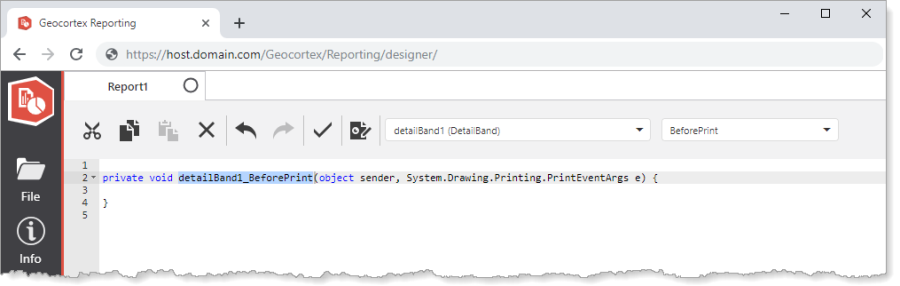
Stub for a script that runs before detailBand1 is generated
-
Add the remaining code to the stub:
CopypictureBox1.ImageUrl = "[image-url-no-image]";
var serviceUrl = "[feature-layer-url]";
var fid = GetCurrentColumnValue("OBJECTID");
var attachmentsUrl = serviceUrl + fid + "/attachments?f=json";
using (var wc = new System.Net.WebClient())
{
using (var stream = wc.OpenRead(attachmentsUrl))
{
var serializer = new Newtonsoft.Json.JsonSerializer();
using (var sr = new System.IO.StreamReader(stream))
using (var jsonTextReader = new Newtonsoft.Json.JsonTextReader(sr))
{
var response = serializer.Deserialize<Newtonsoft.Json.Linq.JObject>(jsonTextReader);
var infos = response["attachmentInfos"] as Newtonsoft.Json.Linq.JArray;
if (infos != null)
{
var info = System.Linq.Enumerable.FirstOrDefault(infos, (x) =>
{
var contentType = (string)x["contentType"];
if (!string.IsNullOrEmpty(contentType) && contentType.StartsWith("image/"))
{
return true;
}
return false;
});
if (info != null)
{
var imageUrl = serviceUrl + fid + "/attachments/" + info["id"].ToString();
pictureBox1.ImageUrl = imageUrl;
pictureBox1.Visible = true;
}
}
}
}
} -
If the name of the Picture Box control is not
pictureBox1, change all instances ofpictureBox1to the correct name. -
Locate the following line and replace
[image-url-no-image]with the URL of the image that you want to show in the report when a feature does not have an attached image.CopypictureBox1.ImageUrl = "[image-url-no-image]"; -
Locate the following line and replace
[feature-layer-url]with the URL of the feature layer.Copyvar serviceUrl = "[feature-layer-url]";The URL must end with a slash (
/). -
If the layer's object ID field is not called
OBJECTID, locate the following line and replaceOBJECTIDwith the correct field name.Copyvar fid = GetCurrentColumnValue("OBJECTID"); -
Click Validate
to validate the script.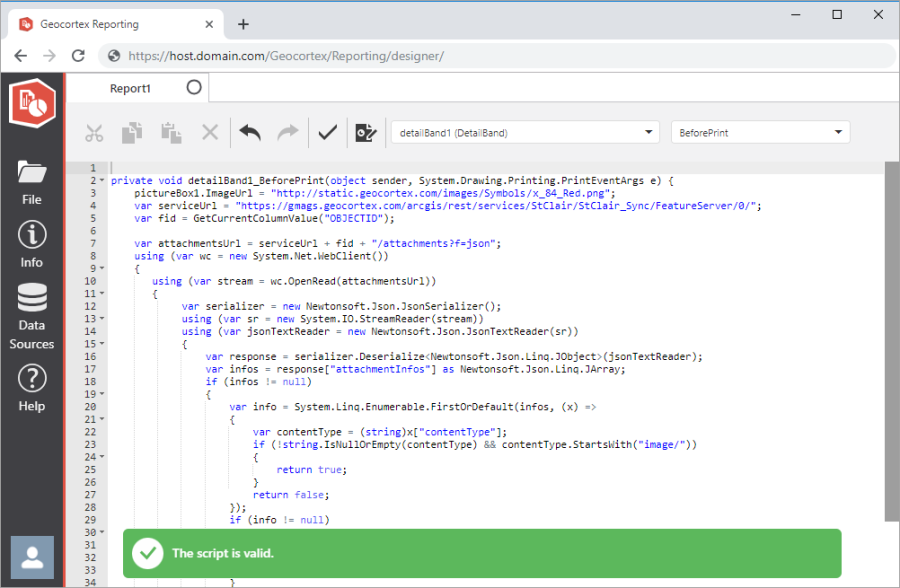
-
When the script is valid, click Designer
to return to the design surface. -
Click Preview
 to preview the report.
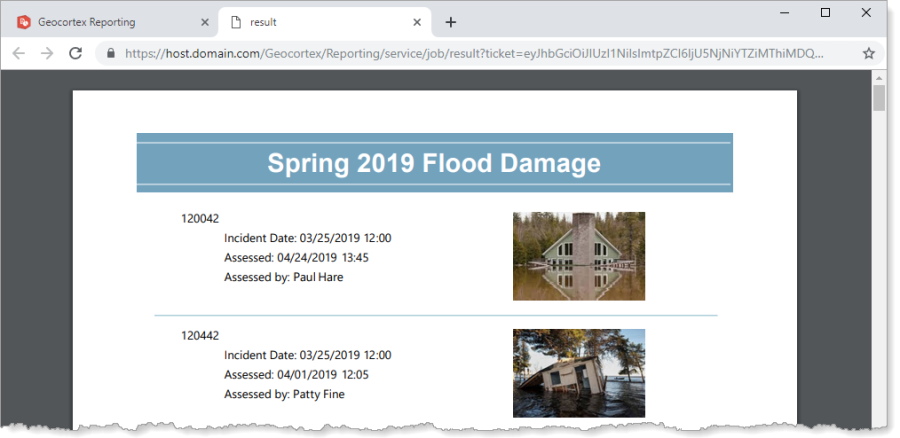
Preview of a report showing feature attachments located by a C# script