Attribute-based import routes imported records to different target layers based on the value of a selected attribute in the source data. This is useful when a single CSV or GPX file contains records that belong in multiple feature classes.
When enabled, you select the source attribute that determines the destination layer for each record. During the import, the tool evaluates the value of that attribute for every record and imports it into the corresponding target layer.
Using attribute-based import can help you:
•Import mixed datasets without manually separating the source data.
•Ensure that records are imported into the correct target layers based on predefined rules.
•Reuse the same routing configuration by saving it as a Profile.
For the procedure below, we use the example scenario of managing municipal 311 service requests.
A municipality exports a daily CSV file containing citizen service requests. The file includes multiple issue types, such as potholes, graffiti, and broken streetlights, in a single dataset.
By configuring an attribute-based import that evaluates the Issue_Type field, records can be routed automatically to the appropriate target layers.
To configure an attribute-based import:
1.Open Import Survey Data.
2.Select the source CSV or GPX file.
3.Enable Attribute-based import.
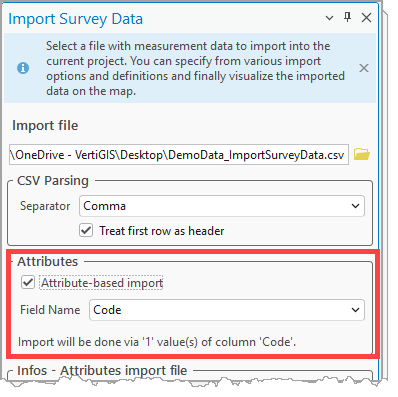
4.Select the Field Name to identify the specific column in your source data that contains the categories you want to sort by. In the table below, we use Issue_Type as the Source Value.
Sample import data
Source Value (Issue_Type) |
Target Layer |
|---|---|
Pothole |
Street_Maintenance_Points |
Graffiti |
Code_Enforcement_Incidents |
Broken_InfoScreen |
Public_Works_Electrical |
Broken_Streetlight |
Public_Works_Electrical |
5.Configure the Input/Output settings or load a saved configuration from the Profiles tab.
6.Configure the Field Mapping for each target layer.
•Define which target attribute fields receive which value. If the Source and Target attribute fields have an identical name and type, then it can be done by selecting the Auto field mapping checkbox.
The Field Mapping configuration can also be saved and loaded as a Profile.
7.Click Start import.
When the import runs,each record is evaluated and imported into the appropriate layer automatically.